
Creating a PIN to Release Your Print Job
In order to release your print job, you’ll be required to authenticate on the printer from which you want to release the print job. If you don’t have, or aren’t eligible to receive, Mobile GOCard, or if you don’t have an NFC-enabled physical GOCard (issued after November 2020), you’ll need to create a PIN to authenticate. (Note: You must create a PIN before you can release your print job.) You’ll only need to create a PIN once; you can use that PIN to authenticate each time you release a print job.
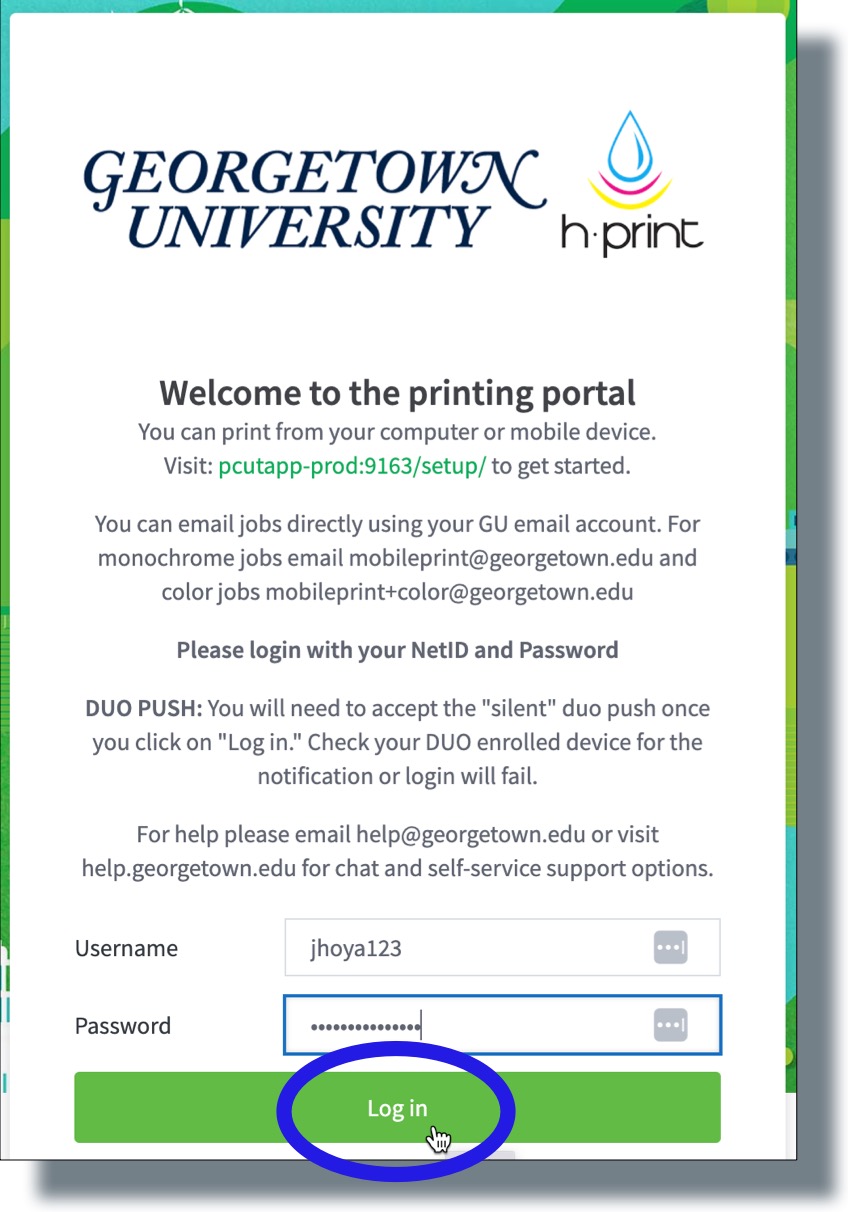
- Go to the Georgetown printer portal.
- From the portal, log in with your NetID and password.
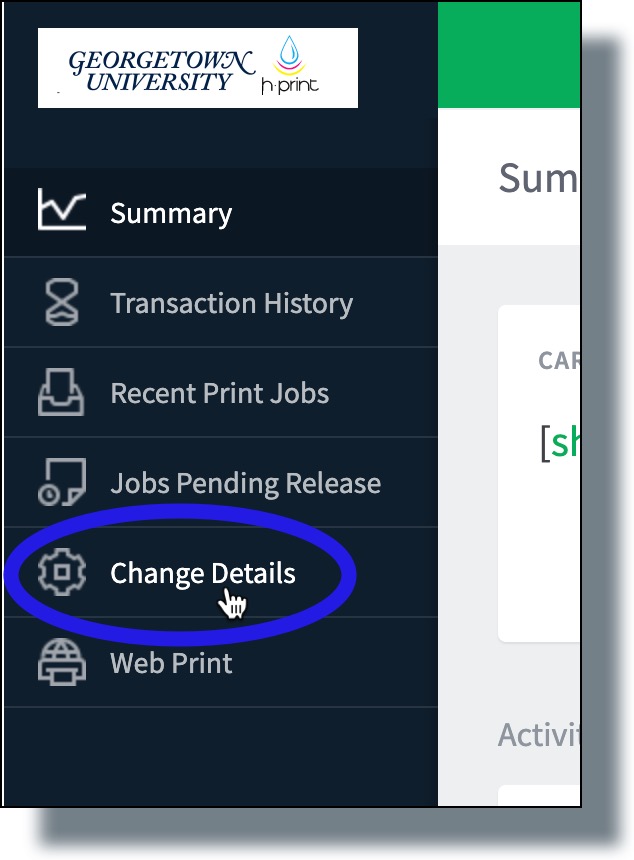
- Click on the Change Details menu item located on the left-hand side of the screen.
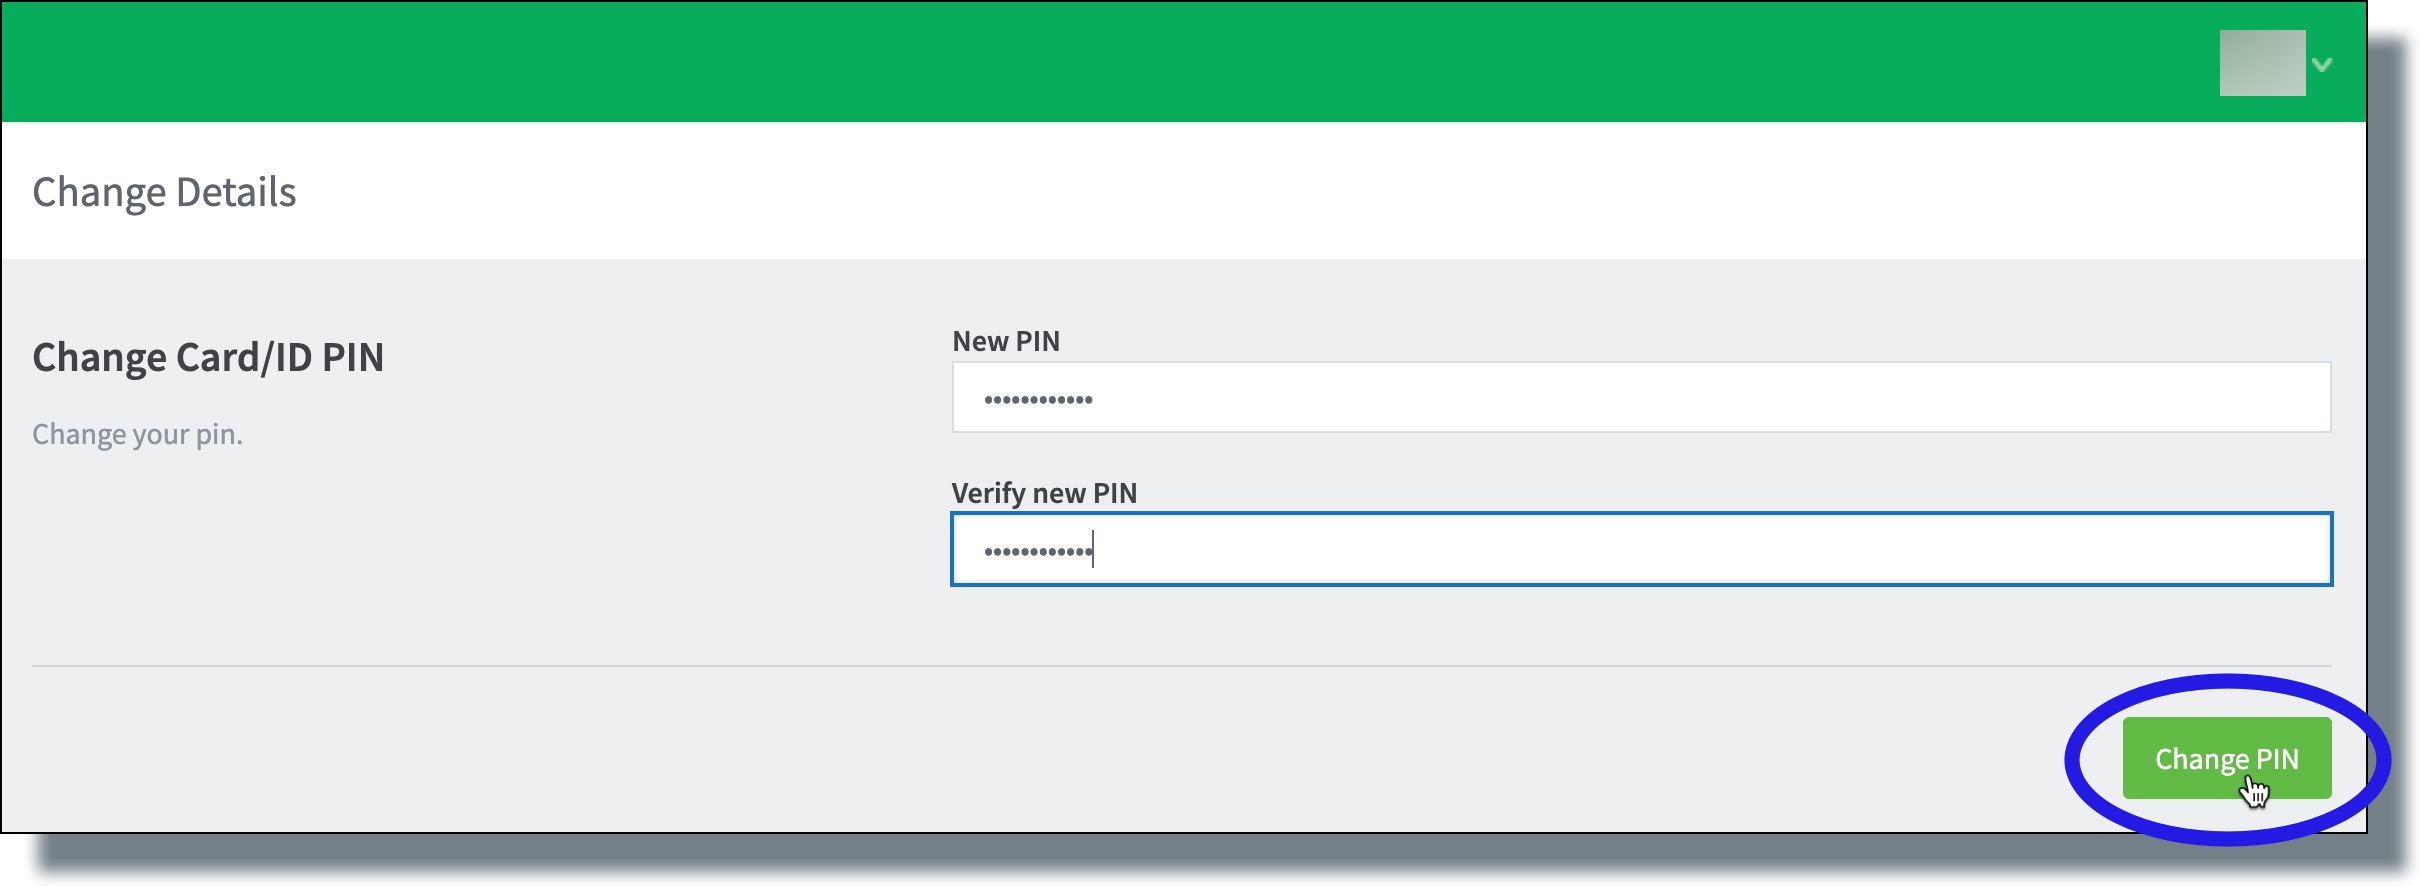
- On the ‘Change Details’ page, perform the following:
- In the Change Card/ID PIN section, enter, and then re-enter to verify, your desired PIN. (Note: Your PIN must be between 6 and 12 numbers.) Click Change PIN when you’re done.
You should see the following confirmation message: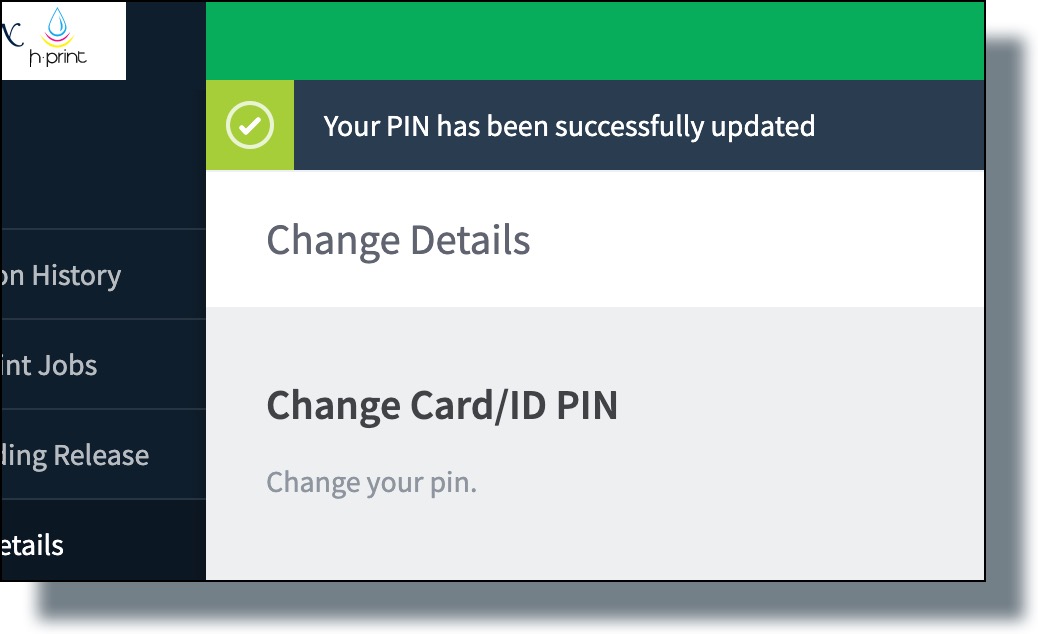
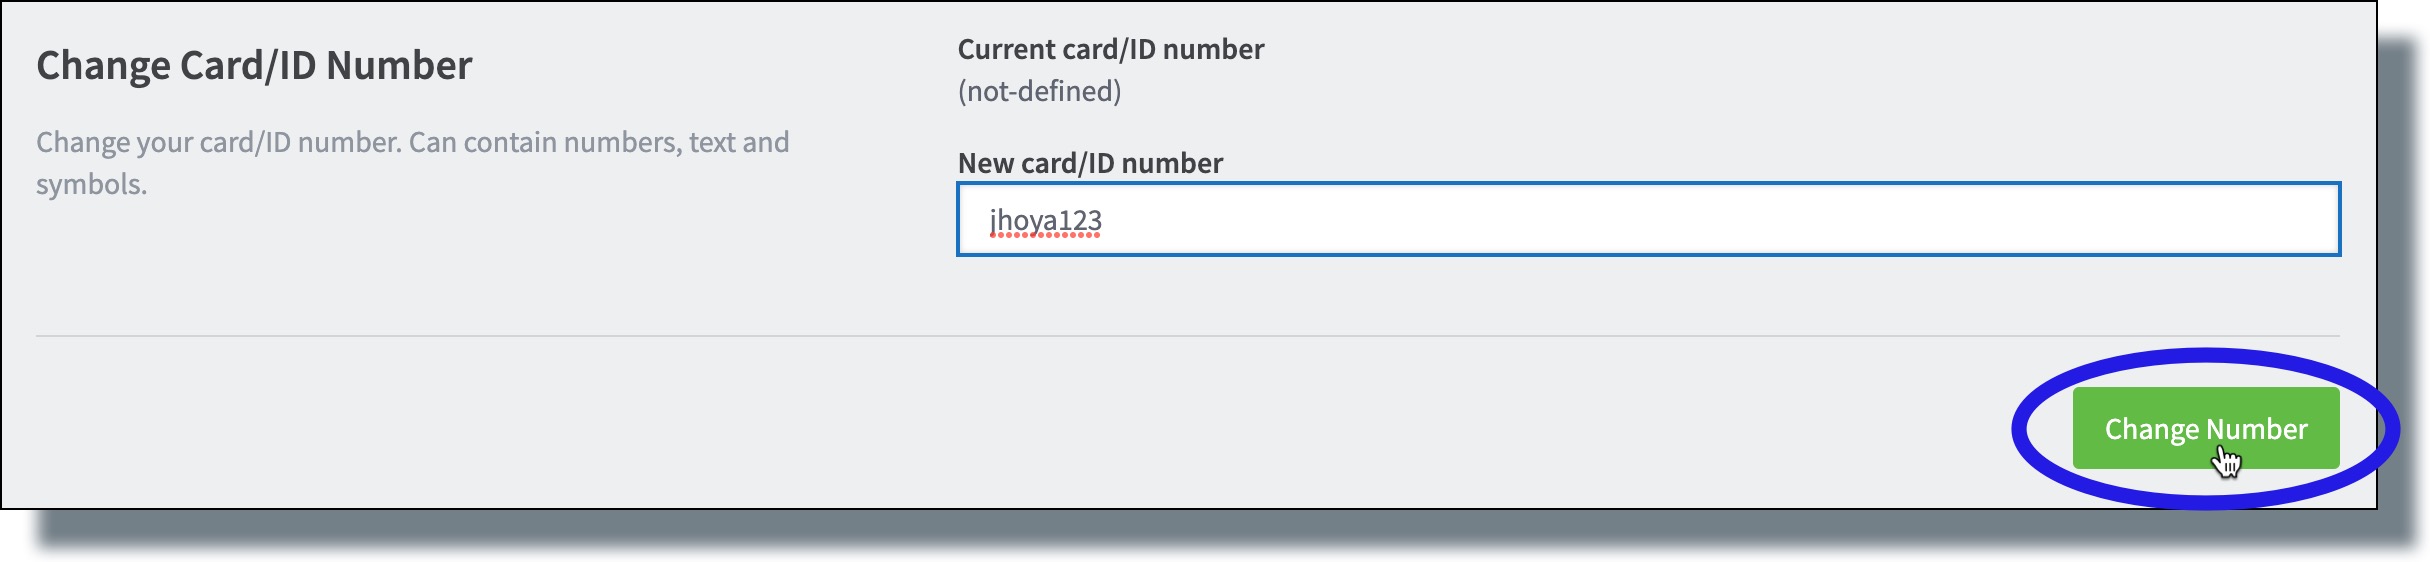
- In the Change Card/ID Number section, enter your NetID, and then click Change Number. (In the example below, “jhoya123” is entered as the NetID.)
You should see the following confirmation message: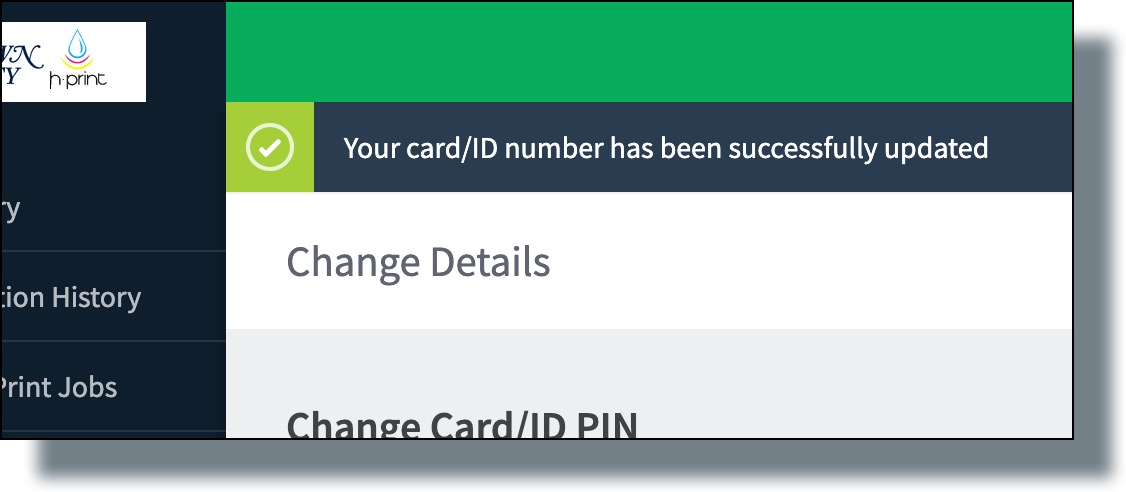
- In the Change Card/ID PIN section, enter, and then re-enter to verify, your desired PIN. (Note: Your PIN must be between 6 and 12 numbers.) Click Change PIN when you’re done.
You’ll now be able to release your print job.