
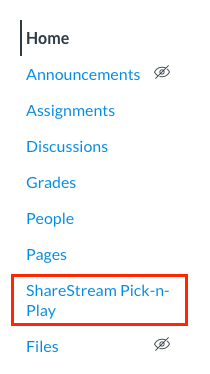
ShareStream Pick-n-Play
Only available within Canvas, Pick-n-Play is primarily used for media playback and adding engagement activities like ShareStream Student Assignments. It can also be used to copy media from one course to another and upload new media files.
- Add Pick-n-Play to Canvas Course Menu
- Copy Media
- Upload New Media
- Use ShareStream Student Assignments
- ShareStream Pick-n-Play Visual Guide and FAQs (PDF)
Copy Media
ShareStream’s Pick-n-Play Copy Wizard allows Instructors and administrators to copy media from preexisting ShareStream Course Folders into new ShareStream Course Folders in Canvas.
The Course Media Copy Wizard launches automatically whenever ShareStream Pick-n-Play is accessed from a course in Canvas that does not already contain ShareStream media files.
Note: You will not be able to return to the Copy Wizard after you have uploaded new media or copied files into a ShareStream Course Folder.
- Enable Pick-n-Play in Canvas (if you haven’t already).
- Click on ShareStream Pick-n-Play in the course menu.
- The Course Media Copy Wizard will automatically appear only if the ShareStream Course Folder is empty. Click Yes to use the Course Media Copy Wizard.
- Select the Course Folder you wish to copy, and the Copy button can now be selected.
- After a brief processing period, the copied media files from the past Course Folder will appear in the new Course Folder.
- A confirmation message appears, with the total number of files copied to your new Course Folder.
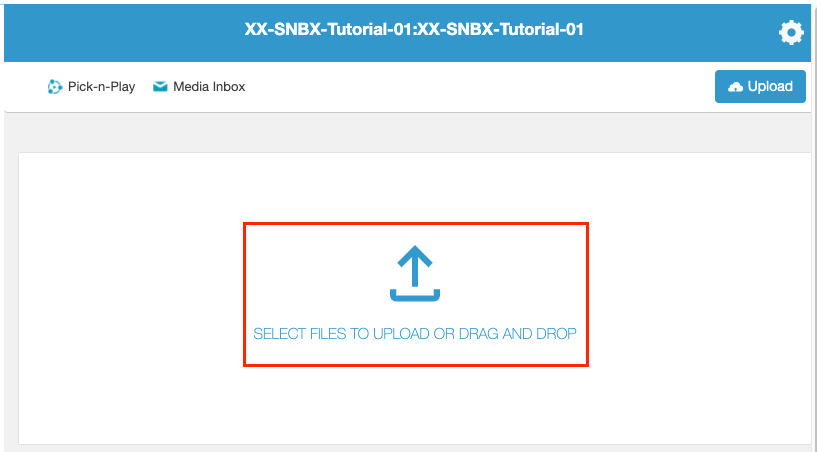
Upload New Media
ShareStream’s Pick-n-Play Upload tool allows Instructors and administrators to upload new media files. Please allow ample time for your uploads to be processed. In extreme case, the processing time might take up to 48 hours.
1. Enable Pick-n-Play in Canvas (if you haven’t already).
2. Click on ShareStream Pick-n-Play in the course menu.
3. Click the Upload button, which is located in the upper-right hand corner of the Pick-n-Play interface.

4. Click the button that says “SELECT FILES TO UPLOAD OR DRAG AND DROP” and choose the file(s) from your computer you would like to upload; or alternatively, drag and drop file(s) onto the “SELECT FILES TO UPLOAD OR DRAG AND DROP” button.
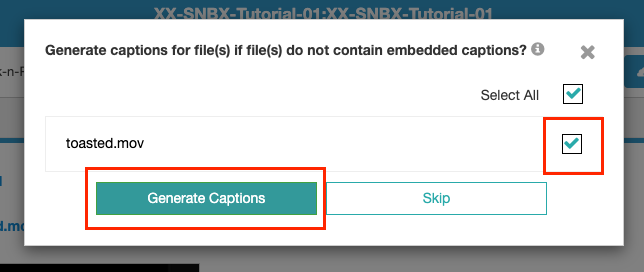
5. Generate Captions (optional): After you have selected (or drag-and-dropped) the file(s), ShareStream will start the upload and transcoding process.
Note: For video files, you will need to select whether you’d like to have ShareStream automatically generate closed captions; this can be done at a later date too. See the ShareStream Closed Captions page for more details.
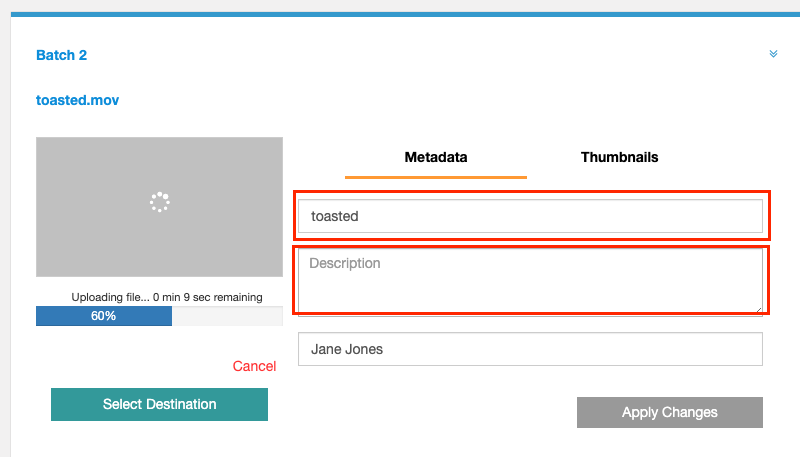
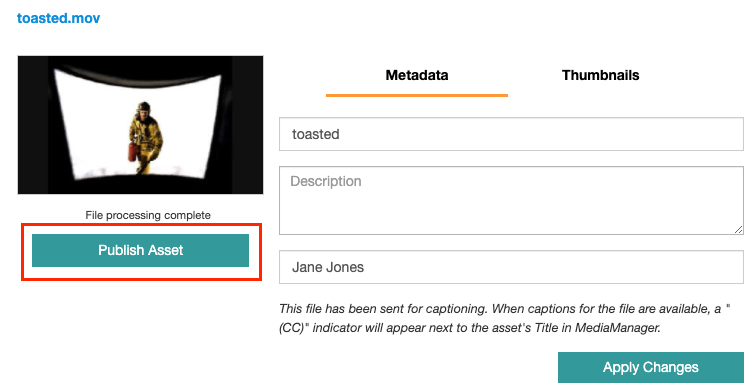
6. Enter or edit the name and/or description of the file (optional).
7. Once the file(s) has been uploaded and processed, you will need to publish the file(s) before students can view them. Click the Publish Asset button.
8. Select a destination folder for your new file, then Publish: From the Publish window, select the destination folder, and then click the Publish Assets button.

To view the file you’ve just published, click on the title of the file from the publish window, or click on the ShareStream Pick-n-Play link in your Canvas course menu to access and play your video collection.