Zoom Workspace Reservation
Zoom Workspace Reservation is a Web-based feature of the Zoom meeting platform that enables you to reserve selected on-demand on-campus spaces for your own use or to hold a meeting. Available spaces include individual cubicles and desks, “huddle” rooms (with some technology options available), small rooms, and small conference rooms.
(Note: If you need to reserve a space for an event, you can visit the Space Reservations and Events page for event space rental options.)
- Reserving a Space
- Viewing Your Existing Reservations
- Editing a Reservation
- Deleting a Reservation
- Checking in to Your Reserved Space
- Checking out of Your Reserved Space
Reserving a Space
From Your Computer
- Open the Zoom app on your computer. If you’re not signed in automatically, sign in to the Zoom app with your NetID and password.
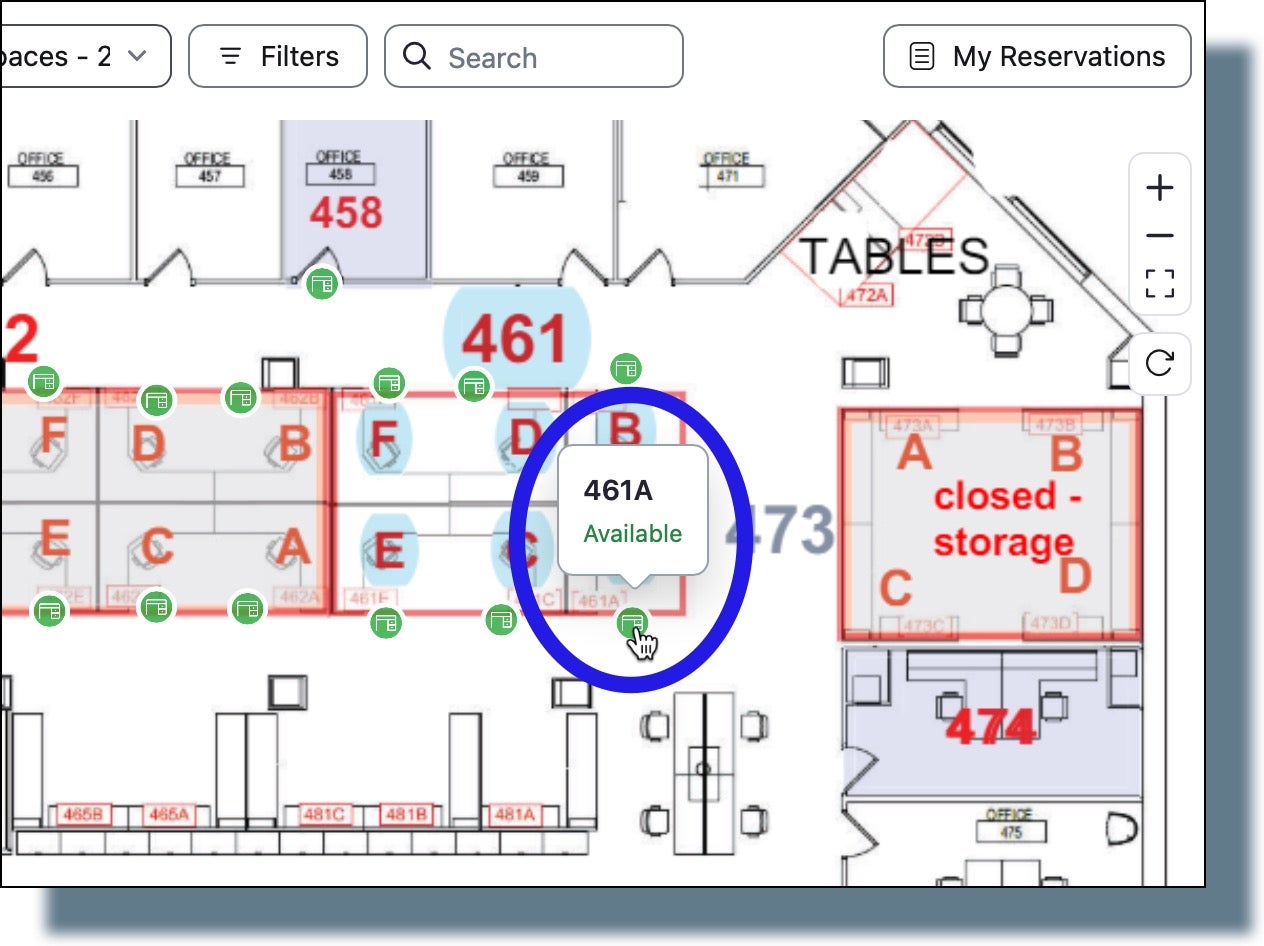
- Click Workspaces from the top-level menu. You should see a floor plan displayed, with small circles next to each space available for you to reserve. (If you have access to other locations, you can select another location, and display that location’s floor plan, from the locations drop-down list.)
- Click the circle next to the space you want to reserve.
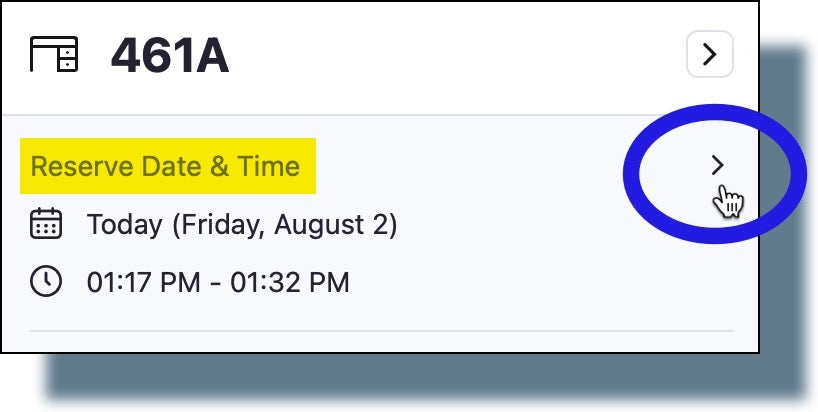
- In the panel that is displayed, perform the following:
- Click the arrow next to Reserve Date & Time.
- Click on the date, and then select the desired day from the calendar. (Note: You can skip this step if you want to reserve a space for the current day.)
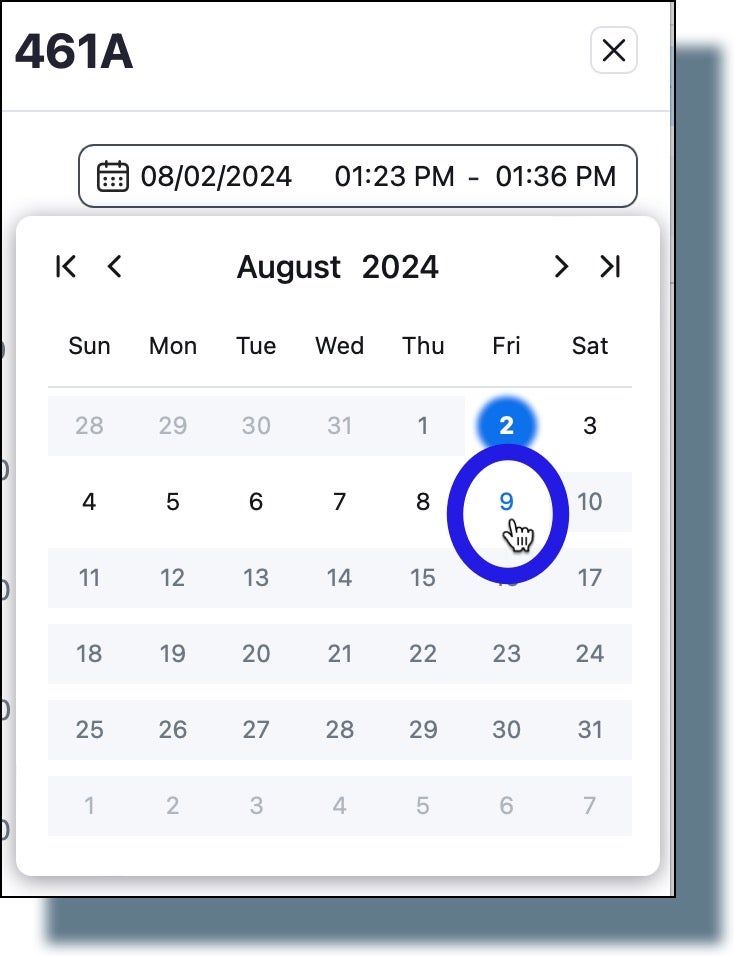
- Select a time range by either clicking on the beginning and ending times and selecting from the drop-down list of times, or by sliding the shaded area to the desired time period. (You can expand the size of the slider to select a wider time range.)
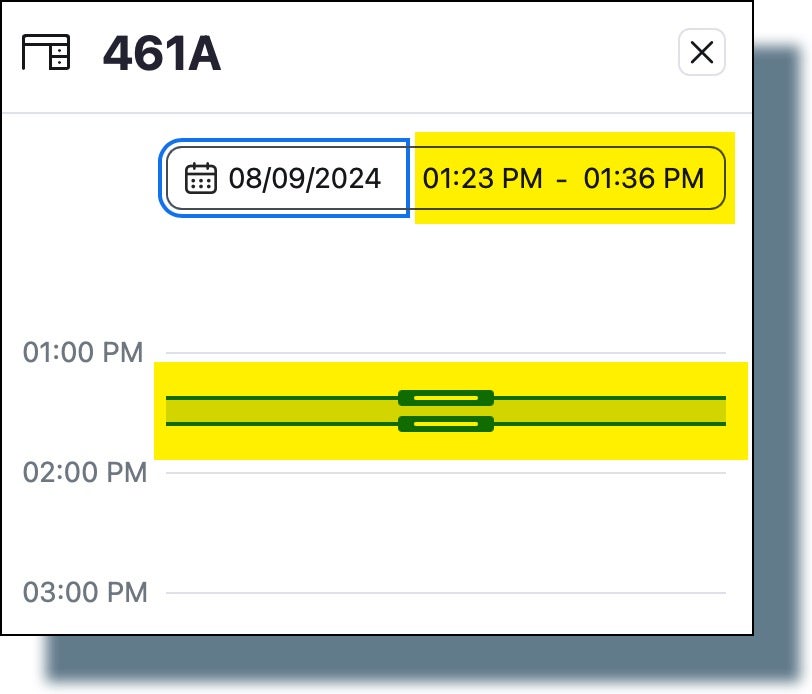
- Click Reserve when you’re done.

- Click the arrow next to Reserve Date & Time.
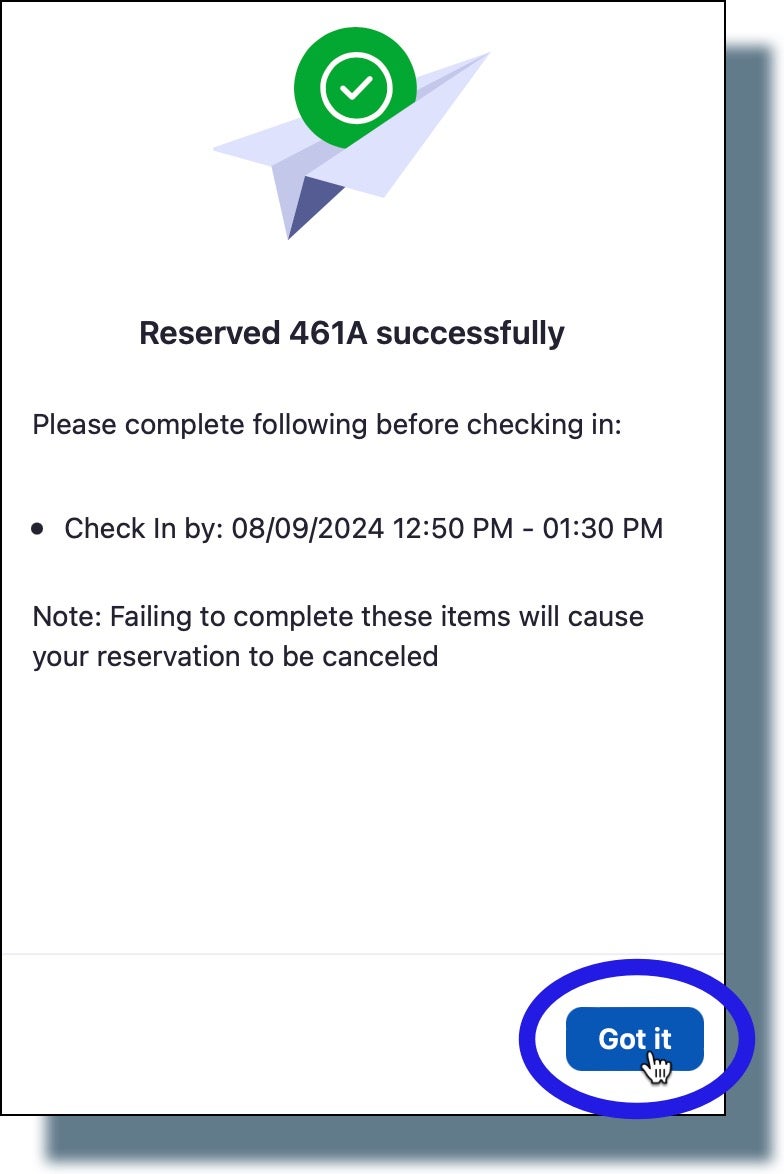
- Click Got It in the following confirmation message. (You’ll also receive a confirmation email from Zoom.)
From Your Mobile Device
- Open the Zoom app on your mobile device. If you’re not signed in automatically, sign in to the Zoom app with your NetID and password.
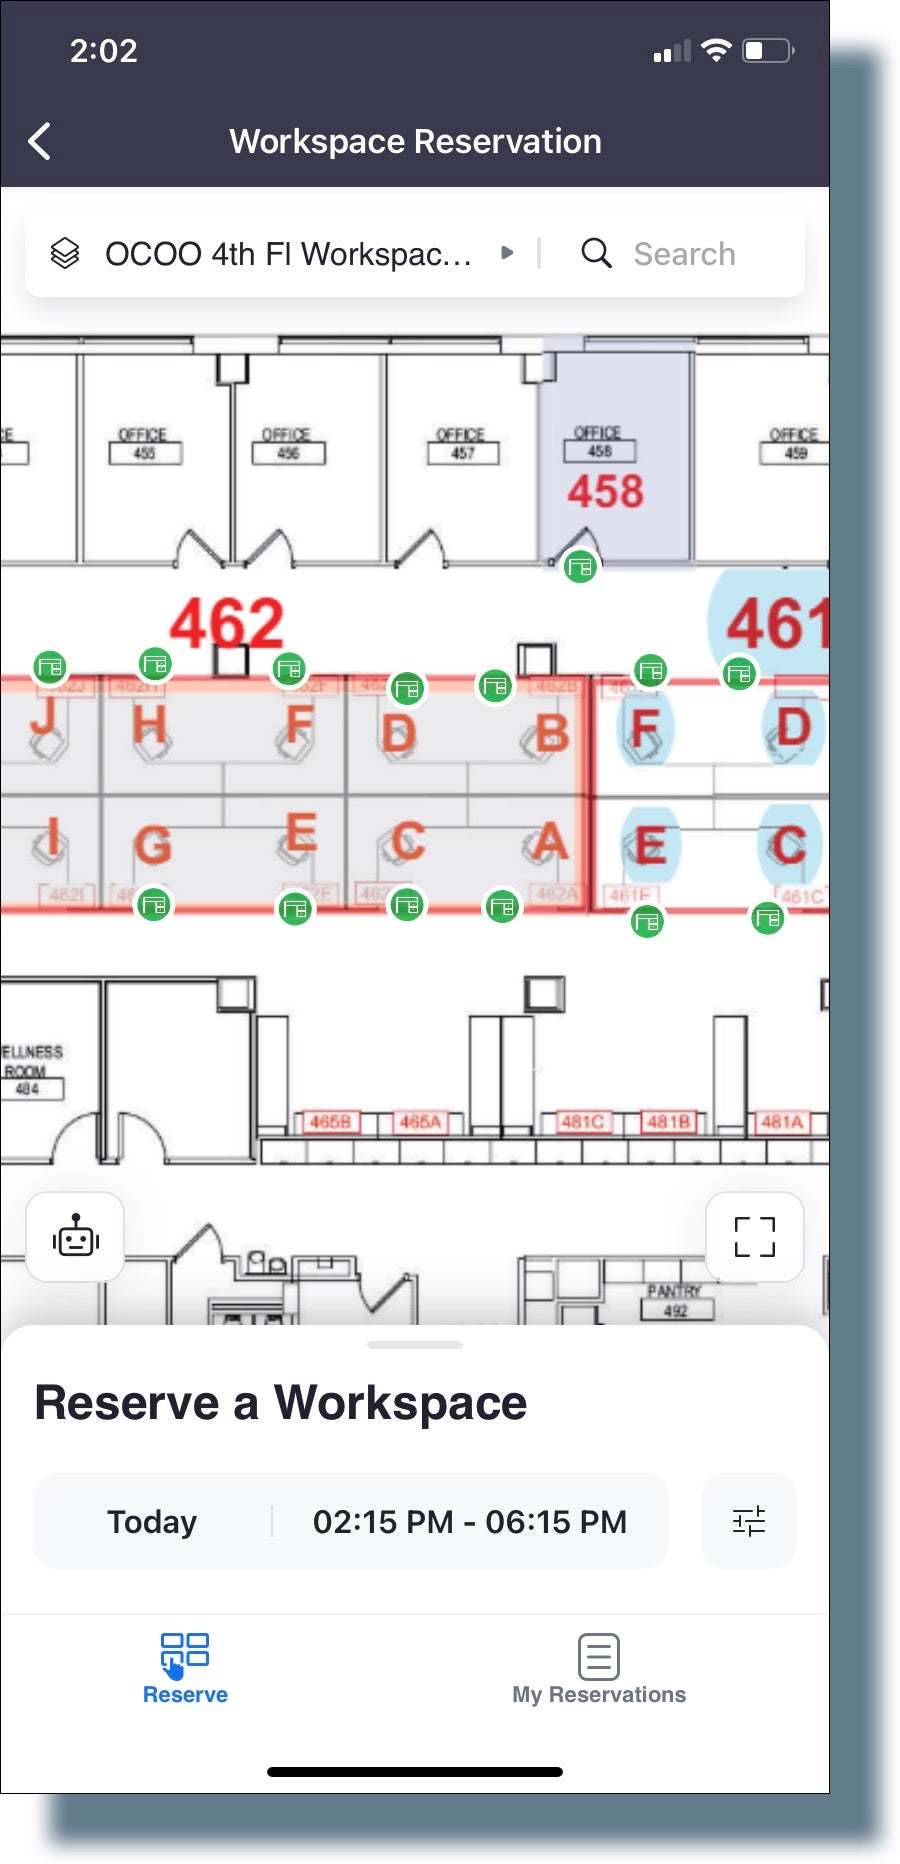
- From the Zoom app, tap Workspaces. You should see a floor plan displayed, with small circles next to each space available for you to reserve. (If you have access to other locations, you can select another location, and display that location’s floor plan, from the locations drop-down list.)
- Set the date and time you want to reserve the space by performing the following: (Note: ([optional] Tap Recurring Dates to reserve the space over a repeated time period (e.g., daily, weekly).)
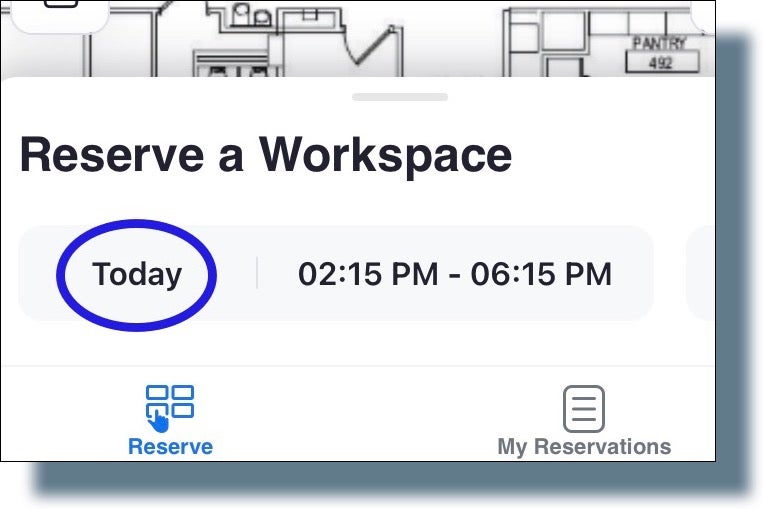
- Tap Today, located at the bottom of your screen. From the calendar displayed, navigate to the day you want to reserve the space, and then tap on that date.

- Tap the time range, and then select the desired time frame.
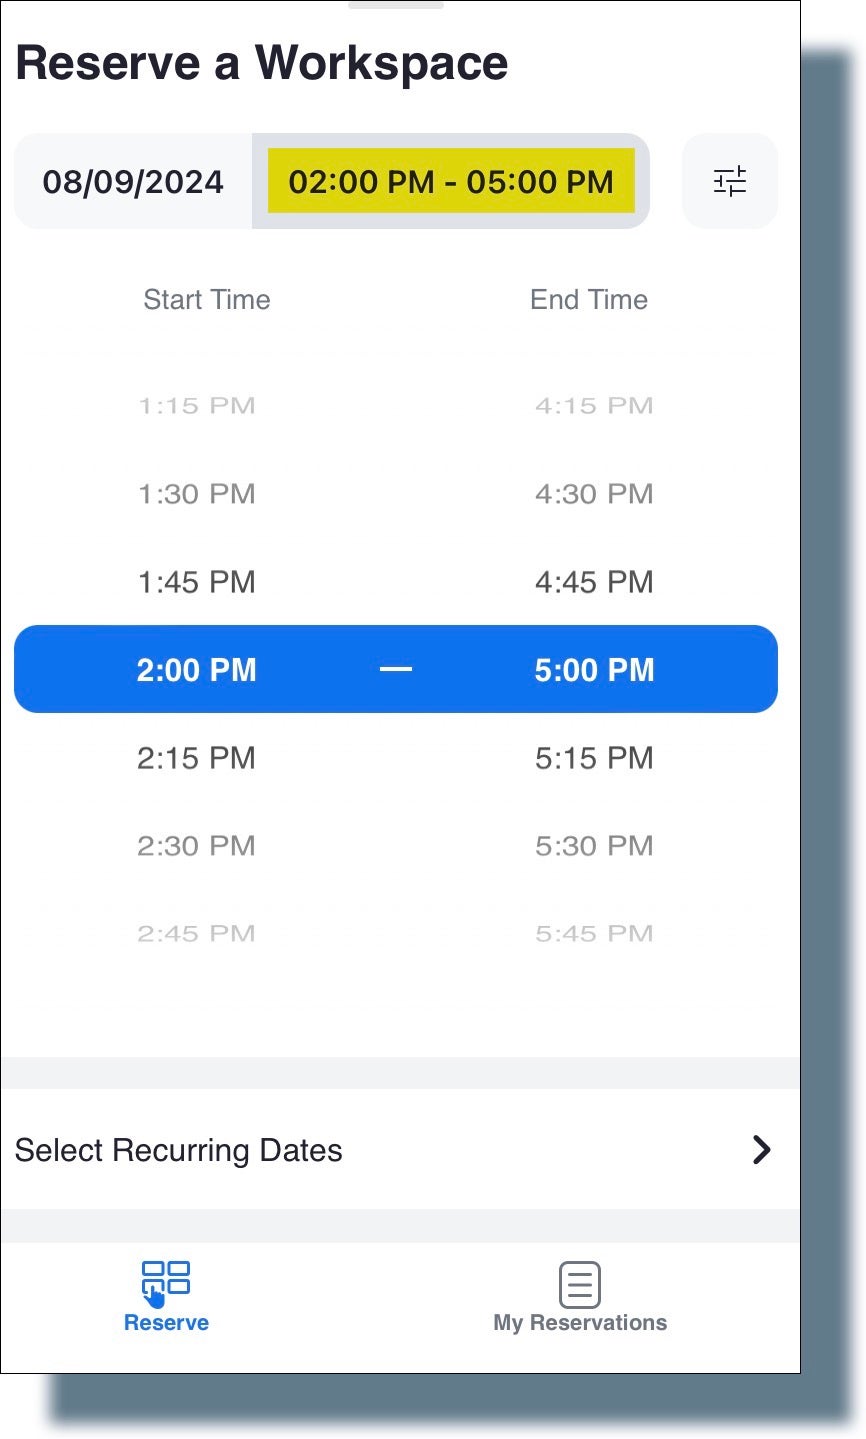
- Tap the top of your screen (just above “Reserve a Workspace”) to display the floor plan again. At the bottom of your screen, you should see your selected date and time frame.

- Tap Today, located at the bottom of your screen. From the calendar displayed, navigate to the day you want to reserve the space, and then tap on that date.
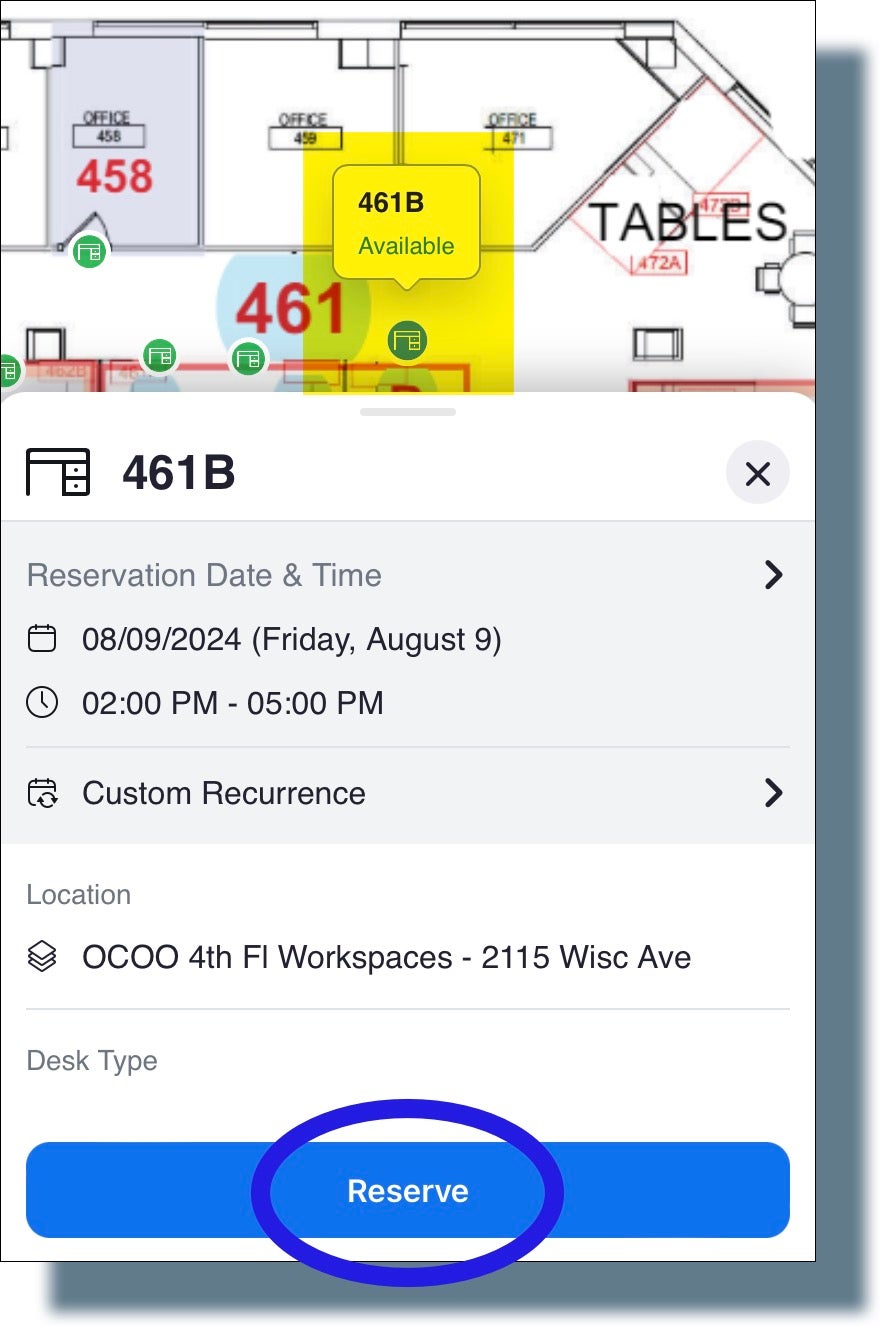
- From the floor plan, tap the circle next to the space you want to reserve. In the panel that is displayed, tap Reserve.
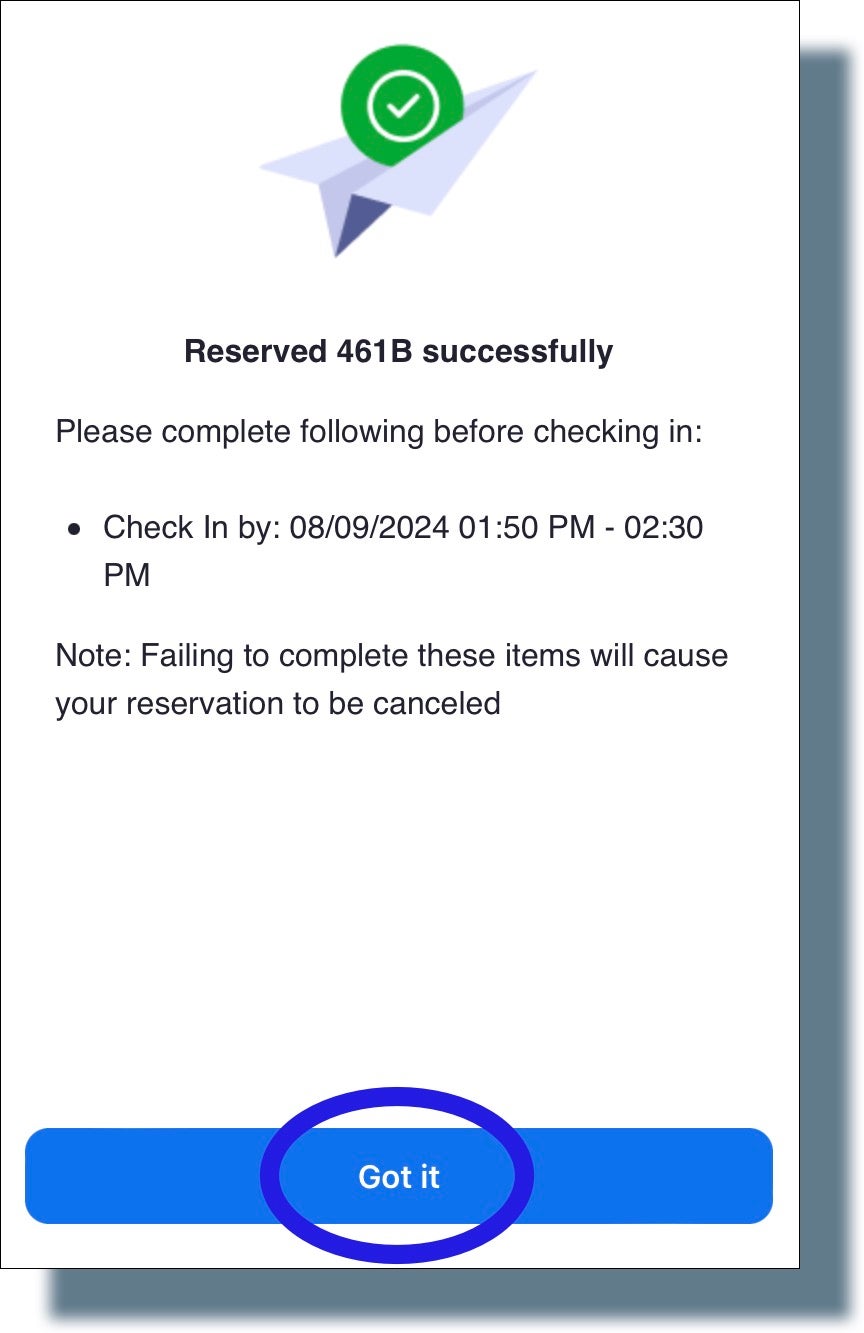
- Tap Got it in the confirmation message window. (Note: You’ll also receive an email from Zoom confirming your reservation.)
Viewing Your Existing Reservations
- Open the Zoom app on your computer or mobile device. Sign in with your NetID and password (if you’re not signed in automatically).
- In the Zoom app, click or tap Workspaces.
- Click or tap My Reservations. A list of your upcoming reservations for the current month is displayed.
- (optional) To view any reservations you’ve made in an upcoming month, click or tap on the down-pointing arrow next to the current month displayed in the upper left-hand corner of your screen. From the drop-down list, select the month for which you want to view your reservations. (Note: You can choose any month up to 6 months in advance of the current month.)

Editing a Reservation
- Open the Zoom app on your computer or mobile device. Sign in with your NetID and password (if you’re not signed in automatically).
- In the Zoom app, click or tap Workspaces.
- Click or tap My Reservations. A list of your upcoming reservations is displayed.
- Next to the reservation you want to edit, click or tap on the button containing three horizontal dots and then select Edit Reservation from the drop-down list.

- Edit the reservation day and/or time frame as needed, and then click or tap Reserve.
- Click or tap Got it in the confirmation screen. (You’ll also receive an email from Zoom confirming your updated reservation.)
Deleting a Reservation
You can delete an existing reservation from the Zoom app or from your reservation confirmation email. You can perform either method from your computer or your mobile device.
From Your Reservation Confirmation Email
- Open the email you received from Zoom confirming your reservation.
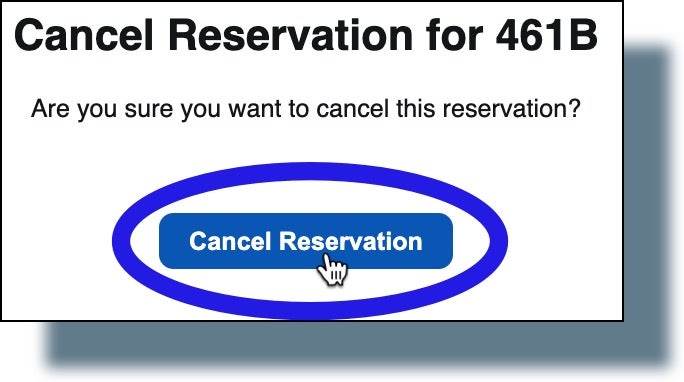
- From your email, click or tap Cancel Reservation.
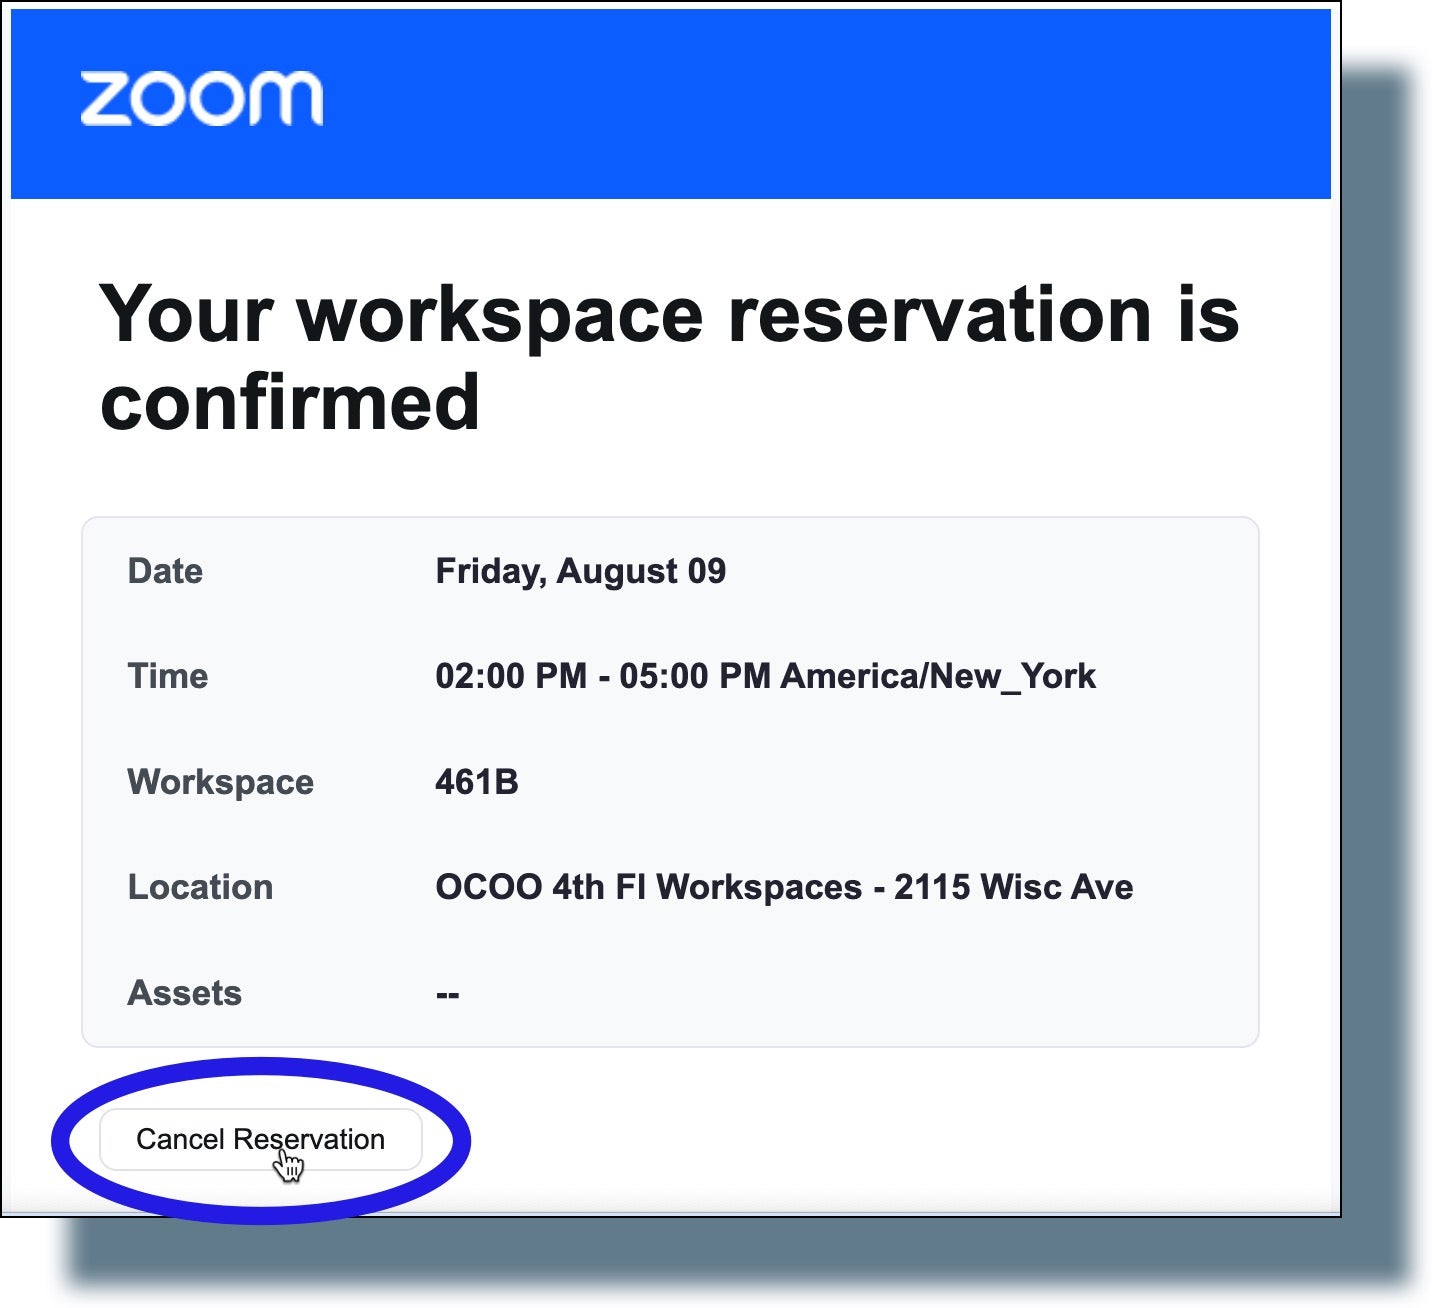
A separate browser tab/window will open, with an additional prompt for cancellation. - In the browser tab/window, click or tap Cancel Reservation to confirm that you want to cancel the reservation.
A confirmation message is displayed stating that your reservation was canceled. (You’ll also receive an email from Zoom confirming the cancellation.)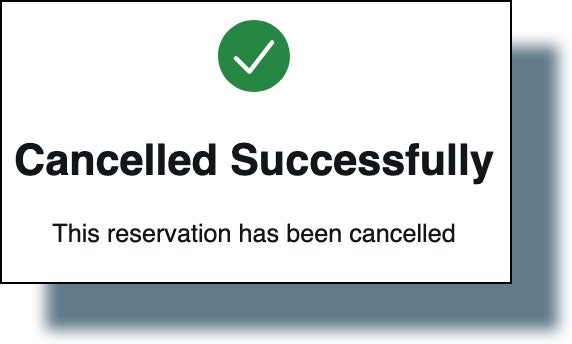
From the Zoom App
- Open the Zoom app on your computer or mobile device. Sign in with your NetID and password (if you’re not signed in automatically).
- In the Zoom app, click or tap on Workspaces.
- Click or tap My Reservations. A list of your upcoming reservations is displayed.
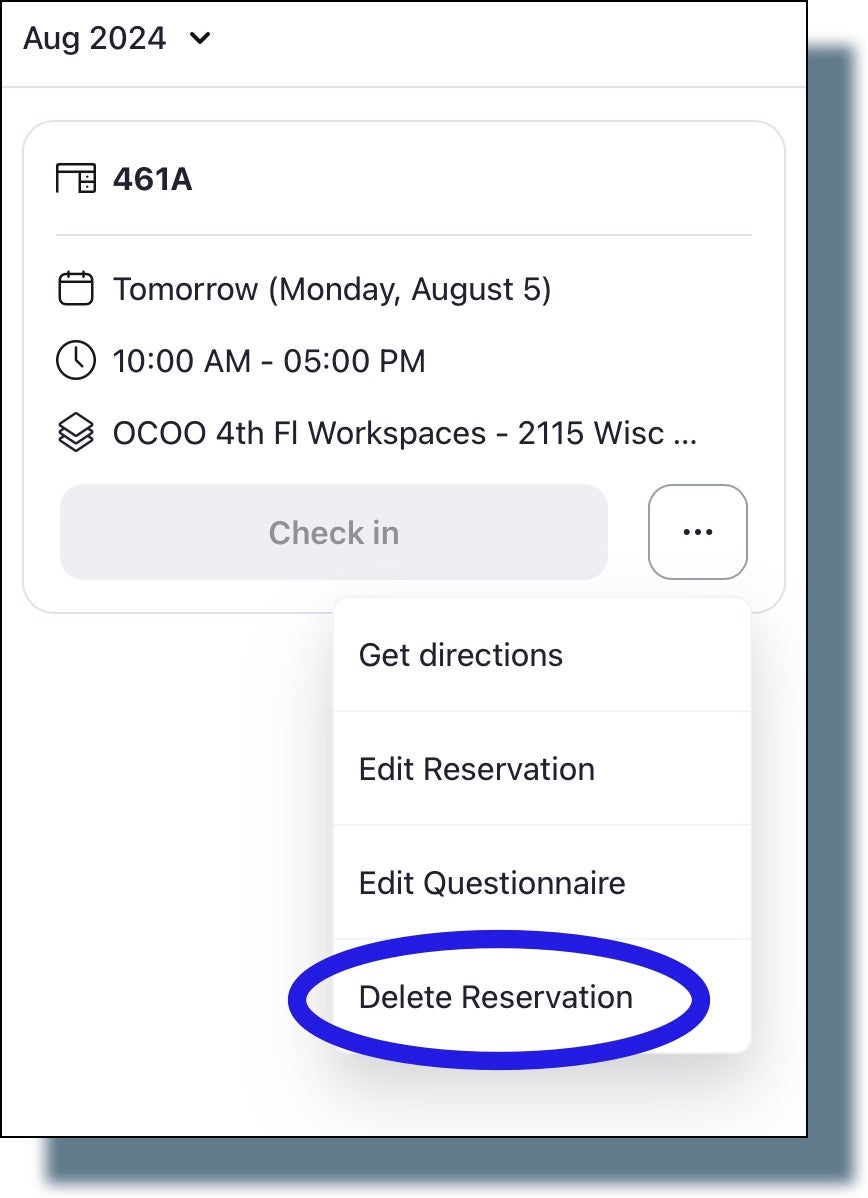
- Next to the reservation you want to delete, click or tap on the button containing three horizontal dots and then select Delete Reservation from the drop-down list.
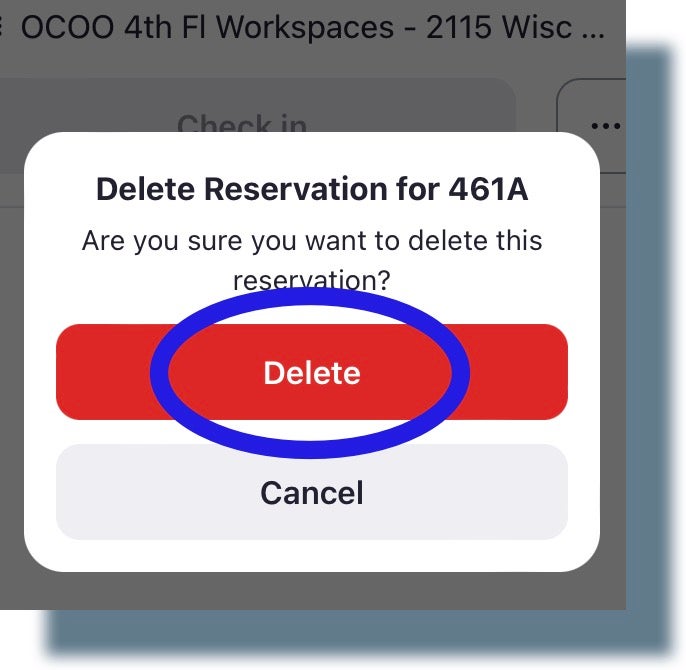
- In the pop-up message, click or tap Delete.
A confirmation message is displayed stating that your reservation was canceled. (You’ll also receive an email from Zoom confirming the cancellation.)
Checking in to Your Reserved Space
You are required to check in at the time of your reservation (ahead of using your reserved space). Checking in will hold your reservation with Zoom. You can check in as soon as 10 minutes ahead of the time you’ve scheduled for your reservation. At the time you’ll be able to check in, you’ll receive a reminder email from Zoom.
IMPORTANT: If you don’t check in during the allotted time period (refer to the check-in reminder email you receive from Zoom for your check-in time period), your reservation will be canceled automatically.
From Your Reservation Confirmation Email
- Open the email you received from Zoom reminding you to check in to your space.
- From the email, click or tap Check In.
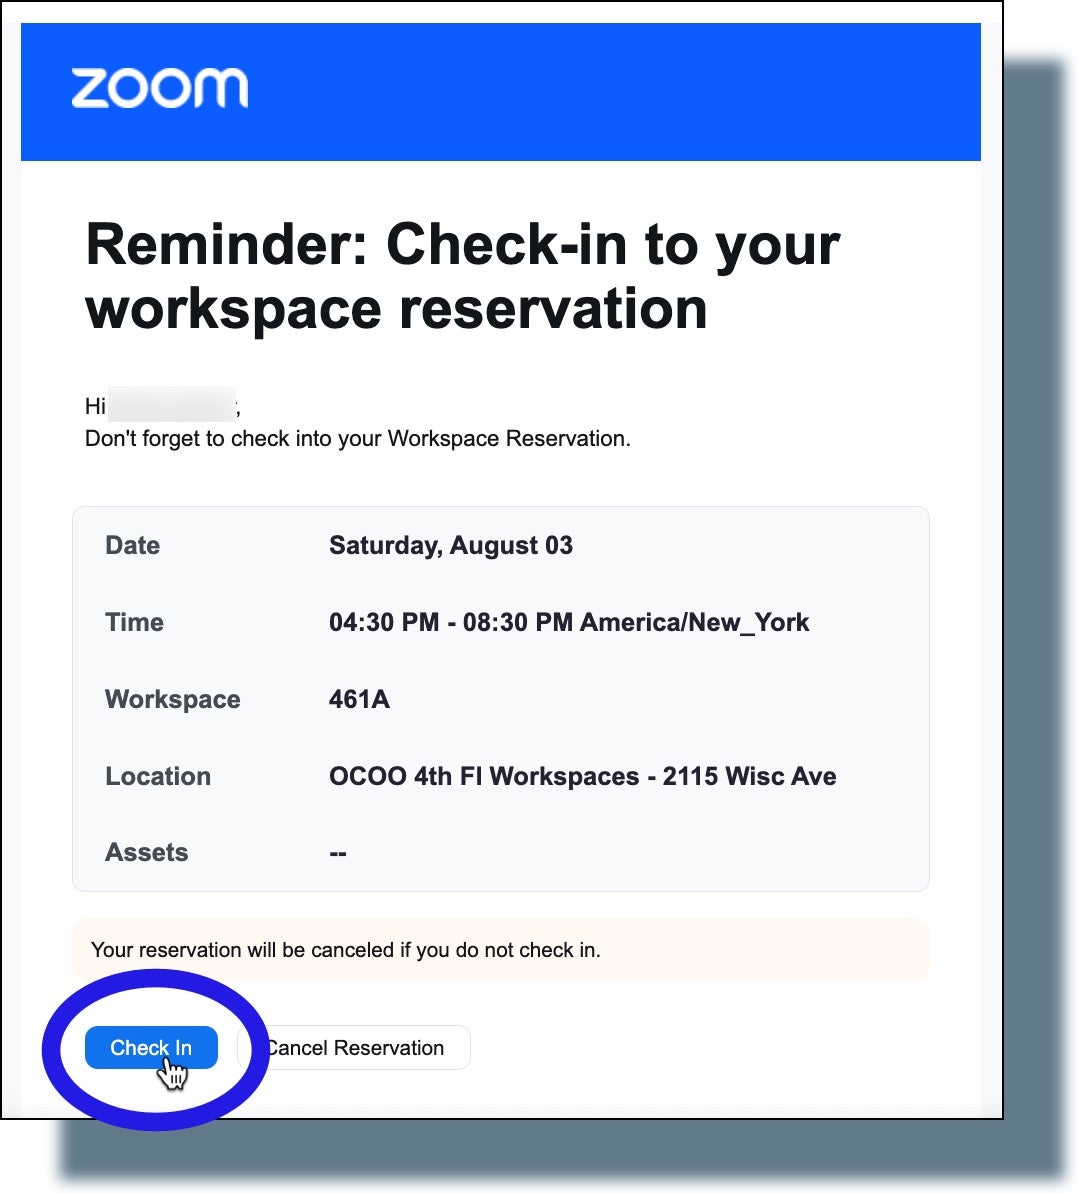
A confirmation message stating that you’re now checked in is displayed.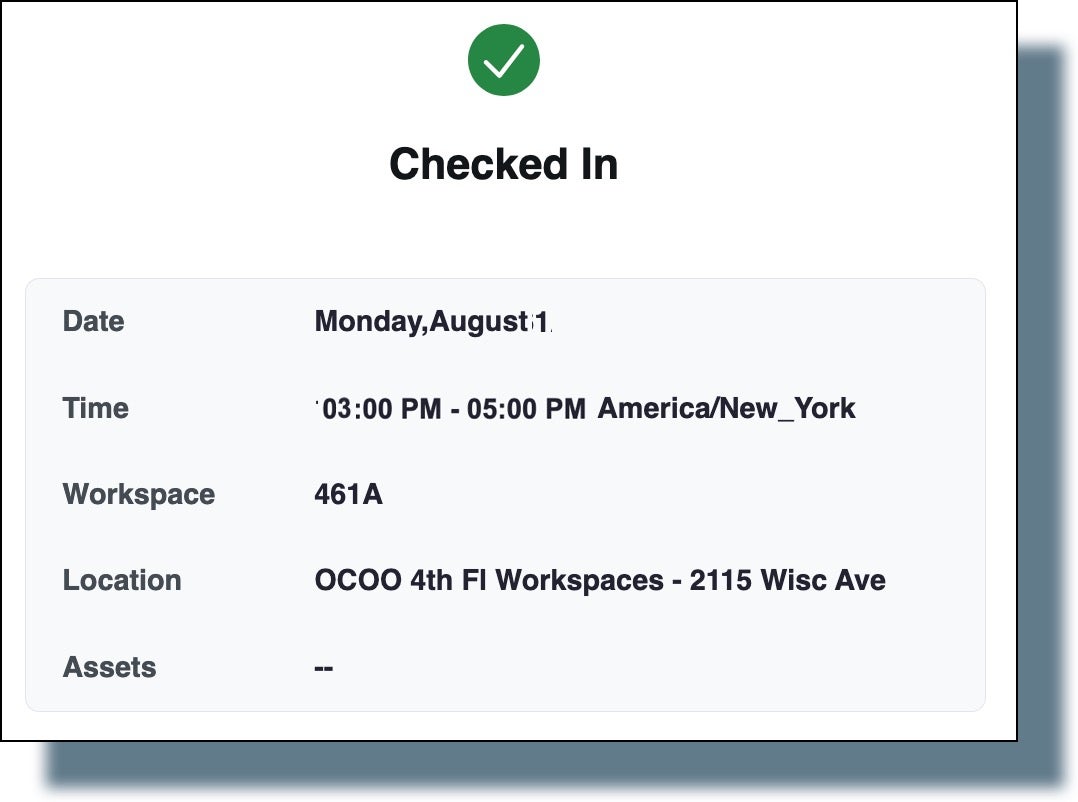
From the Zoom App
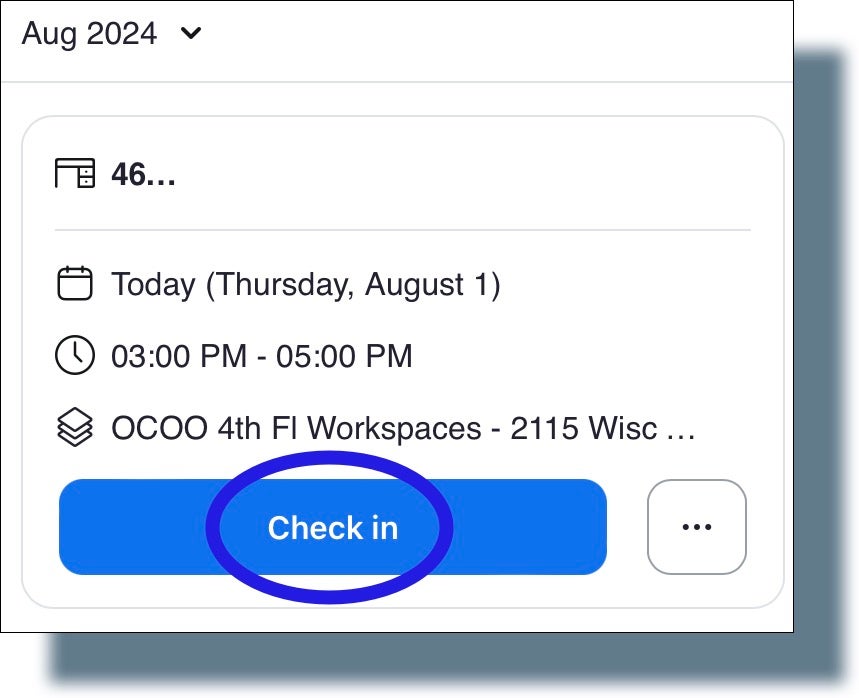
- Open the Zoom app on your computer or mobile device. Sign in with your NetID and password (if you’re not signed in automatically).
- In the Zoom app, click or tap Workspaces.
- Click or tap My Reservations. A list of your upcoming reservations is displayed.
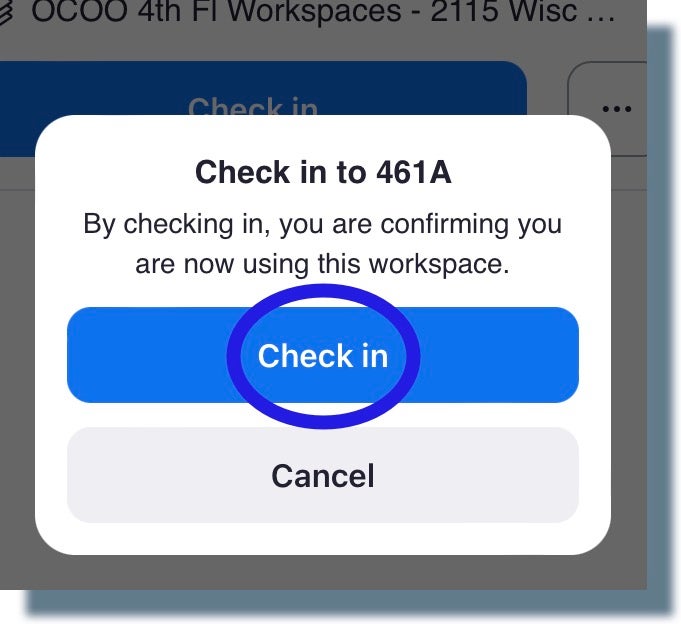
- Click or tap Check in for the reservation for which you’re checking in.
- In the pop-up window, click or tap Check in.
The following confirmation message should be displayed.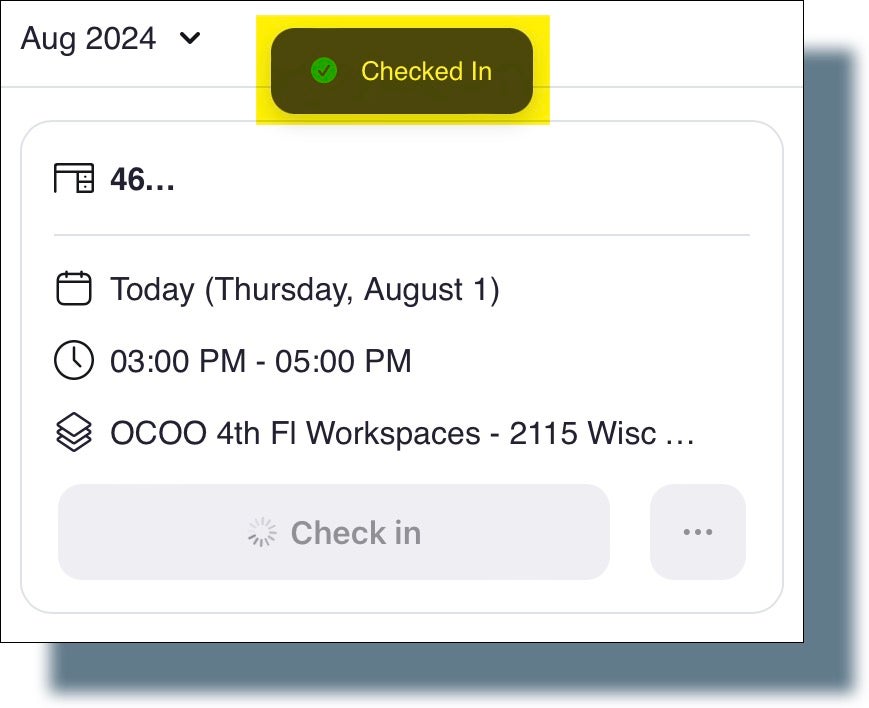
Checking out of Your Reserved Space
Make sure to check out when you’re ready to leave to free up that space for others. You can check out at any time during the period you’ve reserved the space.
- Open the Zoom app on your computer or mobile device. Sign in with your NetID and password (if you’re not signed in automatically).
- In the Zoom app, click or tap Workspaces.
- Click or tap My Reservations. A list of your upcoming reservations is displayed.
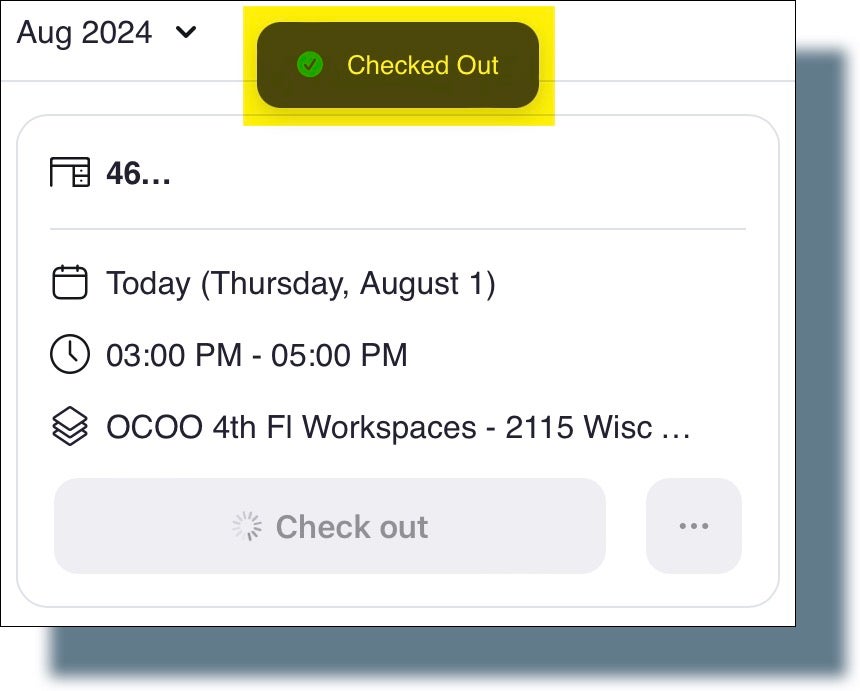
- Click or tap Check out for the reservation for which you’re checking out.
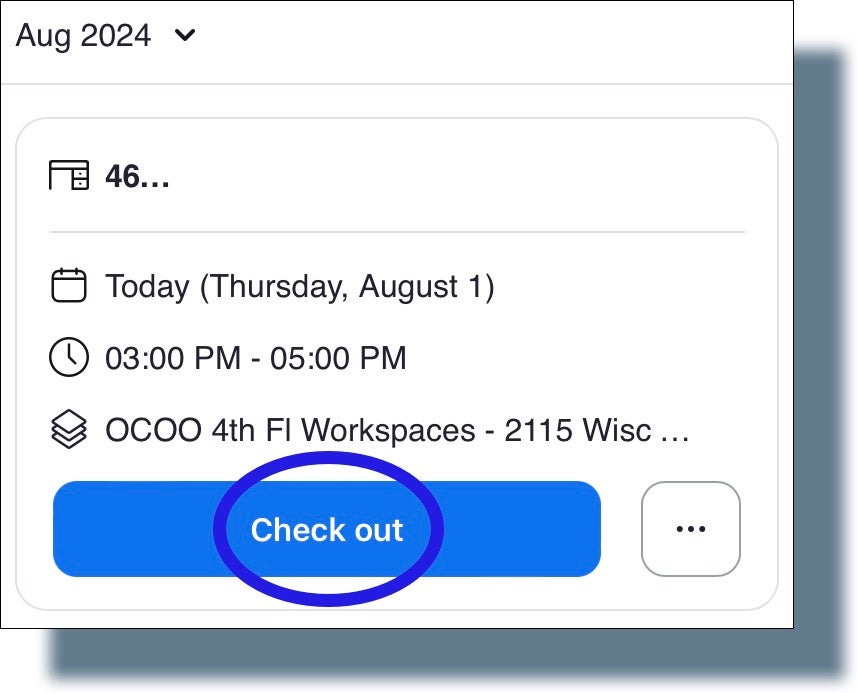
In the pop-up message window, click or tap Check out.
You should see the following confirmation message: