
Panopto: Share Recordings
- Publish Recordings
- Find Your Zoom Cloud Recordings and Share Them in Canvas
- Embed a Panopto Recording in Canvas using the Rich Content Editor (RCE)
- Share Panopto Recordings with Specific People or Anyone
Publish Recordings
When you stop a recording, it will automatically publish the recording to the Panopto folder that you set prior to starting the recording.
See our FAQ on Panopto Folders for more information about the different types of folders in Panopto. If you selected your Canvas course folder in Panopto then your students will be able to view it from the “Panopto” button on your Canvas course menu.
Panopto also allows you to record and upload to a folder without automatically publishing them for viewers and students to see. To do this, you have two options:
It is possible to publish a recording to a folder that is not associated with a course in Panopto, and then move/copy the Panopto recording from one Panopto Folder to another. For instance, this process can be helpful when you want to edit a recording prior to making it available for students in Canvas.
Find Your Zoom Cloud Recordings in Panopto and Share Them in Canvas
Zoom Cloud recordings can be automatically uploaded and saved into your Panopto account after the meeting ends. Starting July 2023 you will need to “opt in” to this service.
Things to note:
- By default, Zoom Cloud recordings in Panopto are only viewable by the meeting host.
- We recommend Canvas instructors enable Panopto in your course before sharing Zoom Cloud recordings.
- In order for students in Canvas to view Zoom Cloud recordings the host must copy or move them into the correct Panopto course folder. Using this method, students will not be able to download nor share these recordings with others outside the Canvas course.
- Panopto provides tracking and viewing statistics, as well as video editing tools.
To find your Zoom Cloud Recordings in Panopto and share them in Canvas:
- Login to the Georgetown Panopto website.
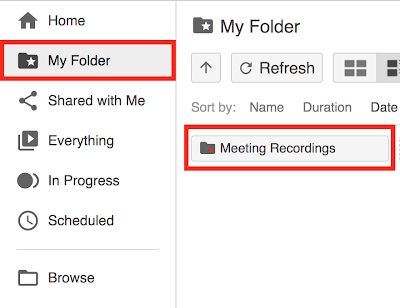
- Click on the ‘My Folder‘ button on the left side of the page.
- Click on the ‘Meeting Recordings‘ Folder.
If you do not see a Meeting Recordings folder then follow these steps:
a. Click the Browse button on the left side of the page.
b. Click the My Folders tab.
c. Scroll down on the list and expand the Zoom Default Folder.
d. Click your NETID@georgetown.edu folder.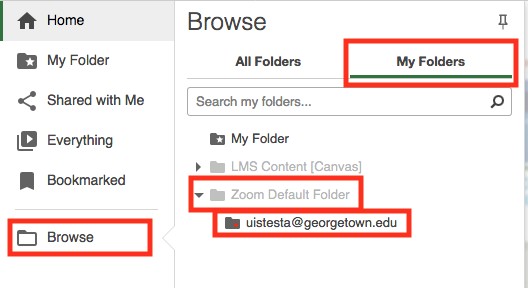
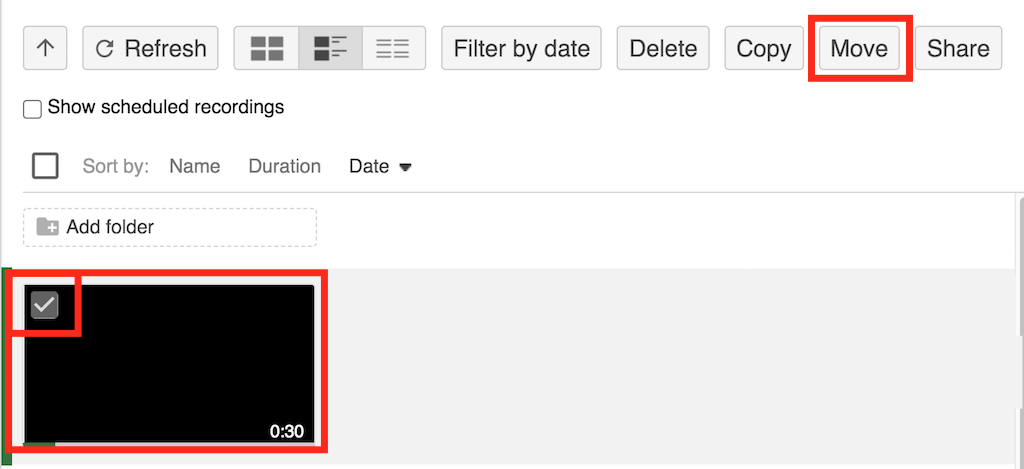
- Locate the Zoom Cloud recording you want to share.
- Mouse over the recording thumbnail, and click on the “white box” that appears in upper left part of the video thumbnail.
- Click the Move button along the top of the page.
- In the ‘Move Session(s) to’ window… Click in the choose a folder or start typing… field.
- Click the “down arrow” next to LMS Content [Canvas].
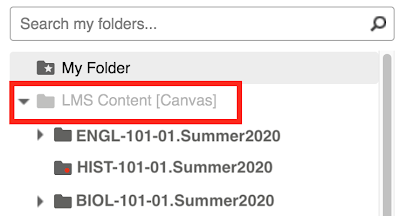
- Click the course folder that matches the course in Canvas (e.g. ENGL-101-01.Summer2020).
- Click the green Move button.

Embed a Panopto Recording in Canvas using the Rich Content Editor (RCE)
Canvas instructors, TAs, designers, and students can record, upload and embed Panopto recordings in Canvas anywhere the Rich Content Editor appears.
We highly recommend you also enable Panopto on your Canvas course menu. Using the Panopto button on the course menu can help resolve user access issues with embedded recordings in Canvas.
To embed a Panopto recording using the Canvas RCE:
- Login to Canvas
- Go to the course where you want to embed a Panopto recording
- Select the area in your Canvas course (e.g. Page, Discussions, etc.) where you want to embed a Panopto recording.
- Then, follow the instructions to how to embed recordings using the Rich Text Editor in Canvas.
Share Panopto Recordings with Anyone or Specific People
If an instructor has enabled Panopto in their Canvas course, and/or has embedded Panopto recordings in Canvas using the Rich Content Editor, then there’s no need to make any changes to the ‘Share’ settings in order for students to view them in Canvas. Panopto automatically allows students in Canvas to view any recordings uploaded and published to the specific Panopto course folder. Learn more about Panopto folders.
If you have a need to share recordings with people not associated with a Canvas course (can be shared with people outside or university), please review the sharing options and instructions below.
- Restricted: This option allows you to share the specific recording with specific people using their email address.
- Your Organization (unlisted): Choosing this option will enable viewing access for anyone who has a NetID and a link to the recording. Unlisted means that the recording won’t be listed in the ‘Everything’ folder nor discoverable by anyone browsing the Georgetown Panopto website. The recording can only be accessed by having a direct link.
- Your Organization: This option will enable viewing access for anyone who has a NetID, and the recording will be listed the under the ‘Everything’ folder in Panopto. A direct link to the recording is not needed as it can be discovered by anyone browsing the Georgetown Panopto website.
- Public (unlisted): By selecting this option, the recording won’t be discoverable by anyone browsing the Georgetown Panopto website, but anyone with the direct link can view the recording. We discourage creator (owners) of Panopto media from selecting this option. We recommend you use other platforms when making recordings available to the general public.
- Public: This option will allow anyone on the Internet to find and access the recording. No sign-in required. We discourage creator (owners) of Panopto media from selecting this option. We recommend you use other platforms when making recordings available to the general public.
Before you begin, make sure to login to Georgetown’s Panopto website.
Don’t see what you’re looking for or need help?
Check out the Panopto FAQs or Support and Training page to get help.