
Opt in and have Zoom Cloud recordings copied into Panopto
Faculty and staff at Georgetown can opt in to the service that automatically copies Zoom Cloud recordings into your Panopto account.
- Sign in to Georgetown’s Panopto web portal
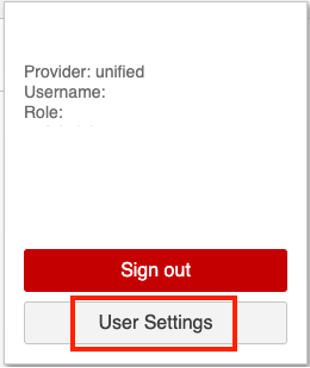
- Click your initials at top right of the page

- Click the ‘User Settings’ button
- On the ‘Info‘ tab, locate the ‘Meeting Import Settings’ section towards the bottom of the page, and then the ‘Automatic Import‘ sub heading
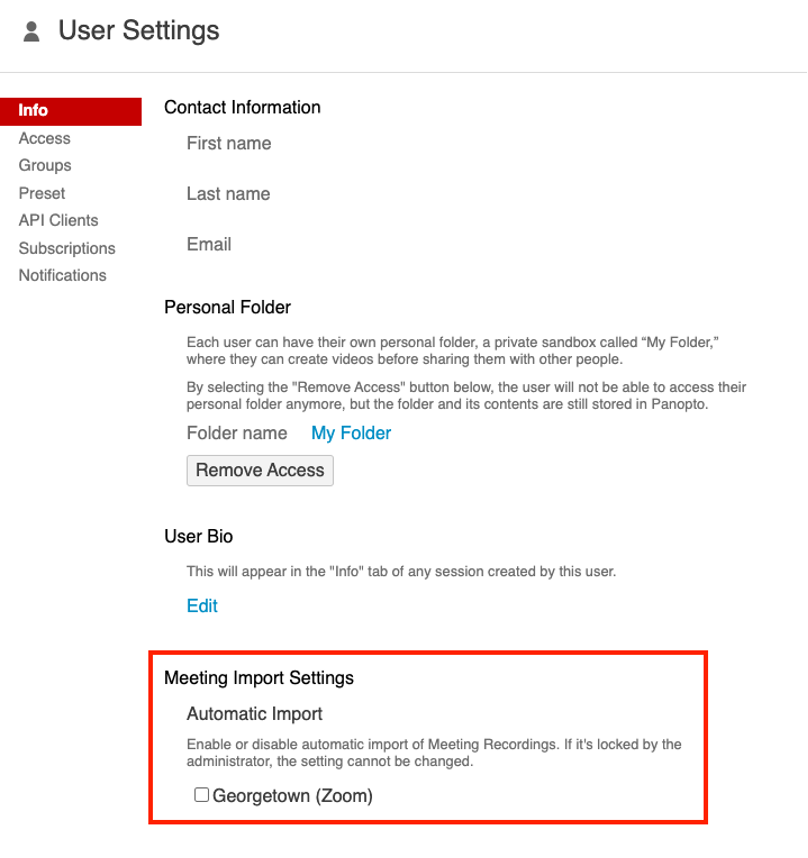
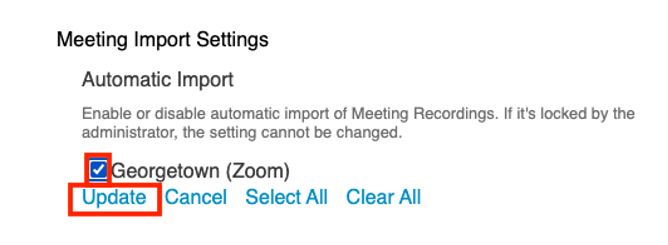
- Under the the ‘Automatic Import‘ sub heading, place a checkmark next to “Georgetown (Zoom)” and click ‘Update‘
Done! You have now completed the process to opt in and future Zoom Cloud Recordings will appear in your Panopto account.
Note:
- By default, your Zoom Cloud Recordings will be copied to your “Meeting Recordings” folder, which can be found within your “My Folder” in Panopto. Content located in your “My Folder” (by default) is not shared with anyone other than yourself.
- In some rare cases you may not have a “Meeting Recordings” folder to select (see optional settings below).
- You can change where you want your Zoom Cloud Recordings to appear in your Panopto account (see optional settings below).
- If you had mapped specific Zoom Meeting IDs to Panopto folders (this is rare) then those will be restored and visible under the Meeting Mapping Source heading displayed on the page.
Optional Settings
Change the Default Folder where your Zoom Cloud Recordings automatically appear in your Panopto account.
The “Meeting Recordings” folder located under your “My Folder” in Panopto is set as the default folder where all your Zoom Cloud recordings automatically appear. This is still the recommended location.
In some cases you may want (or need) to set a different folder to collect all your Zoom Cloud recordings in Panopto. If this is the case, please see instructions below:
- Sign in to Georgetown’s Panopto web portal
- Click your initials at top right of the page
- Click the ‘User Settings’ button
- On the ‘Info‘ tab, locate the ‘Meeting Import Settings’ section towards the bottom of the page
- Under the ‘Meeting Import Settings’ section, locate the ‘Default Folder’ heading and click the ‘Edit‘ button next to the name of the Default Folder currently listed
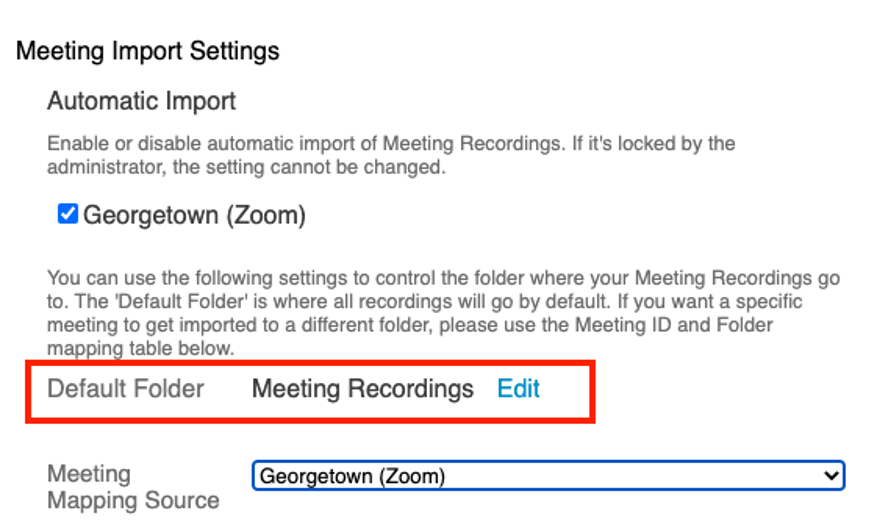
- A menu will be displayed where you can either type the name of the folder or expand the folder hierarchy under the ‘All Folders‘ section displayed on the menu.
- Select the new default folder where wish to have all your Zoom Cloud Recordings appear in your Panopto account.
- Click ‘Save‘ when done