
Installing the GlobalProtect VPN Client (Windows)
- Installing the VPN from the GU Software Self-Service Desktop Client
- Installing the VPN from the GU Software Online Store
Installing the VPN from the GU Software Self-Service Desktop Client
Notes:
- The installation procedure outlined below is the preferred method of installing the VPN client on university-managed computers used by GU faculty/staff, sponsored associates [SUAs], and student employees approved for VPN access.
- Instructions are available for how associates and student employees can install the VPN client on their personally-owned Windows computer.
- You don’t need administrative rights to install the client via Self-Service.
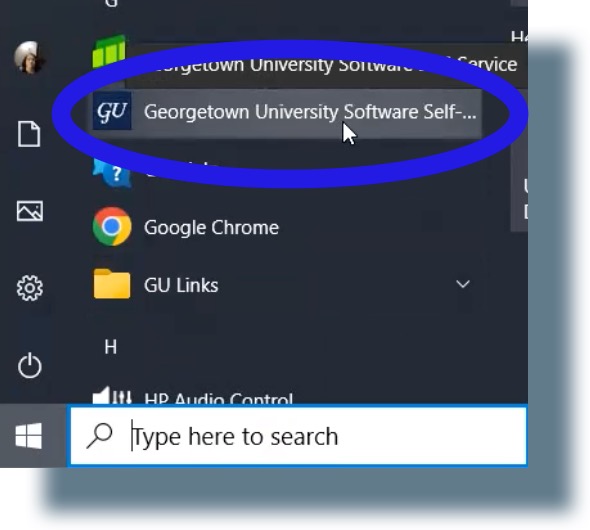
- Open the Self-Service client by clicking on the Windows menu, and then selecting the Georgetown University Software Self-Service listing.
- From the Self Service portal, click Install on the GlobalProtect VPN listing.

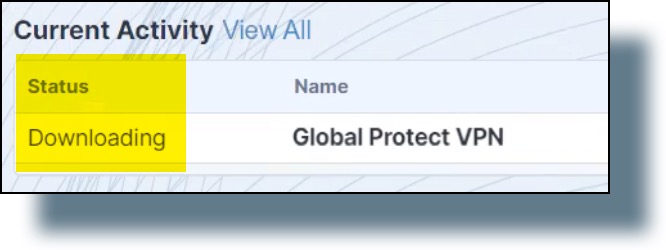
You should see in succession the following status messages at the top of your screen: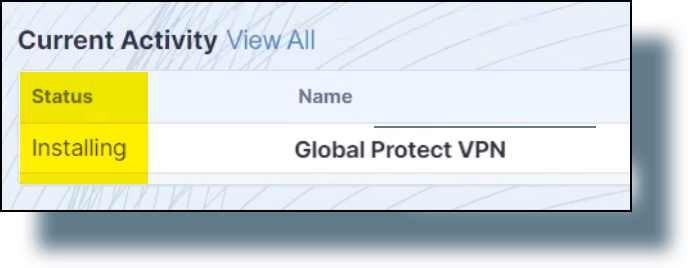
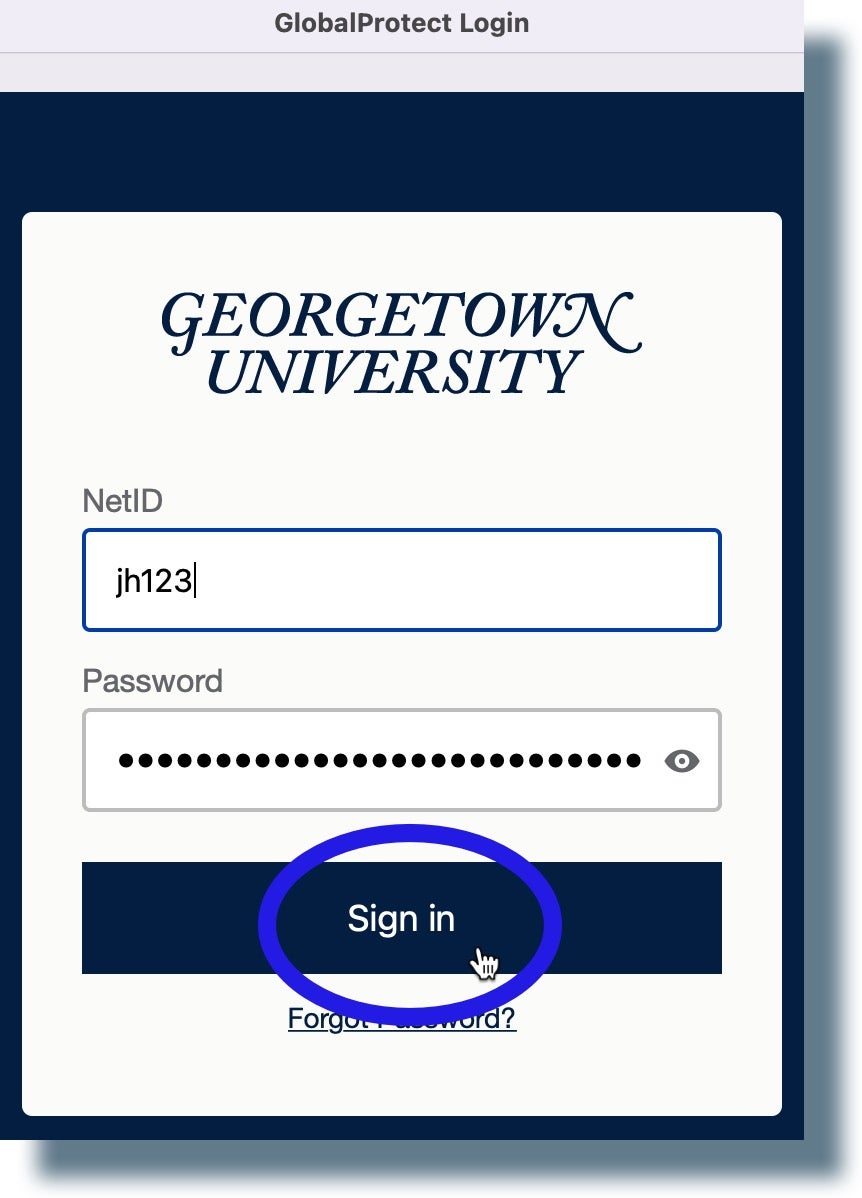
- At the Georgetown login prompt, enter your NetID and password, and then click Sign in. (Note: Make sure to have your mobile device on hand to verify your identity in Duo.)
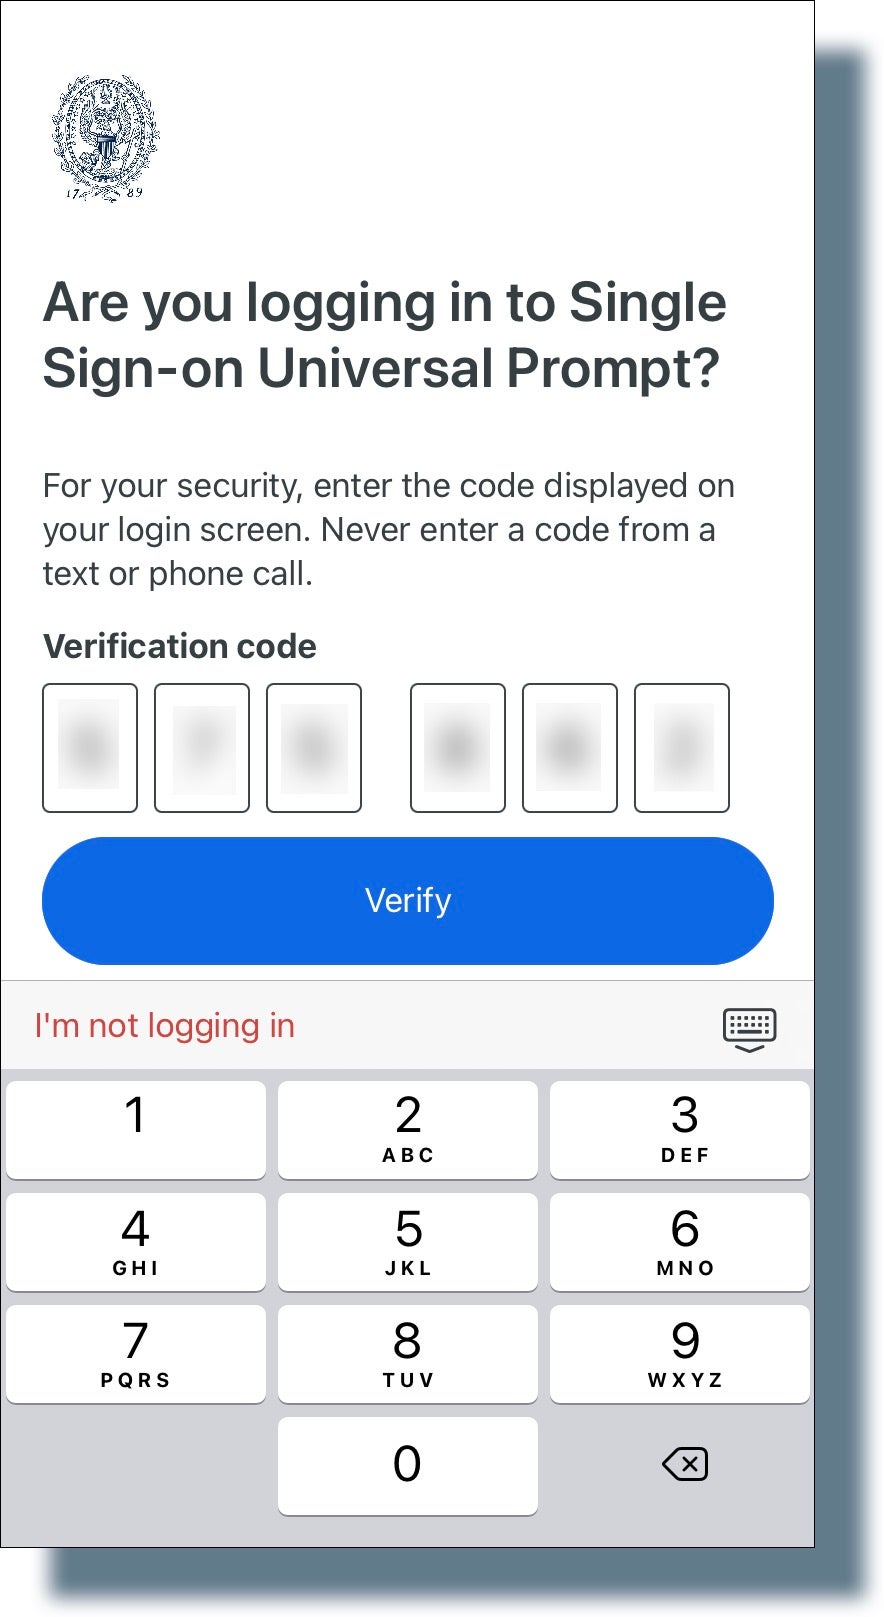
You should see the following screen displayed showing a six-digit verification code. (Note: The code has been greyed out for security purposes.)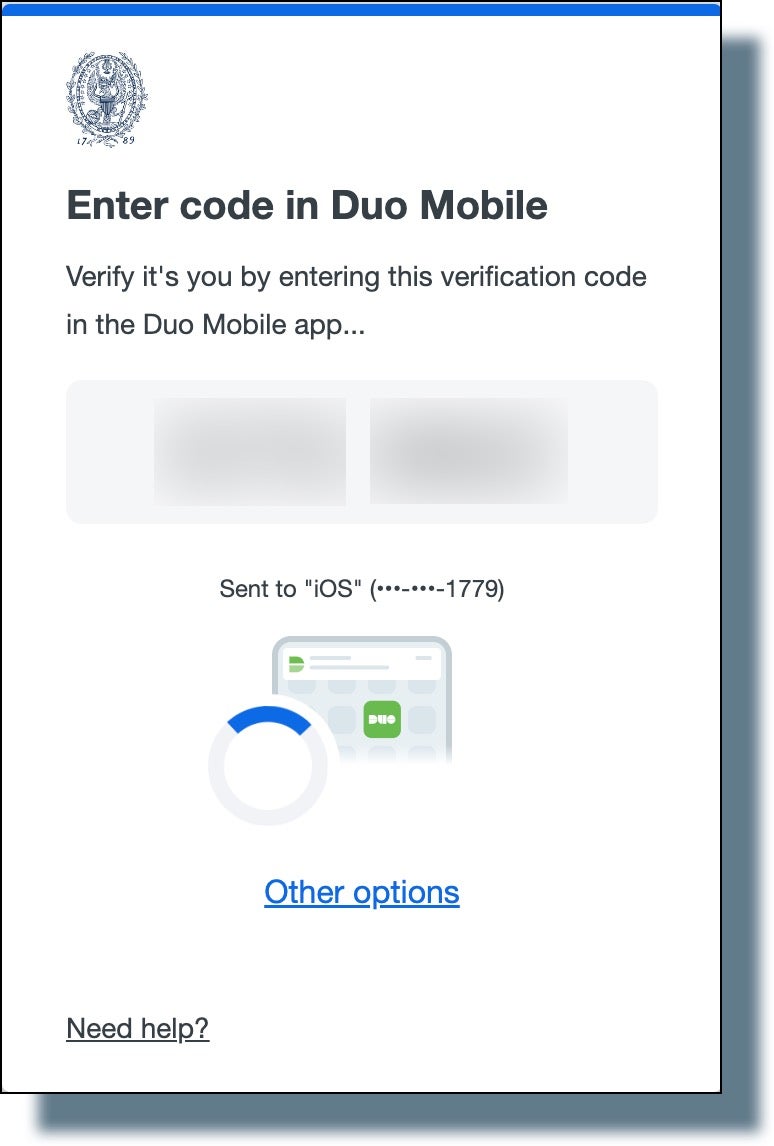
- Tap or swipe the Duo notification banner on your mobile device.

- From your mobile device, enter the six-digit verification code on the screen shown below and then tap Verify.
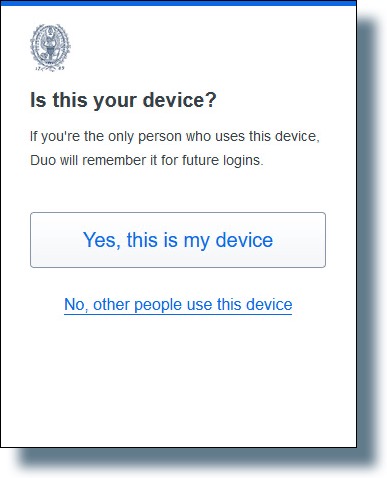
- In the next screen, select one of the options, depending on whether your computer is shared with others.
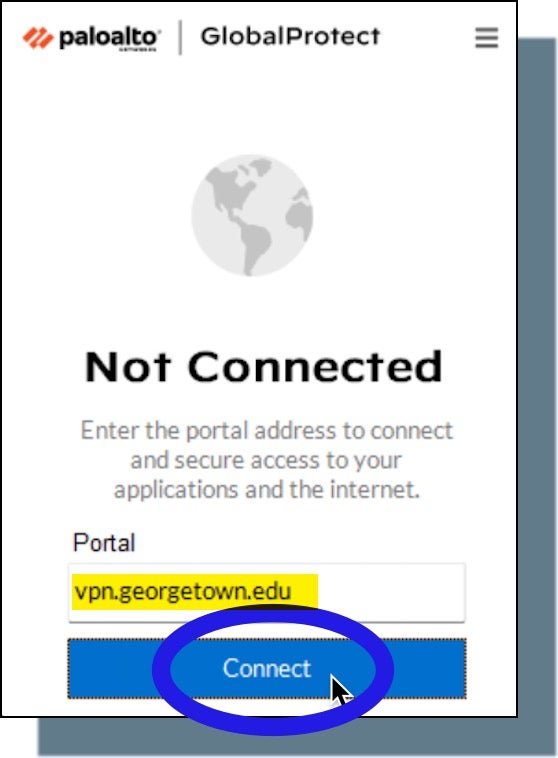
- If you see the following screen displayed, enter vpn.georgetown.edu in the Portal field (if it does not already appear there) and then click Connect.
You should see the following pop-up window stating that the VPN is connecting to your computer.
You’ll then see the following confirmation that you’re connected to the VPN: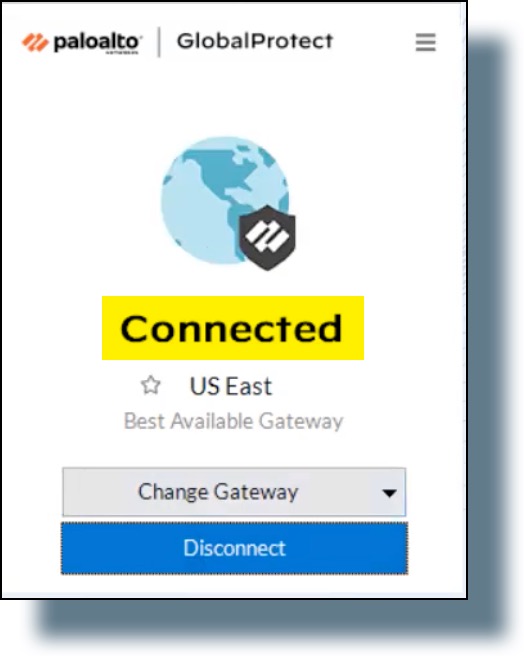
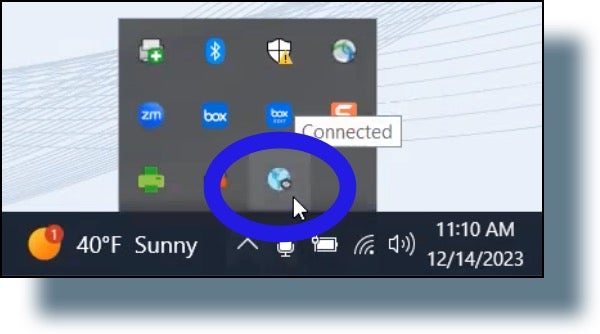
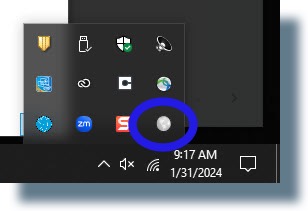
- Locate the VPN icon (globe-shaped icon) by clicking on the up-pointing arrow in your system tray.
Installing the VPN from the GU Software Online Store
Note: You must have administrative rights to your Windows computer in order to install the VPN client from the online store. If you don’t have administrative rights, you can install the VPN via the Georgetown Software Self-Service desktop client.
- Go to the GU software store for faculty and staff.
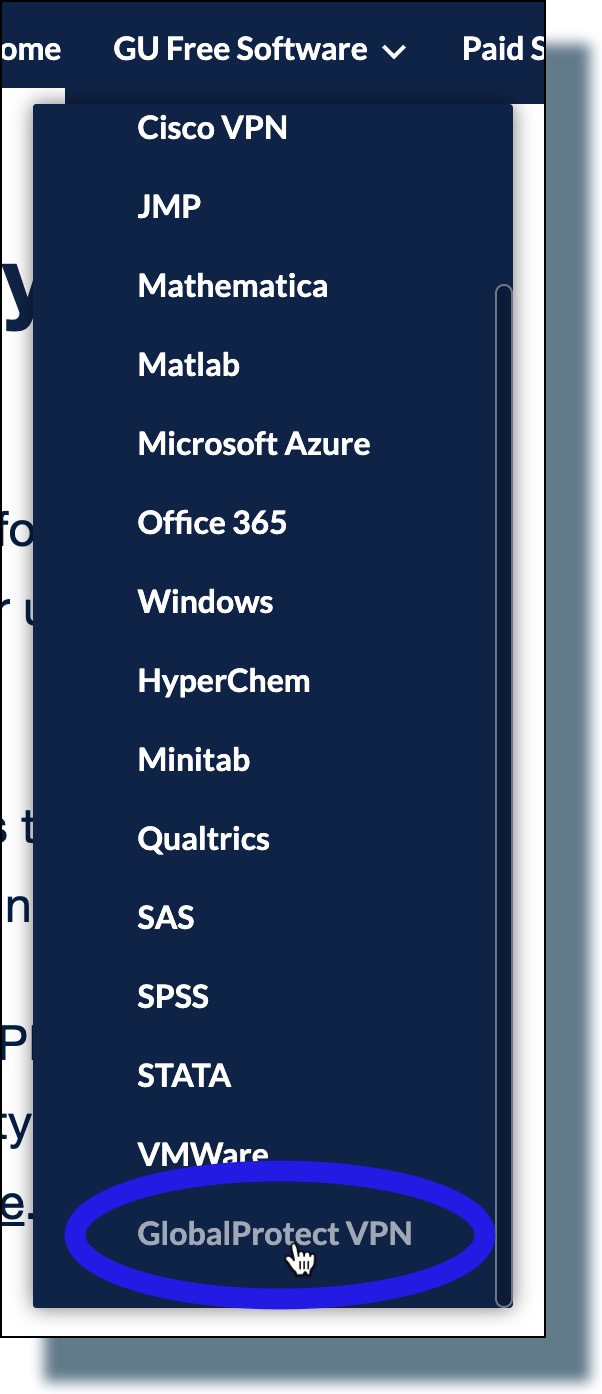
- Click on the GU Free Software menu item at the top of the page, and then select Global Protect VPN from the drop-down list. (You might have to scroll down the list to see the VPN listing.)
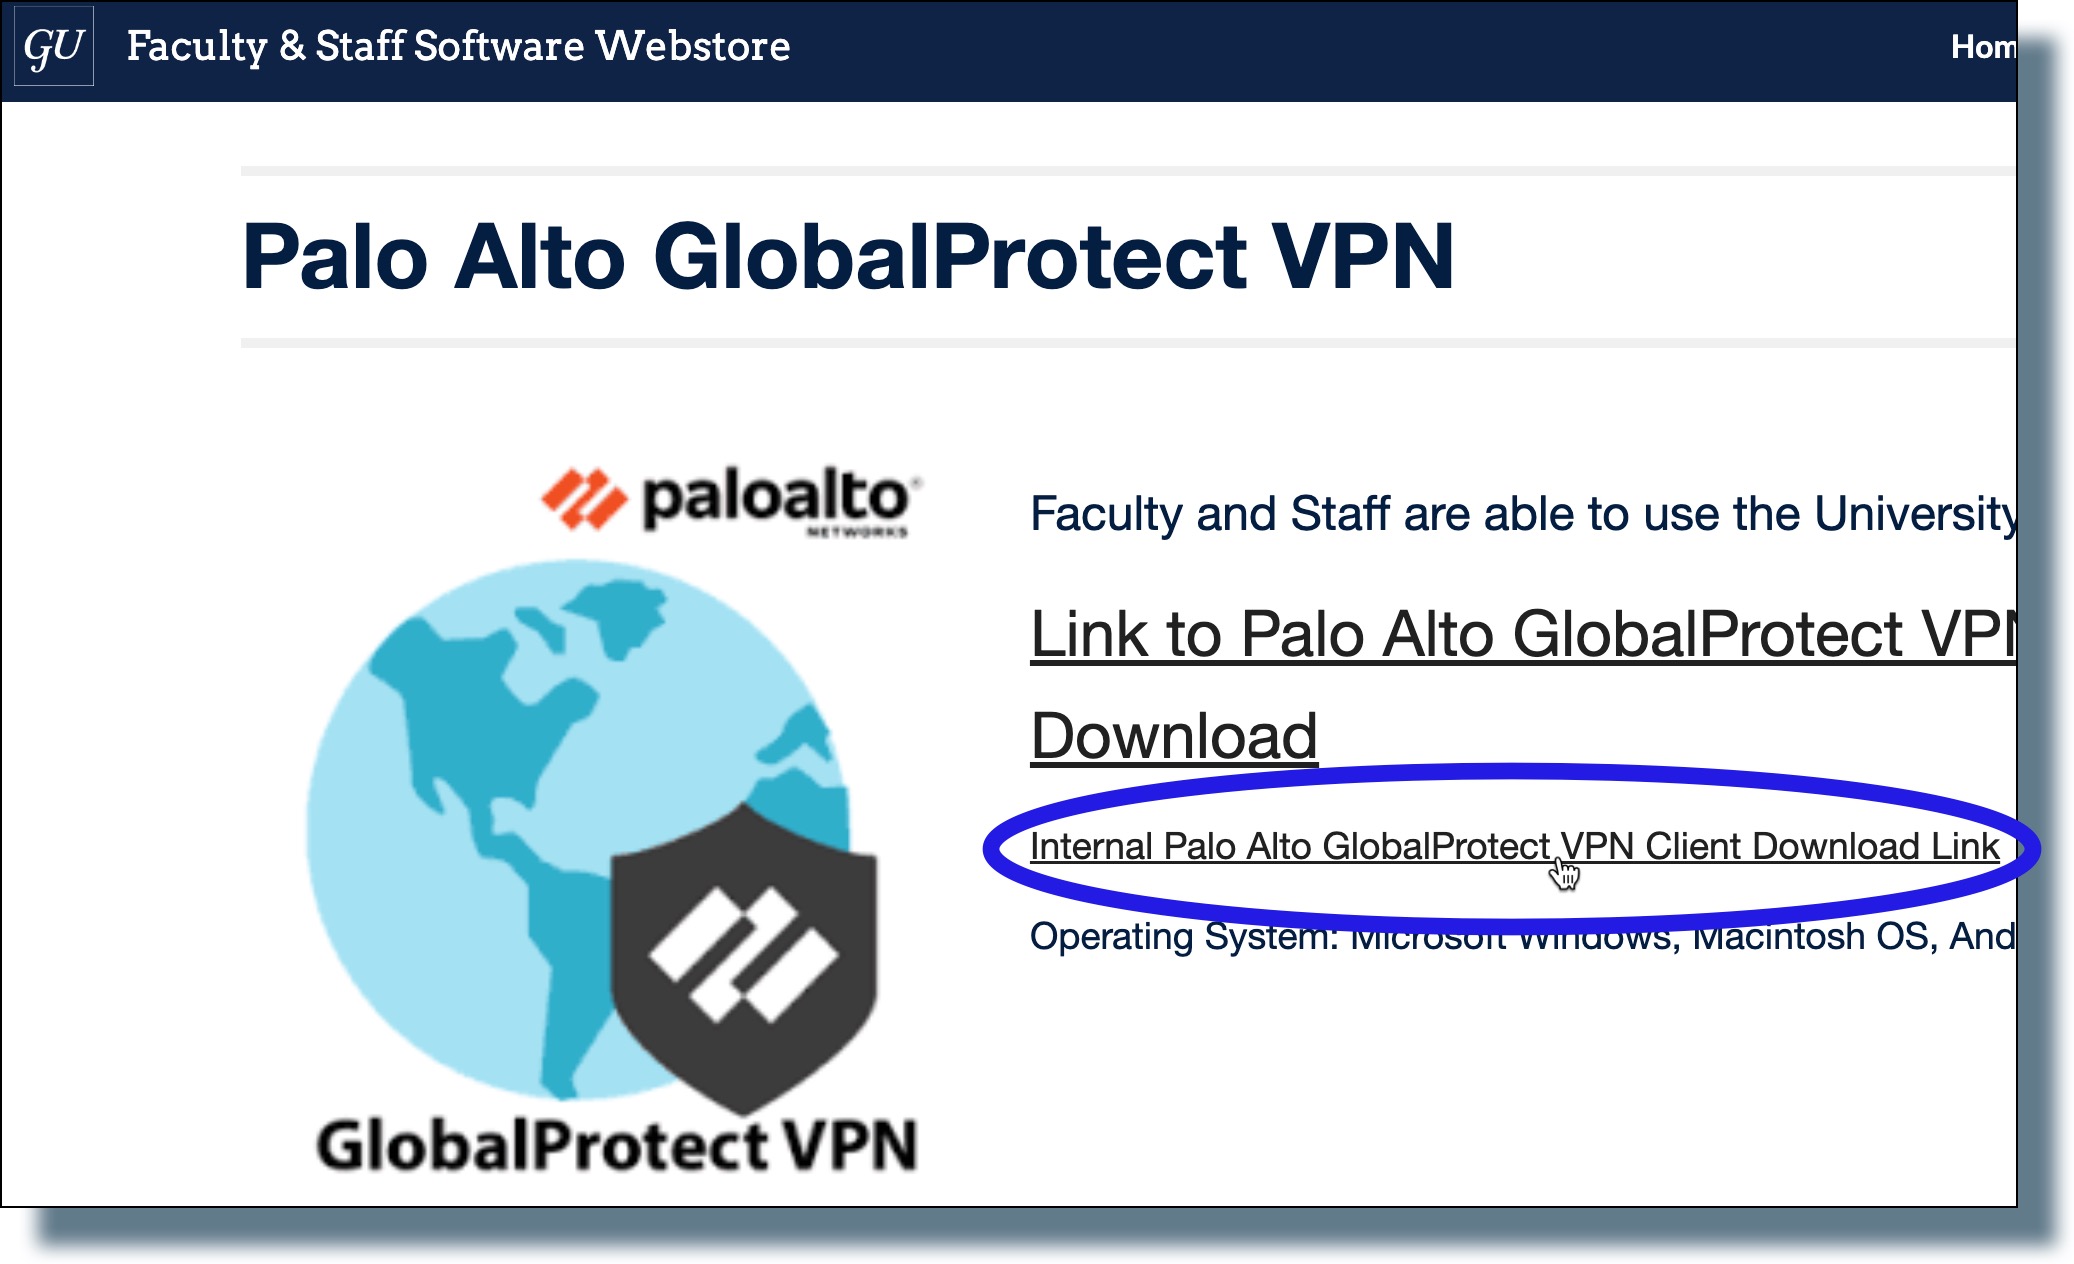
- On the VPN page, click on the link Internal Palo Alto GlobalProtect VPN Client Download link.
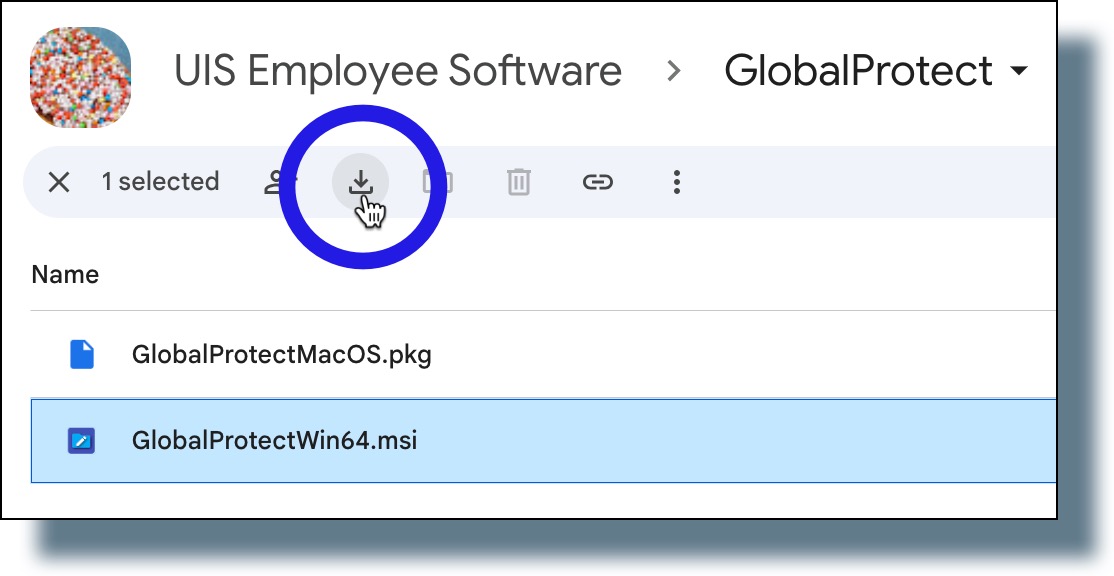
- In the Google Drive window, select the installer file, GlobalProtectWin64.msi, and then click on the file download button.
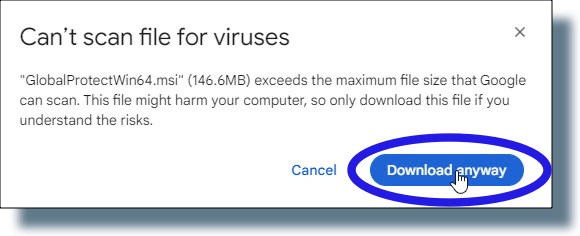
- Click Download anyway in the pop-up window.
- At the Windows Explorer prompt, save the file to your Desktop.
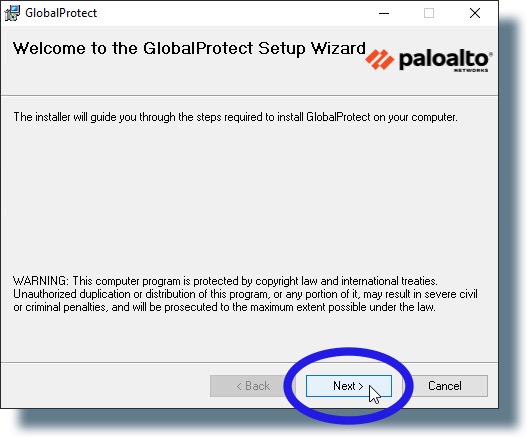
- In the welcome window, click Next.
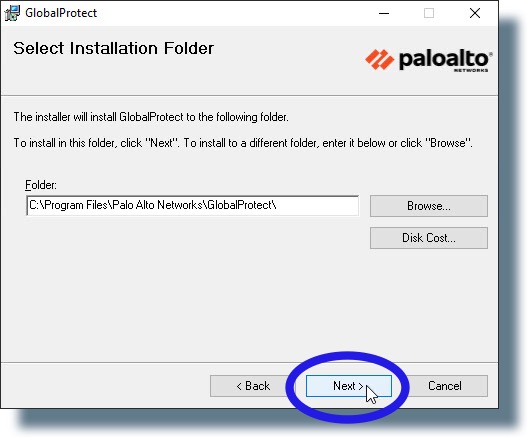
- In the “Select Installation Folder” window, click Next.
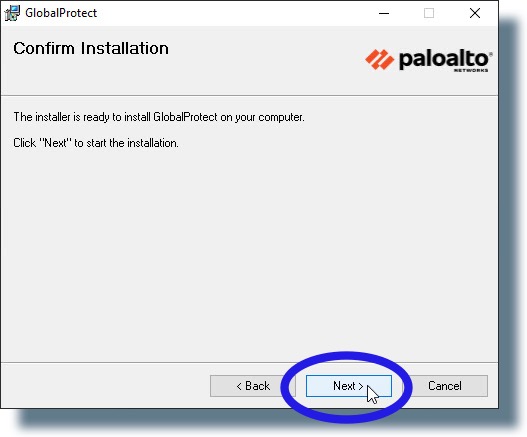
- In the “Confirm Installation” window, click Next.
The install will begin.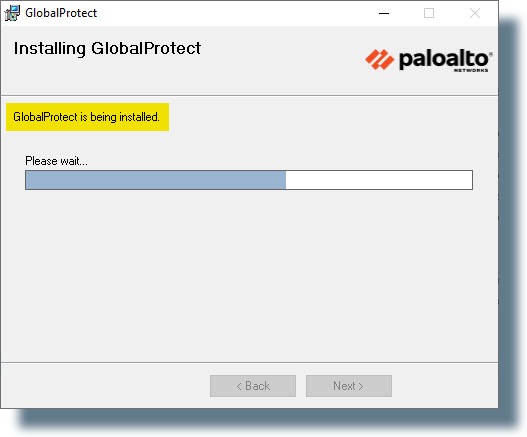
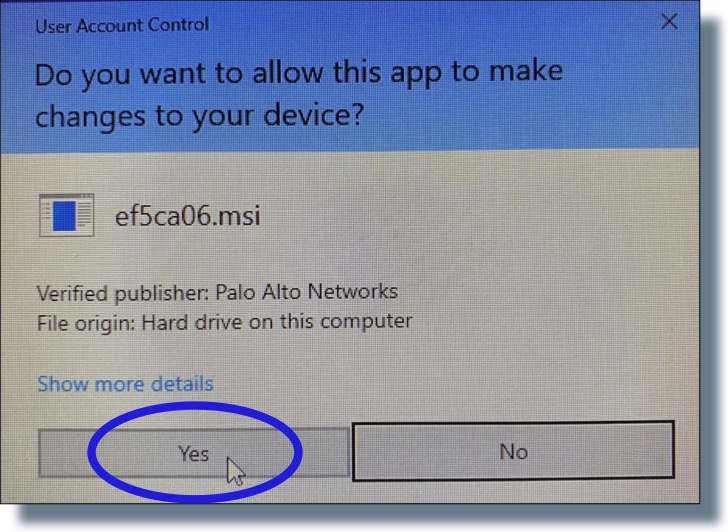
- In the Windows security window, click Yes.
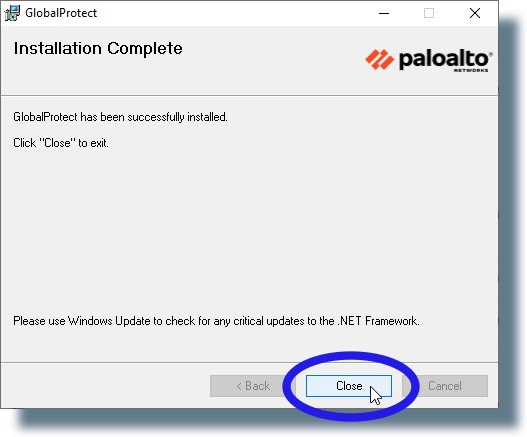
- After a few moments, you should see the “Installation Complete” window. Click Close.
- Click the up-pointing arrow in the lower right-hand corner of your screen to view the app icon for GlobalProtect VPN.
You can now connect to the GlobalProtect VPN.