Wi-Fi Calling
Wi-Fi calling enables you to make calls, send text messages, and check voicemail on your mobile device over a WiFi network when you’re in an area where cell coverage is weak or not available. All the major carriers (AT&T, Verizon, and T-Mobile) offer Wi-Fi Calling.
With Wi-Fi Calling, your device will only route calls and texts when cellular coverage is limited or unavailable.
You can set up Wi-Fi Calling on a university-owned device or on your personal device. And there’s no charge for using Wi-Fi Calling with your existing phone plan.
- Getting Started
- Wi-Fi Calling Details by Carrier
- Supported Devices
- Enabling Wi-Fi Calling on Your iPhone
- Enabling Wi-Fi Calling on Your Android Device
Getting Started
Before you can enable Wi-Fi Calling on your device, make sure:
- Your device is connected to a wireless network.
- Your device offers Wi-Fi Calling (Refer to Supported Devices)
- You read the details about Wi-Fi Calling for your carrier. (Details are available in the section Wi-Fi Calling Details by Carrier.)
Wi-Fi Calling Details by Carrier
Visit the link(s) for your carrier for details and questions about Wi-Fi Calling. Note: If you’re unable to locate your device as one of the devices offering Wi-Fi Calling, you can go to Settings and look for the Wi-Fi Calling option.
AT&T
Verizon
- Verizon Wi-Fi Calling FAQ (Note: Before you enable Wi-Fi Calling, you’ll first need to activate HD Calling [called Advanced Calling on some devices] for your device.)
- Supported Devices
T-Mobile
Supported Devices
iPhone
Wi-Fi Calling is supported on iPhone 6 devices or later.
Android
Wi-Fi Calling is available on most newer Android phones. To find out if Wi-Fi Calling is available on your device, go to Settings and look for the Wi-Fi Calling option.
Enabling Wi-Fi Calling on Your iPhone
- Tap on the Settings icon.
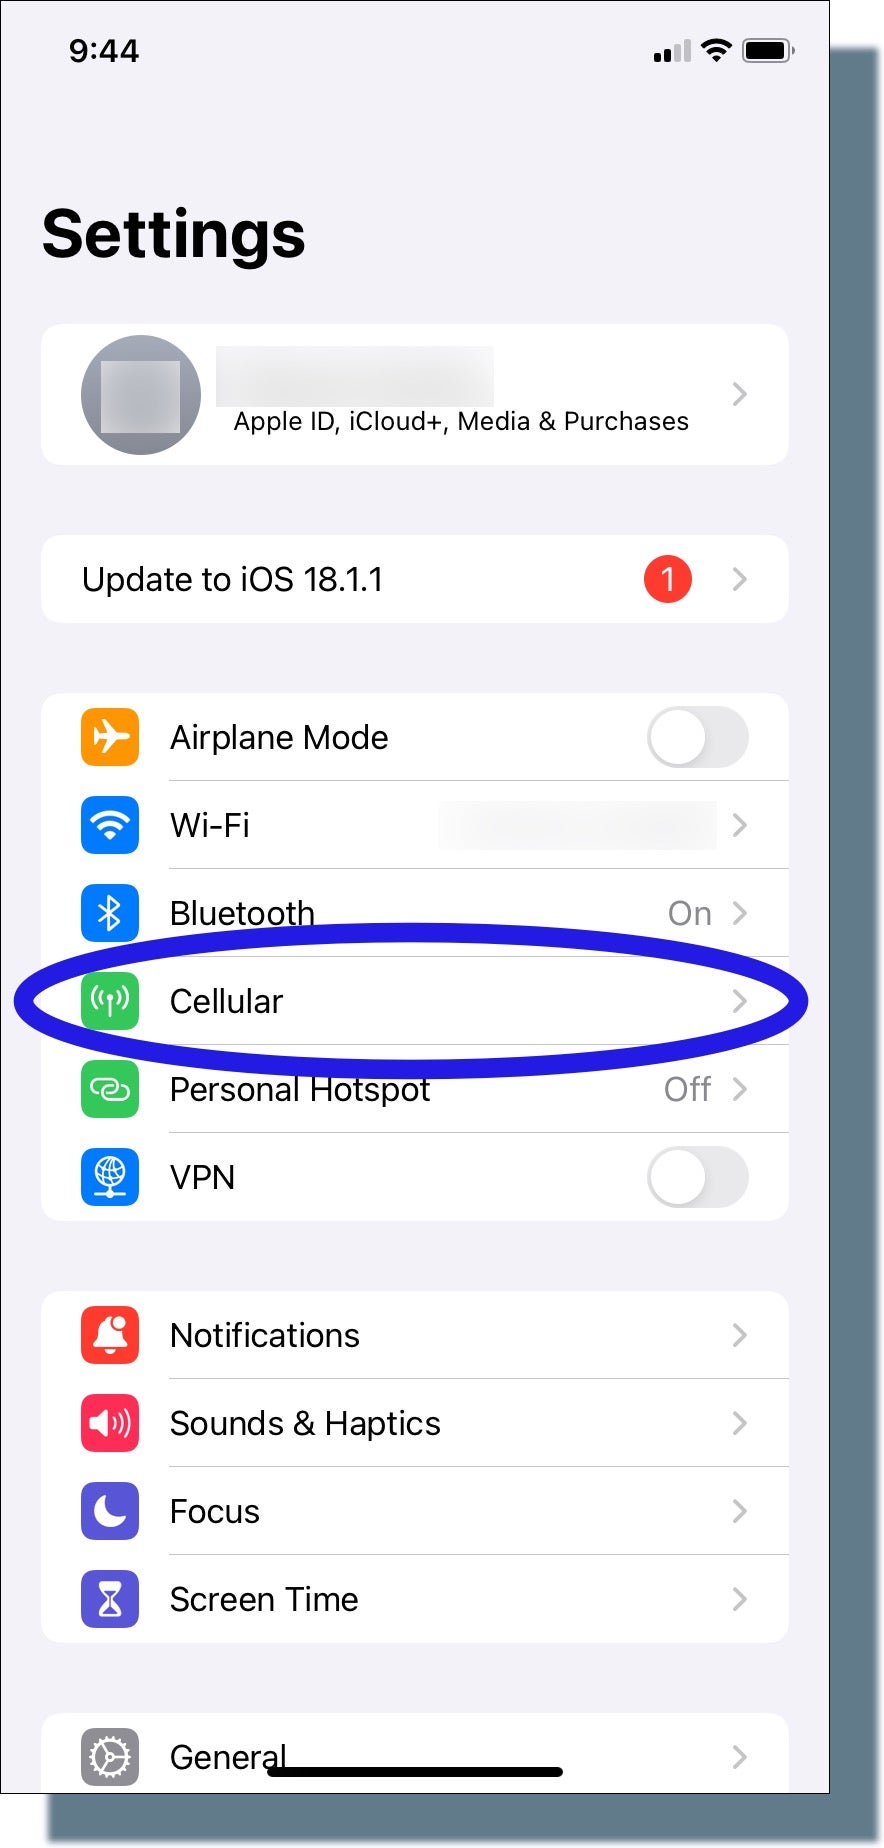
- From the ‘Settings’ screen, tap Cellular.
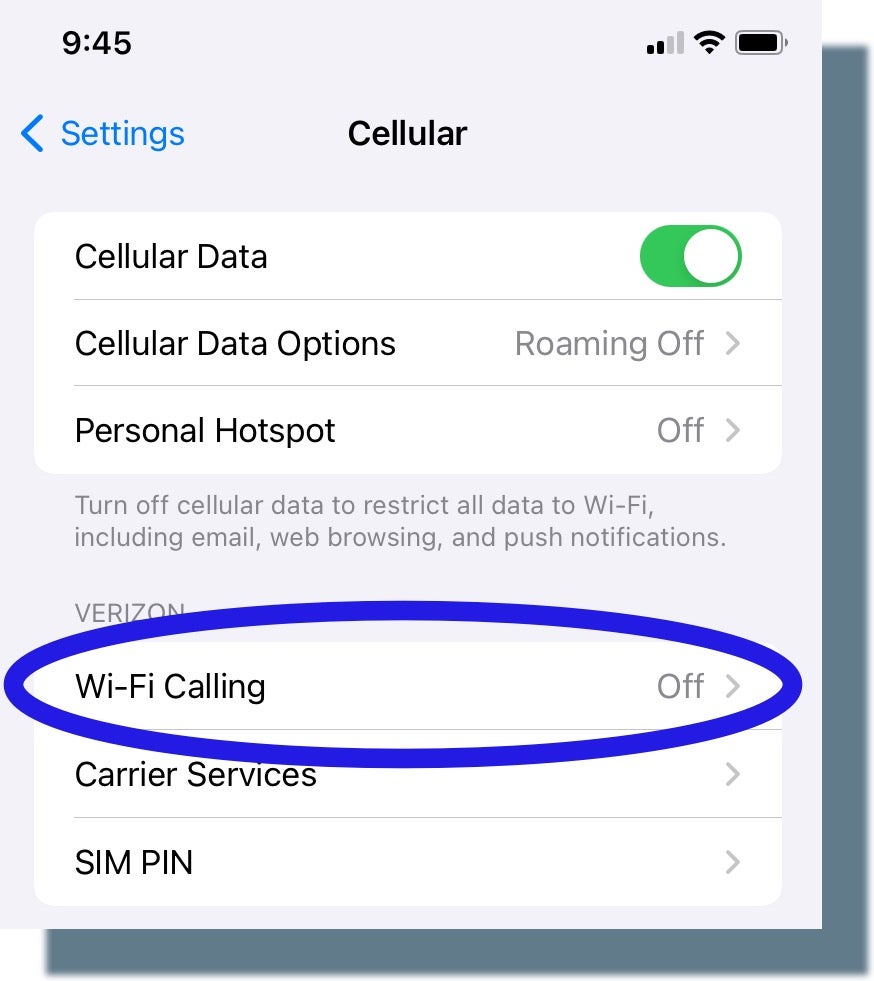
- From the ‘Cellular’ screen, tap Wi-Fi Calling.
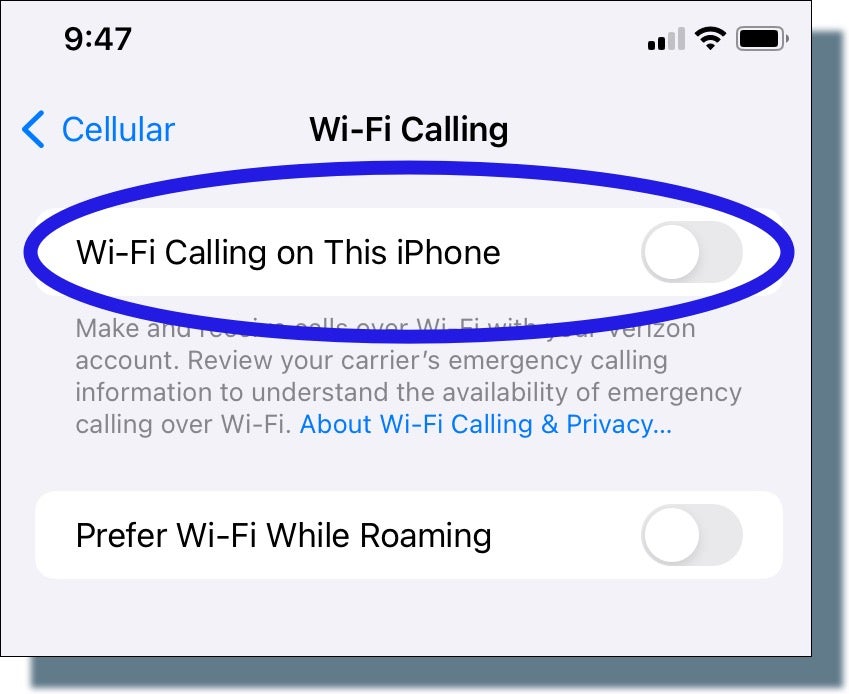
- On the ‘Wi-Fi Calling’ screen, tap the slider next to Wi-Fi Calling on This Phone.
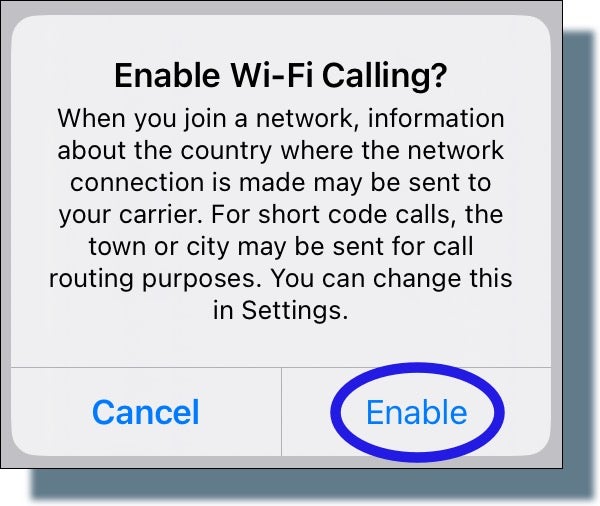
- Tap Enable in the pop-up message.
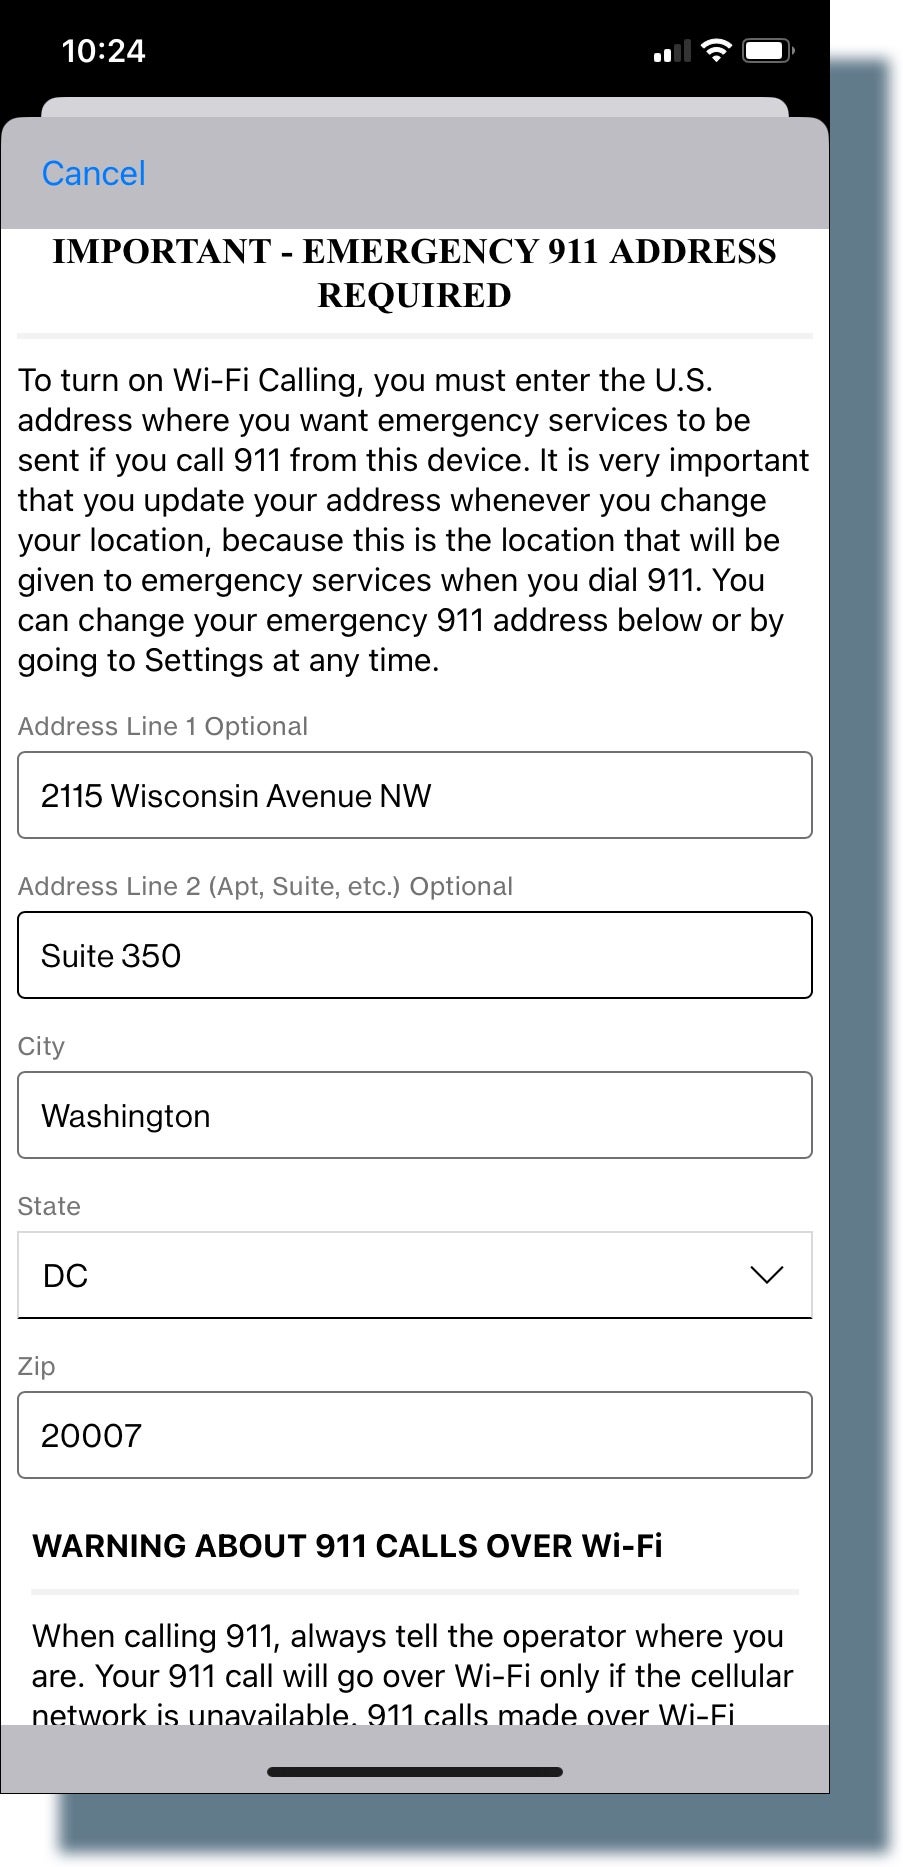
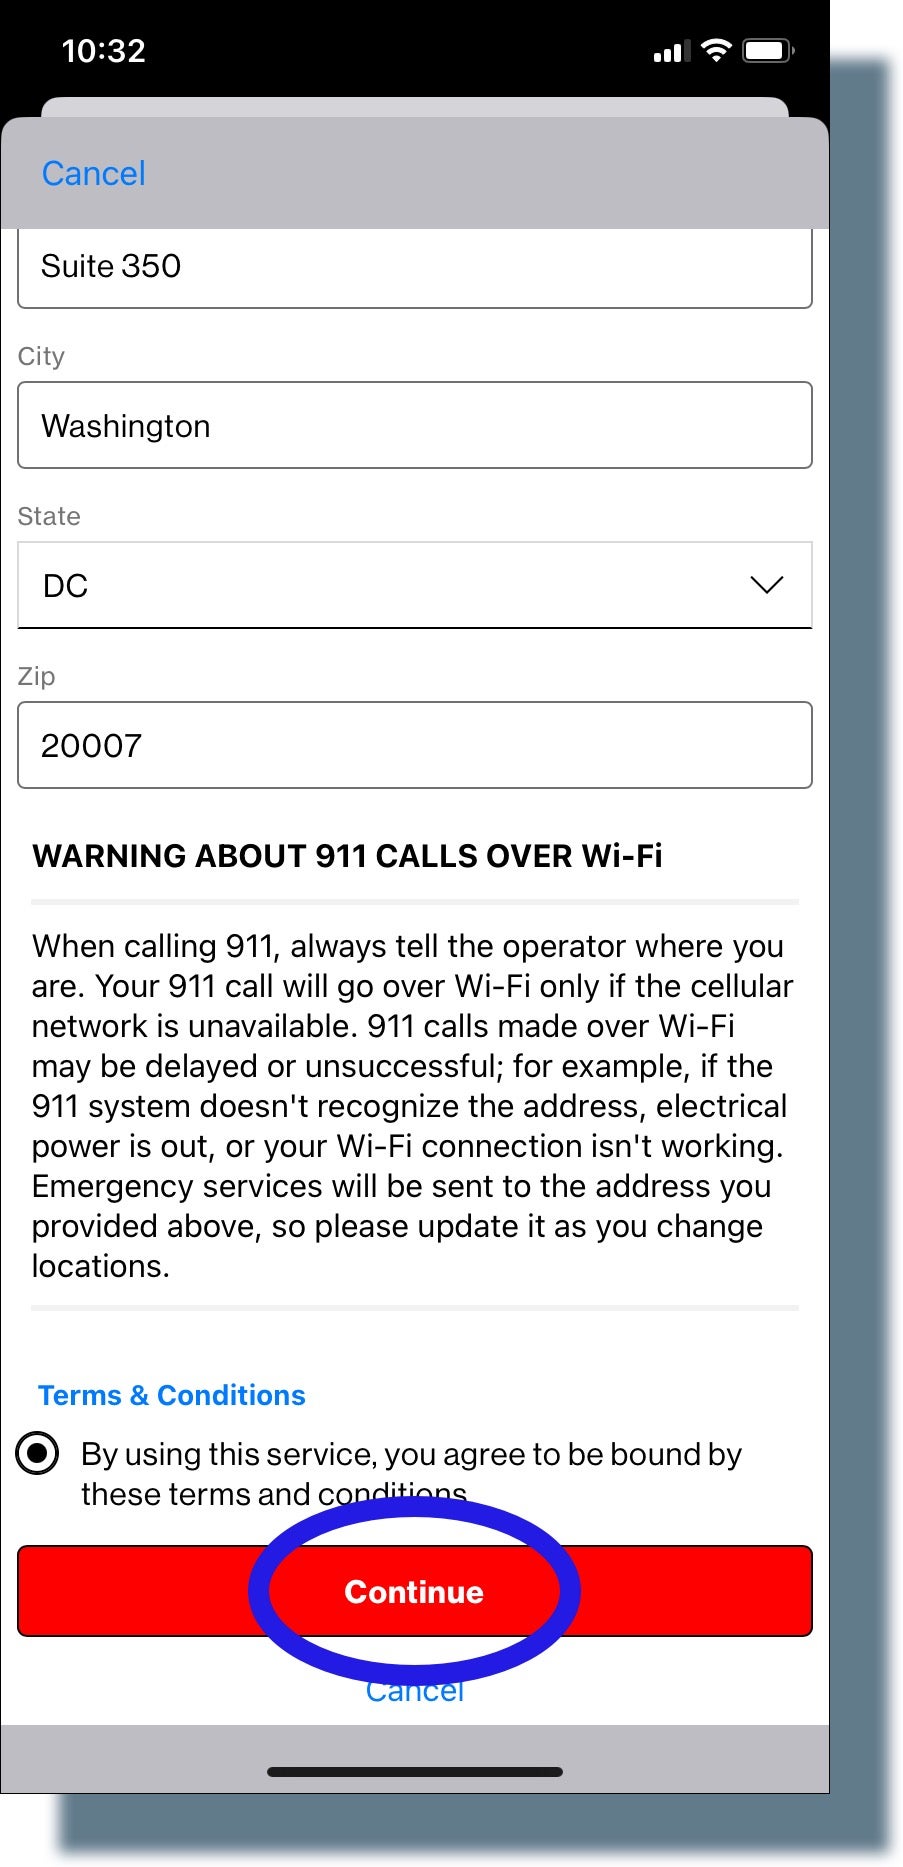
- In the next screen, enter your emergency address (as shown in the example images below), accept the terms and conditions, and then tap Continue.
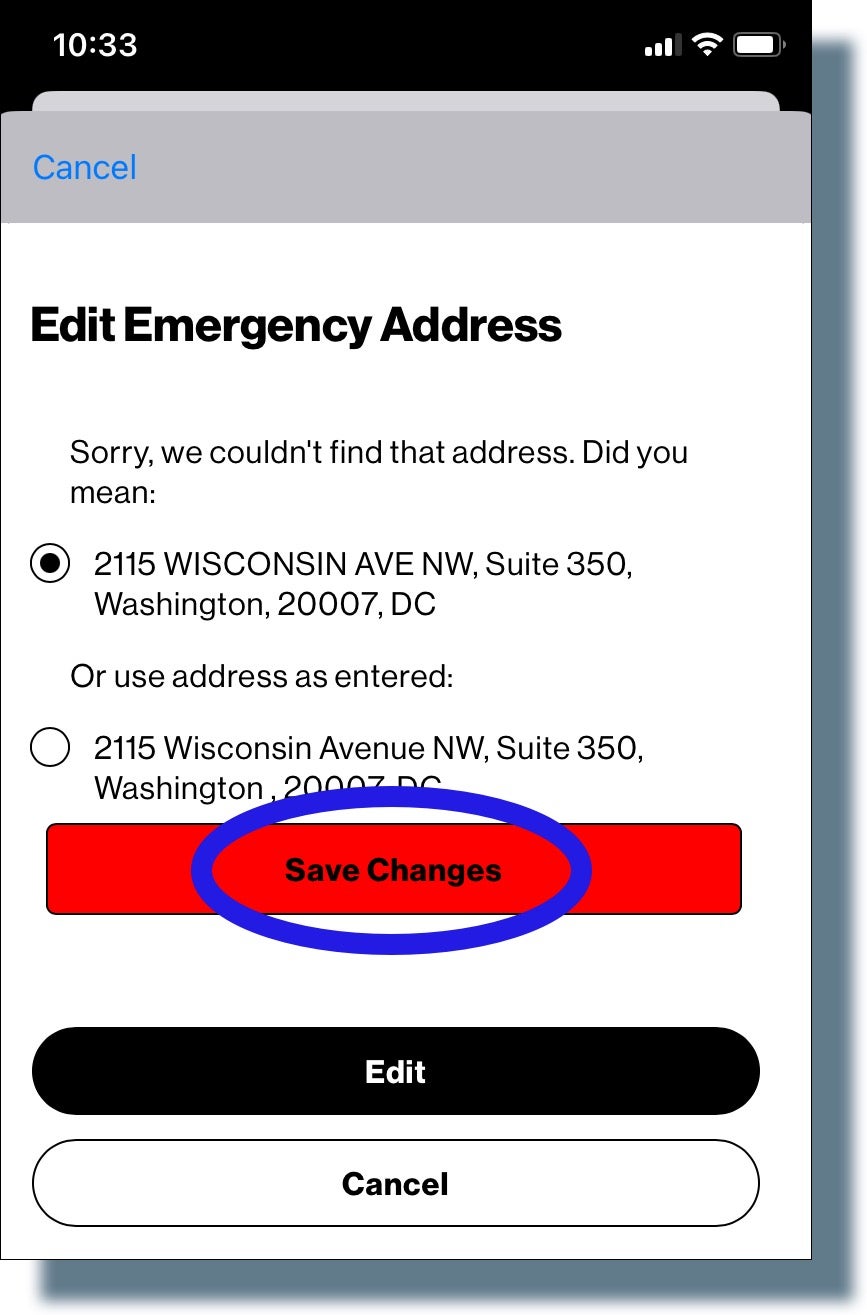
- In the next screen, verify the address you entered, and then tap Save Changes.
The ‘Wi-Fi Calling’ screen is displayed again, showing that Wi-Fi Calling is now enabled on your device.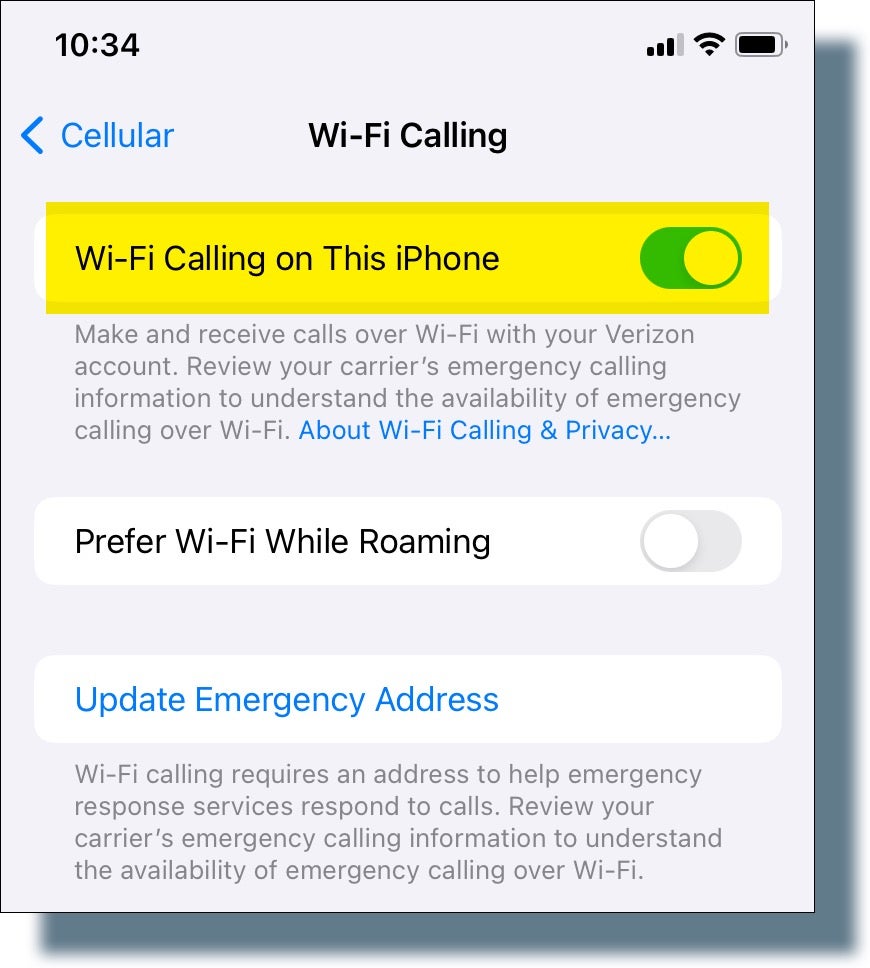
Enabling Wi-Fi Calling on Your Android Device
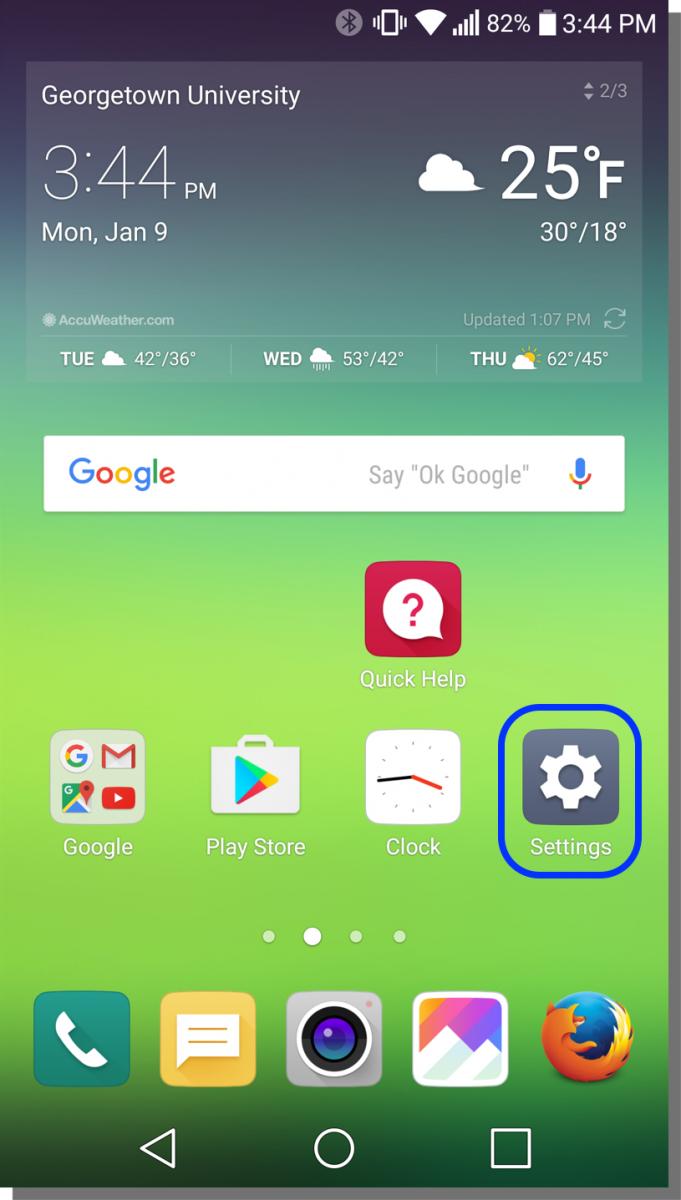
- Tap on the Settings icon.
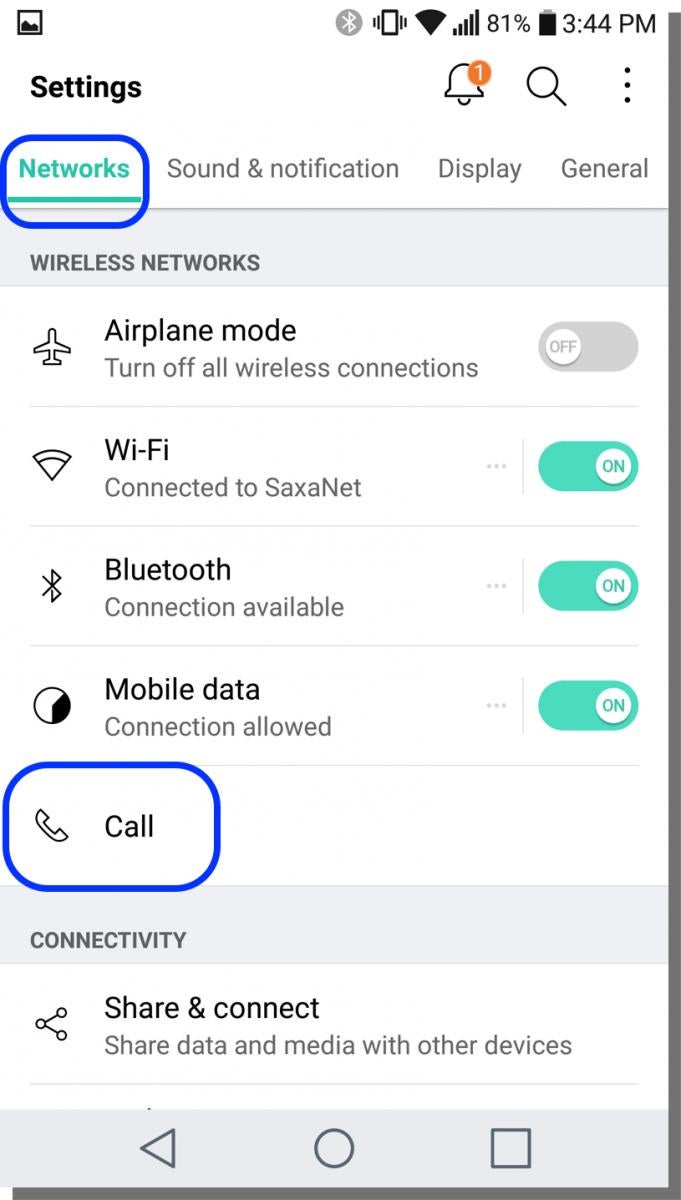
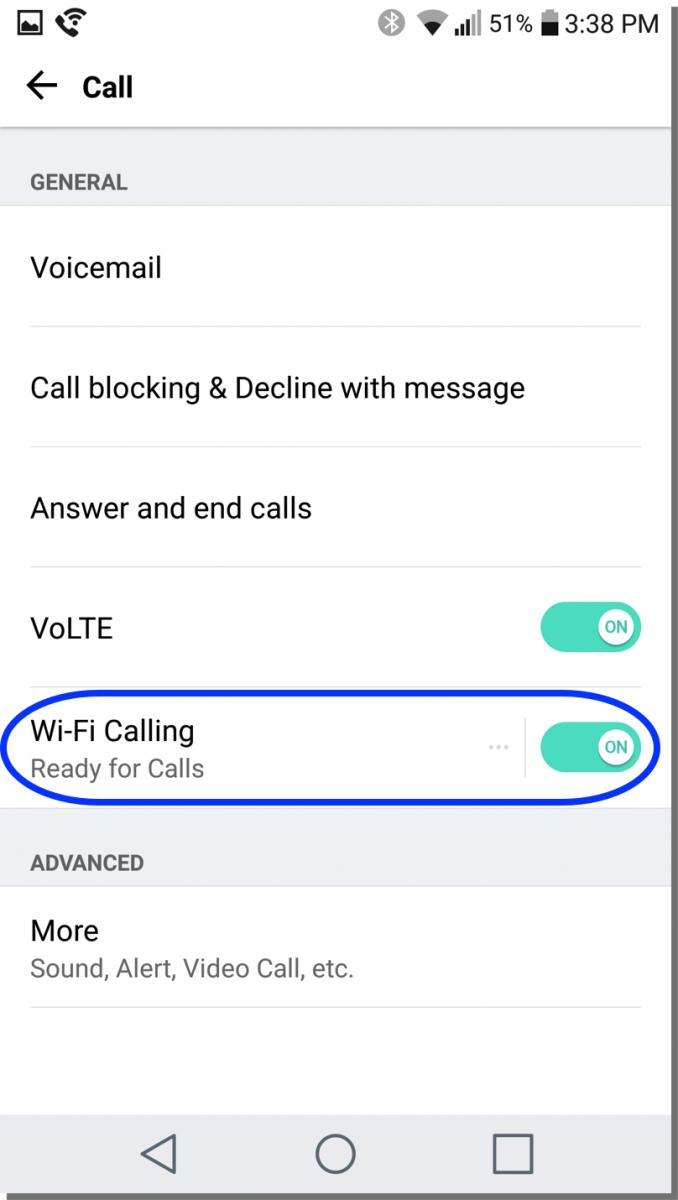
- Make sure the Networks tab is selected, and then tap on Call.
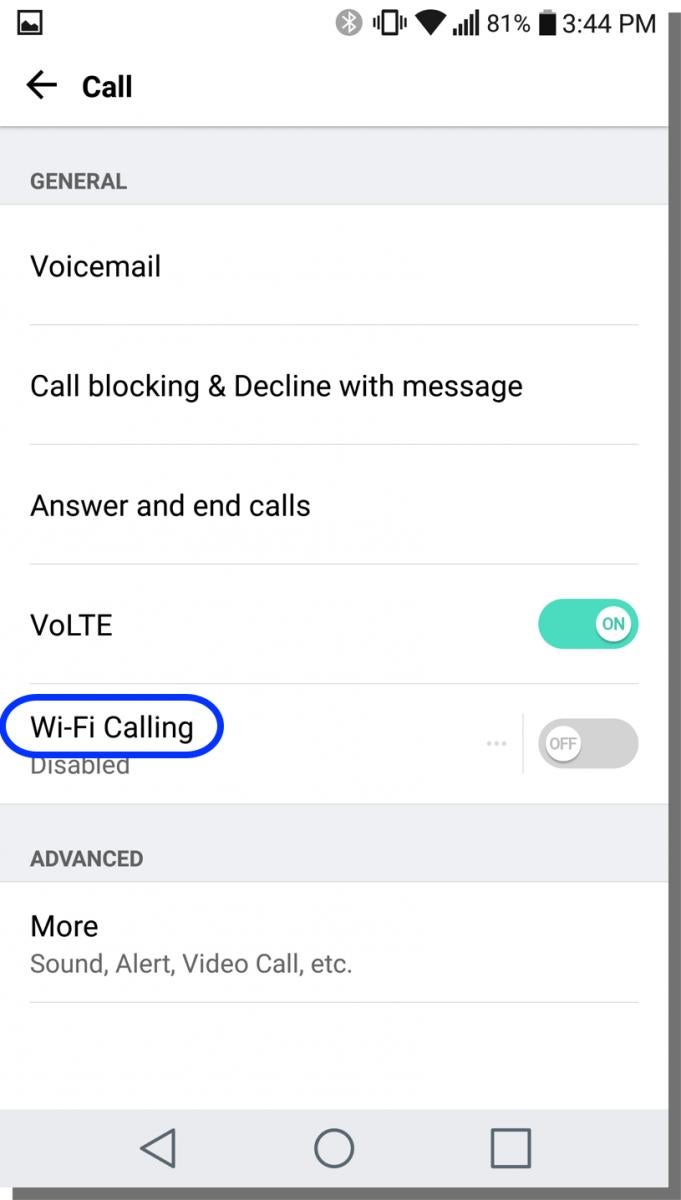
- Tap on the slider next to Wi-Fi Calling so that ON is displayed.
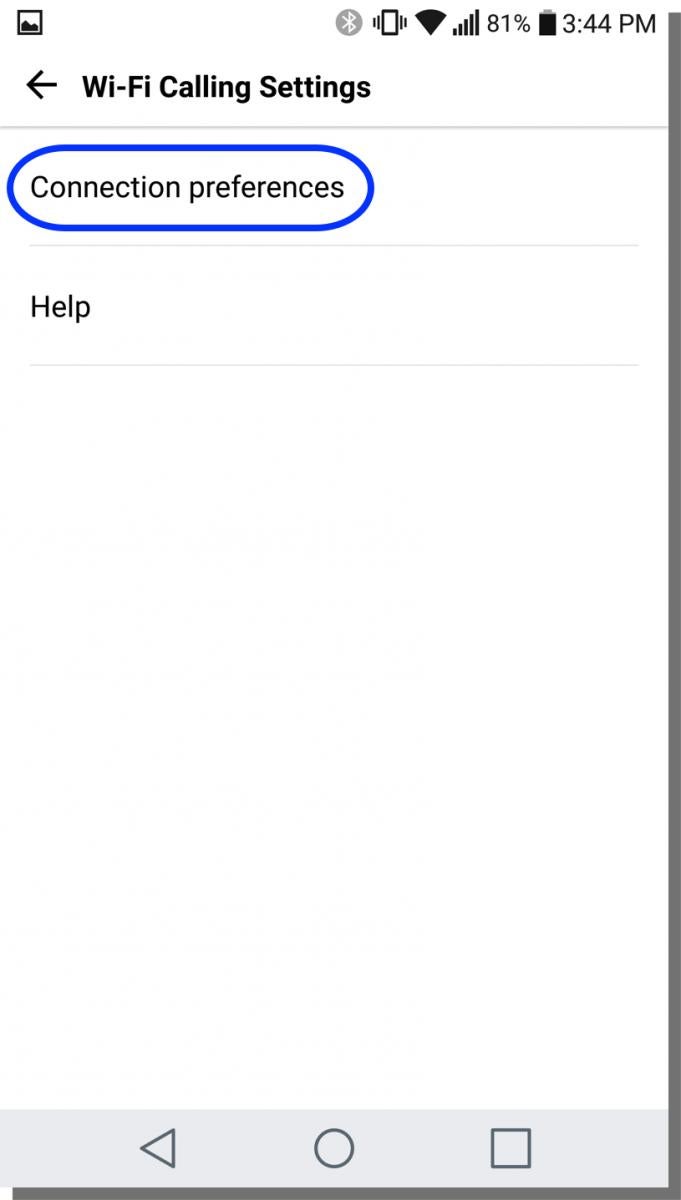
- In the next screen, tap on Connection preferences.
- In the next screen, select the option Wi-Fi preferred.
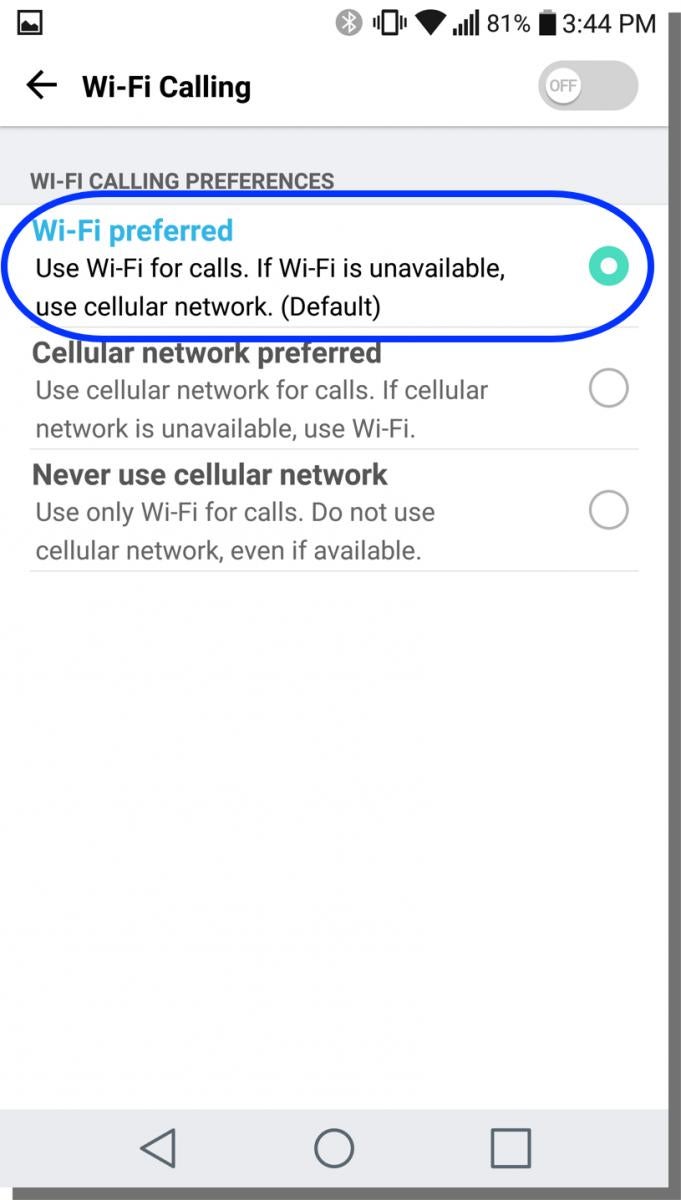
- In the next screen, tap in the selected area.
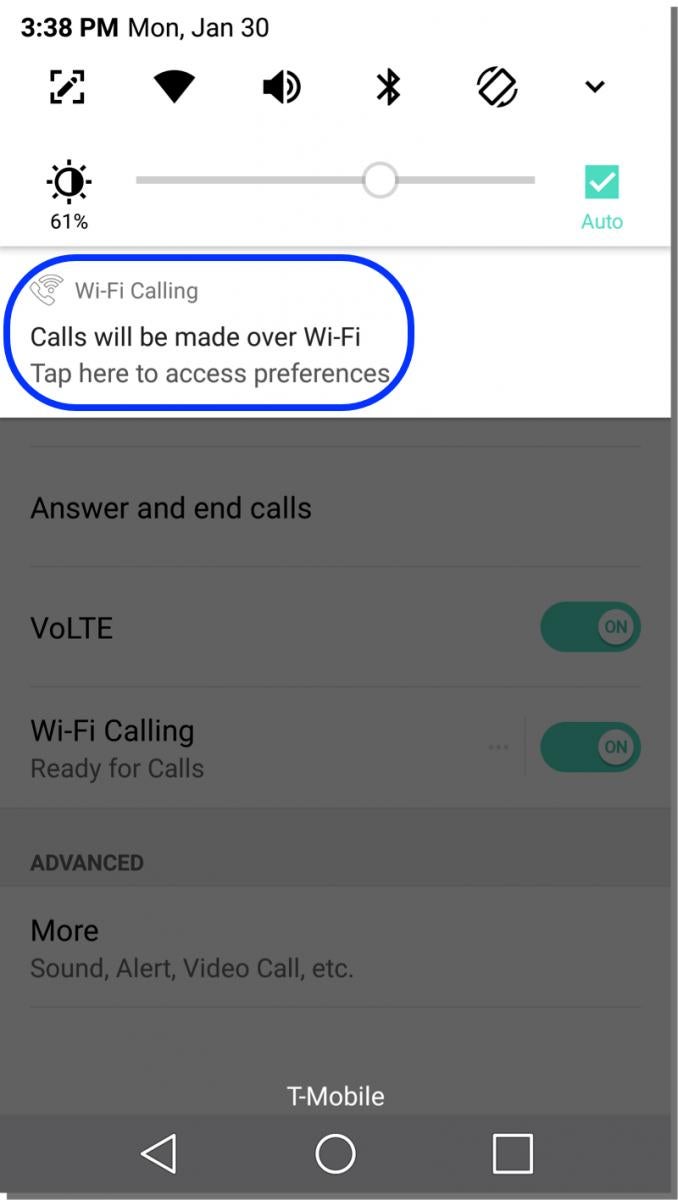
You should see the confirmation shown below.
