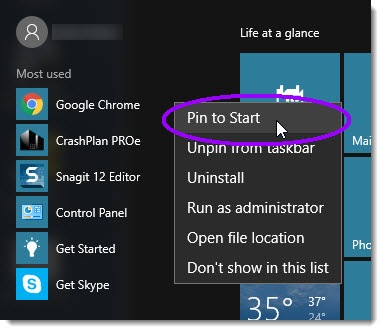
Tiles are a carryover feature from Windows 8.x. Files are square- or rectangular-shaped colored panels located in the Start menu that you can use to access your programs and view “live” information such as news. Tiles can be an easy and convenient way to open programs you use regularly.
Windows 10 displays a number of tiles by default, but you can add, remove, edit, and rearrange tiles as you want.
From the drop-down menu, select the size. (Note: Your size choices will vary, depending on whether the tile is a Microsoft app, such as Microsoft Edge, or a third-party program, such as Google Chrome.)
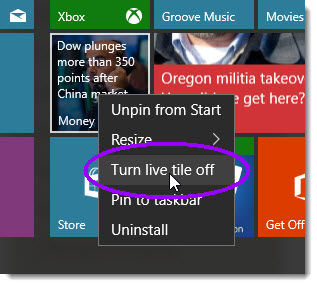
A live tile displays and updates information or messages automatically. An example of a live tile is a news app. You can stop a live tile from displaying information automatically.
Right-click on the live tile you want to turn off.
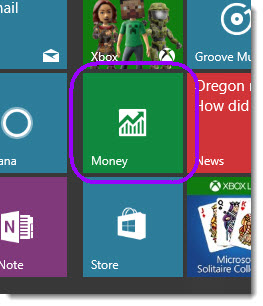
Select Turn live tile off from the drop-down menu. The live tile converts to a solid color, similar to the one displayed in the example below.
A tile group is a collection of tiles grouped by a specific theme or category. You can create work-, course-, or project-related tiles, to name a few. You can include tiles of folders and apps in your tile group.
Add a tile with which you want to create a tile group.
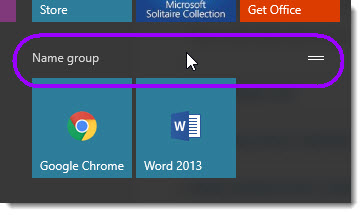
Move your mouse above the tiles you just added to display a title bar, as shown below.
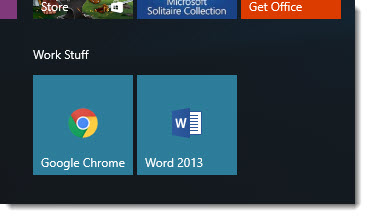
In the text box that is displayed, type a name for your group. In the example below, “Work stuff” has been entered as the tile group name.
Click anywhere on the Start menu when you’re done so that the text box is no longer displayed.
To remove a tile group from the Start menu, remove each tile from the tile group. When you remove the last tile from the group, the title bar for that tile group is removed automatlcally.