Docusign
What is Docusign?
Docusign enables students, faculty and staff to easily and securely collect electronic signatures on documents sent to colleagues, collaborators and partners on campus and around the world. Such eSignatures are compliant with the ESIGN Act in the United States and the European Union’s eIDAS regulation.
Who can use Docusign?
All current Georgetown students, faculty, and staff may use their NetID@georgetown.edu email address to open a Docusign account. With this account, you can read and electronically sign a document that has been shared with you.
What if I need to send someone a document to sign?
If you need to send envelopes out for signature, or you want to create a template for a document you send out for signature regularly, you must submit a form to request additional Docusign permissions. You may use Docusign to support administrative services, academic research or teaching.
Can I use Docusign to Transmit Protected Health Information?
No. Unlike Box which permits the storing of HIPAA-protected data, you may not use Docusign to collect, transmit or store protected health information.*
For other questions about Docusign, please email gudocusign.help@georgetown.edu.
*If you are involved in FDA-sponsored clinical research, you may be entitled to use a 21 CFR Part 11-compliant Docusign instance. Please review the Training and Education section of the Georgetown Research Services website and email researchdocusign@georgetown.edu with any questions.
Receiving and Signing a Document
- If you received an email message requiring your signature, your email will look like this:
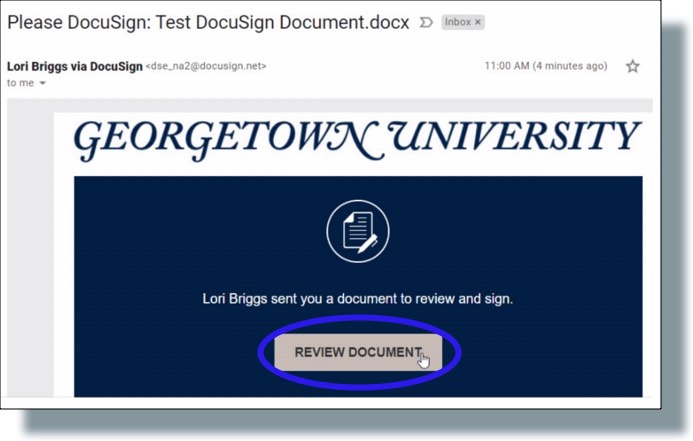
- Click on Review Document. Once you view the document, click on the option to prepare for your signature.
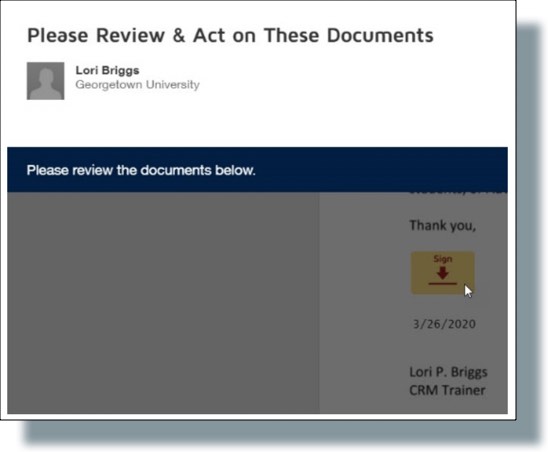
- Once you click to sign, you will see the window below.
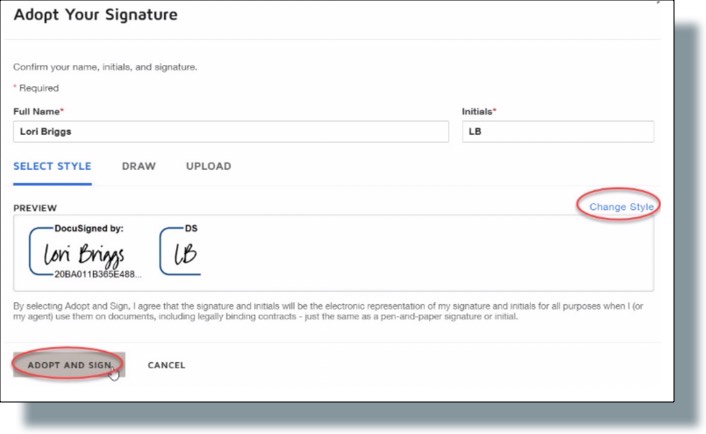
You have the option to change the style of your signature.
Click on Adopt and Sign once your signature choice has been completed. - When you’re done, click on Finish.
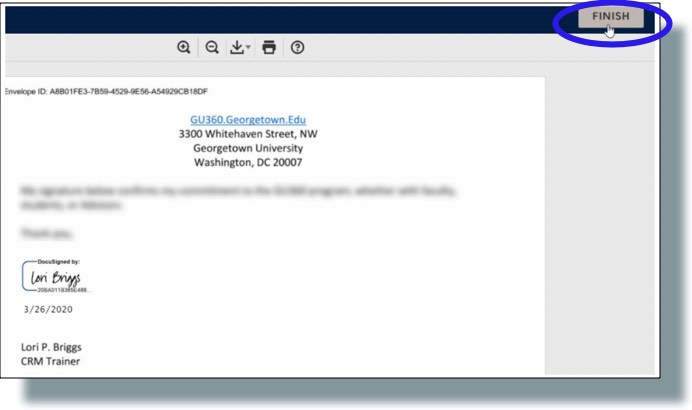
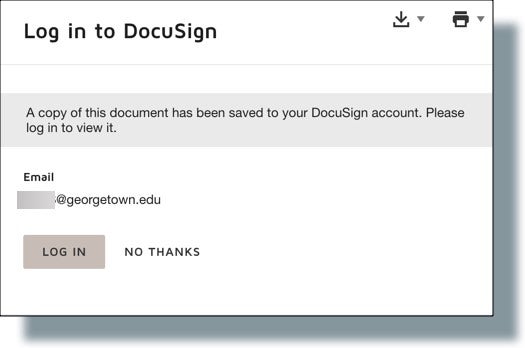
- Your document has been signed, and you should receive the following confirmation message:
Preparing and Sending an Envelope for Signature
You will need to complete the Docusign Permission Request Form to obtain permission to prepare and send documents for signing.
- Go to the Docusign login page.
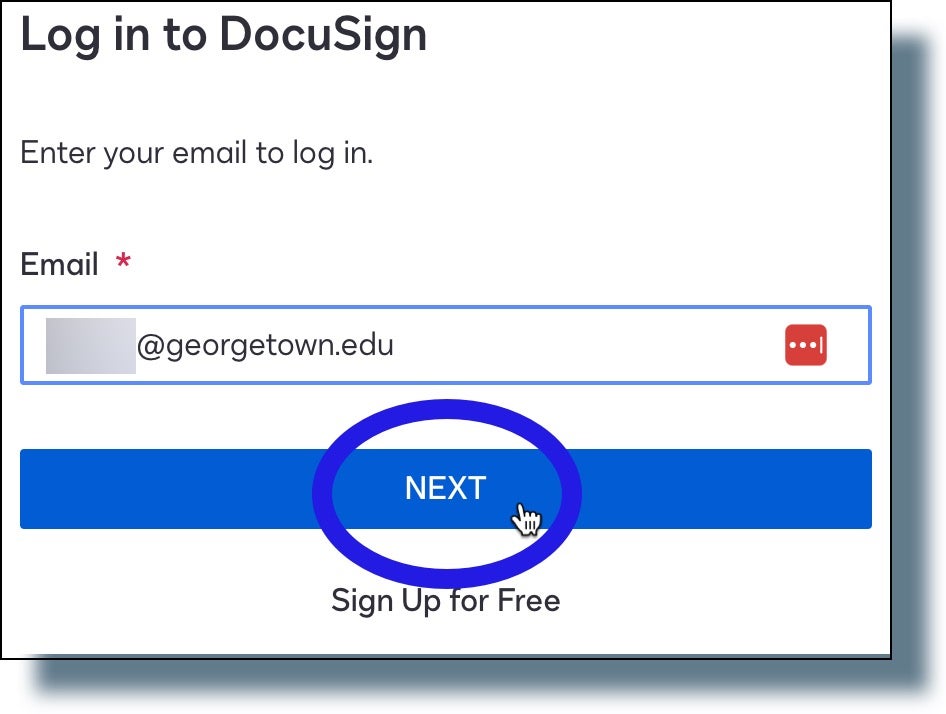
- Enter your NetID@georgetown.edu email address (do NOT use an email alias you may have claimed) and then click Next.
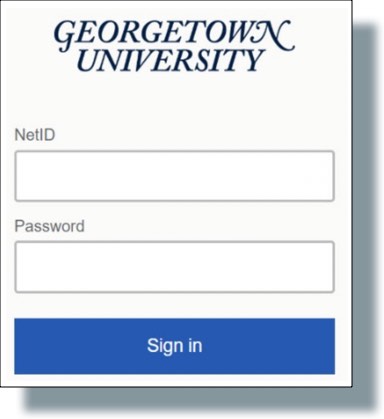
- At the Georgetown login prompt, enter your NetID and password, and then click Sign in. (IMPORTANT: Make sure to have your mobile device on hand to verify your identity in Duo.)
You should see the following screen displaying a six-digit verification code. (Note: The code has been greyed out for security purposes.)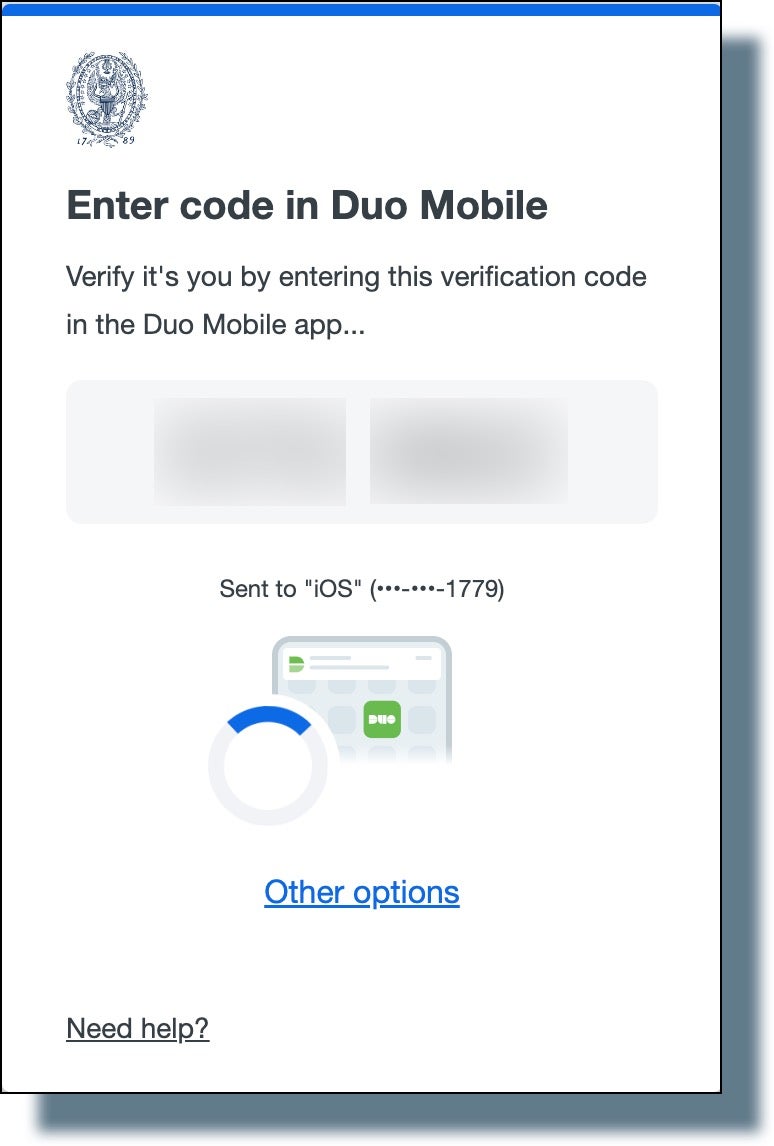
- Tap or swipe the Duo notification banner on your mobile device.

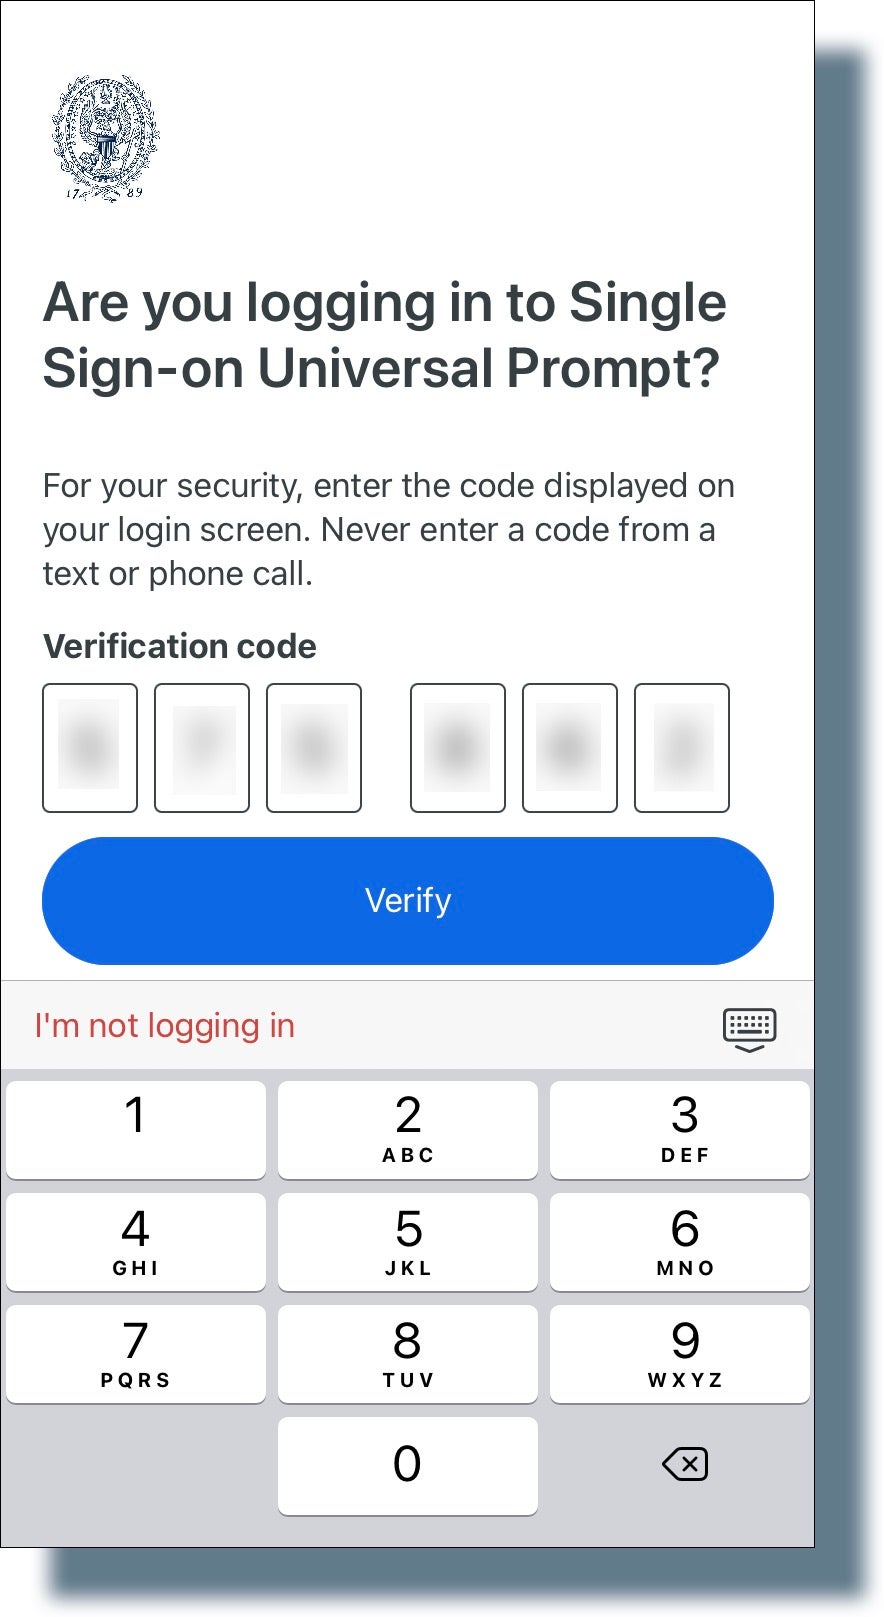
- From your mobile device, enter the six-digit verification code on the screen shown below and then tap Verify.
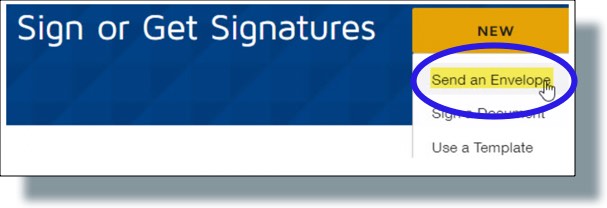
- Click on New, and choose Send an Envelope.
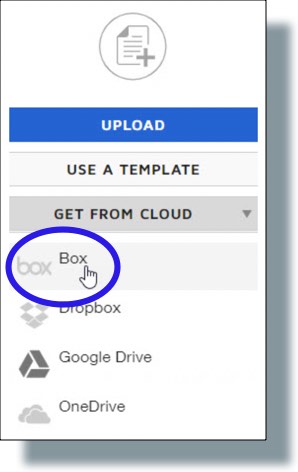
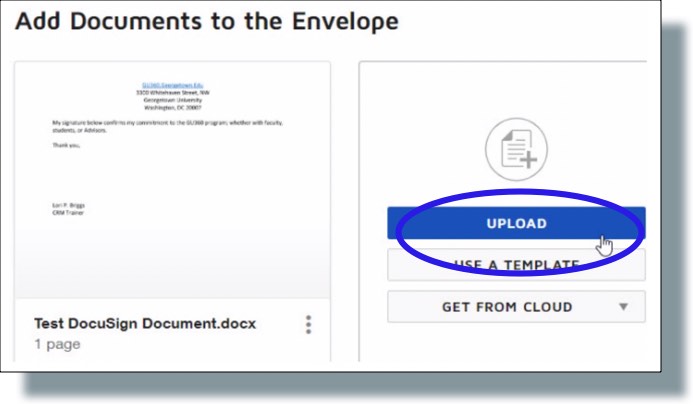
- To prepare the envelope, you have the option to Upload a document from your computer, Use a Template, or Get From Cloud (e.g., Box, Google Drive). In the example below, the option to upload from Box is selected. (Note: If you select a cloud service, you may be prompted to log in to access your documents. You may also be prompted to give Docusign permission to access your cloud account.)
- Continue to add documents as you need. As you add documents, you’ll see them listed, as shown below.
- Add recipients and, if you want, decide on the proper signing order. Enter the recipients’ names and email addresses, and then select from the drop-down menu what action you want them to take. (In the following example, Needs to Sign has been selected.)
To add additional recipients, click Add Recipient.
If you want to specify a signing order, click on the check box next to Set signing order, and then assign the order number for each recipient.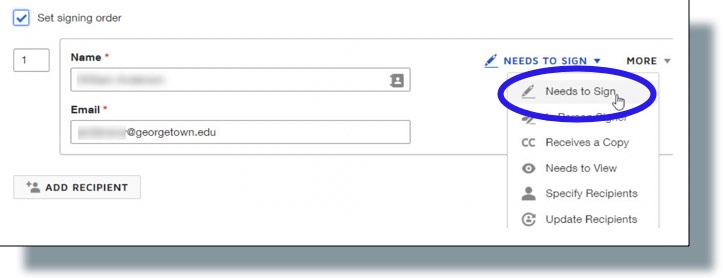
- Once you’ve added all of the desired recipients and chosen the order, click on Next.

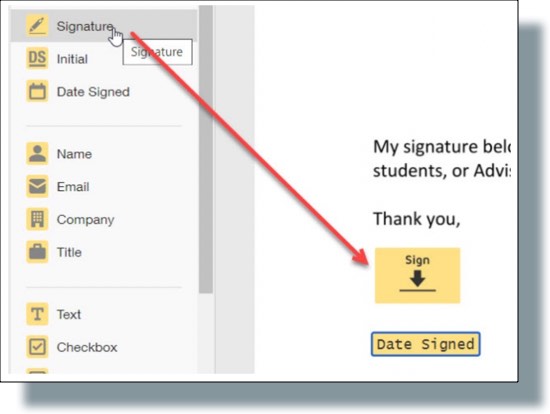
- You have the option to click and drag the items you want placed on your document. In the example below, the signature option and the date signed are being added.
- Click Send.

You will see a listing of those who received your document, as well as the status.
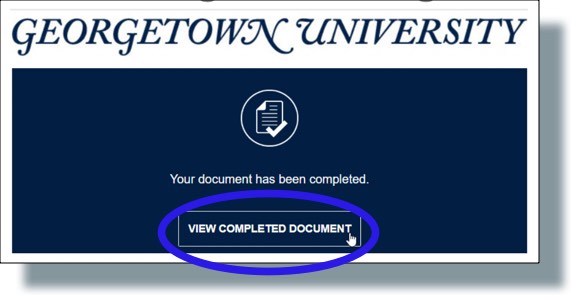
- You will receive an email that informs you that your document has been completed. Click on View Completed Document to see the signed document.
