
Working with the File Explorer in Windows 10
- The Parts of File Explorer
- File Explorer Parts Description
- Opening File Explorer
- Displaying Subfolders
- Accessing Your Files and Folders
- Using the Address Bar
- Viewing Folders at the Same Level as Your Current Folder
- Viewing Previously Visited Folders
- Viewing the Contents of a Folder
- Changing How Your Files and Folders are Displayed
- Adding a Column Heading
- Removing a Column Heading
- Creating a Folder
- Displaying Subfolders
- Searching for Files
- Creating a Shortcut to a Folder
The Parts of File Explorer
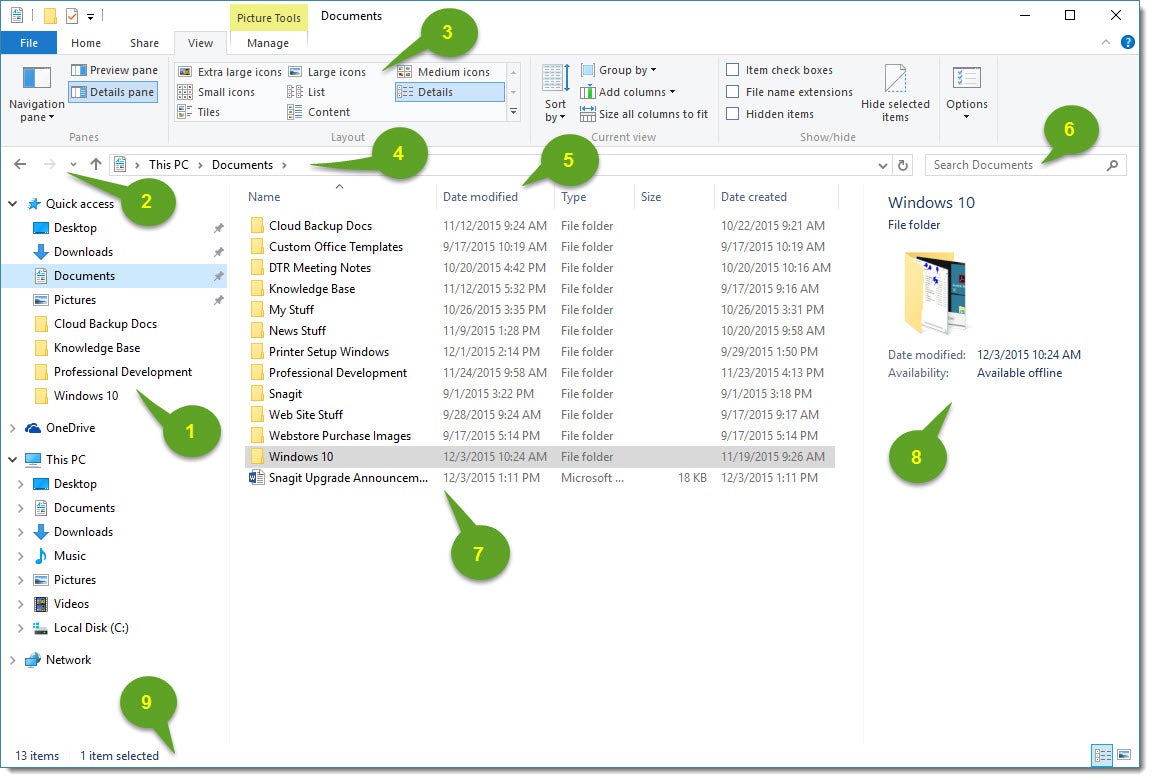
File Explorer Parts Description
| 1 | Navigation pane | From the Navigation pane, you can view your computer’s file and folder structure and access files and folders.
In the Navigation pane is the Quick access area; from the Quick access area, you can quickly and easily navigate to folders you use regularly. To add (“pin”) a folder to the Quick access area, right-click on the folder name and then select Pin to Quick access from the drop-down menu. |
| 2 | Forward and Back buttons | Enables you to go to folders you’ve already opened. If you go to a different folder, you can choose the Back button to return to the last folder you accessed. |
| 3 | Ribbon | Enables you to perform layout, formatting, and sharing tasks, as well as how File Explorer displays your files and folders.
Tasks available to you might differ depending on what folder you select (e.g., Documents vs Pictures). To display the Ribbon, click on one of the menu items at the top of File Explorer, or click on the Expand the Ribbon button (down-pointing arrow) located at the top right-hand side of File Explorer. |
| 4 | Address bar | Enables you to go to a different folder in the same Explorer window. (For more information, see Navigating the Address Bar.) |
| 5 | Column headings | Titles of each of the columns displayed in the file and folder list. You can choose which columns you want to display by adding a column heading or removing a column heading, as well as changing the order in which those columns are displayed. Click on a column heading to sort your files and folders by that column (e.g., date modified). |
| 6 | Search box | Allows you to search for subfolders, documents, images, programs, Web pages, and bookmarks in the current folder. |
| 7 | File and folder listing | Shows you the files and folders in the current folder (the folder you selected in the Navigation pane). |
| 8 | Preview/Details pane | Enables you to quickly preview an item, such as a photo, without having to open that item. To open the Preview pane (it isn’t open by default), click on the View menu at the top of File Explorer, then click on the Preview pane button located at the left-hand side of the Ribbon in the Navigation pane area. |
| 9 | Status bar | Displays information about a selected folder and its contents, such as the total number of items in the folder, the number of items selected and total file size. Contains buttons that enable you to quickly switch between thumbnail and detail views for the items displayed in the current folder. |
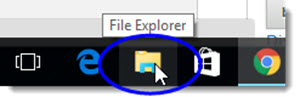
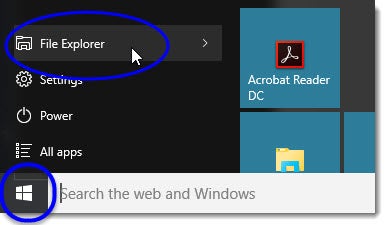
Opening File Explorer
To open File Explorer, click on the File Explorer icon located in the taskbar.
Alternatively, you can open File Explorer by clicking on the Start button and then clicking on File Explorer.
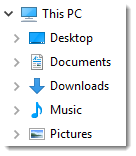
Displaying Subfolders
If you’ve used previous versions of Windows, you know that a folder name would have a plus sign next to it if that folder contains documents or subfolders.
With Windows 10, if a folder contains subfolders, that folder name will instead have a small right-pointing triangle next to it.
- No triangle next to a folder name (
 ) means the folder has no subfolders.
 - Right-pointing triangle next to a folder name (
 ) means that the folder has subfolders.
 - Down-pointing triangle next to a folder name (
 ) means that subfolders are currently displayed for that folder.
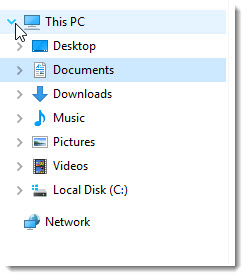
To view a folder’s subfolders, click on the right-pointing triangle next to the folder. The right-pointing triangle will turn into a down-pointing triangle, and the subfolders will be displayed, as shown below.
To hide a folder’s subfolders, click on the down-pointing triangle of that folder so that the subfolders will no longer be displayed. (For more information, see Displaying Subfolders.)
Accessing Your Files and Folders
There are number of ways you can naviagate to your files and folders in File Explorer:
- Using the Address bar (located at the top of File Explorer). The Address bar shows the full path of your current location.
- Forward and Backward buttons
- From the Folders pane
- Using the Search function (searches file names and file and folder contents in the current folder to find items containing your search term)
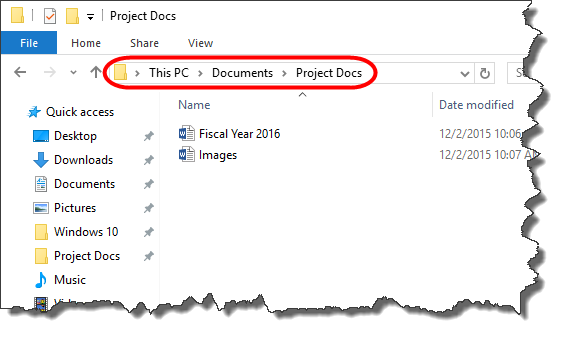
Using the Address Bar
The Address bar, which is located at the top of File Explorer as shown below, displays the path of the currently selected folder.
File Explorer drop-down menus are available for each subfolder in the Address bar. So you can easily go backward or forward in the folder path by clicking on the right-pointing arrow next to a folder and selecting a subfolder from the drop-down menu.
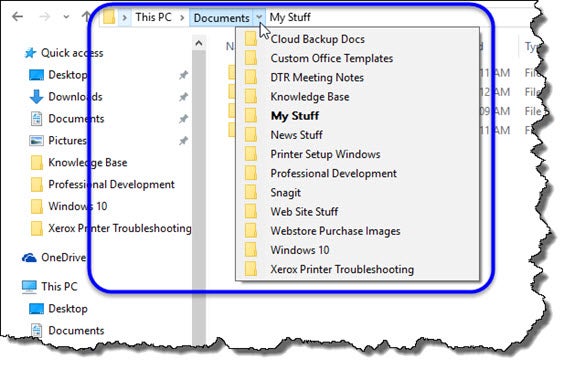
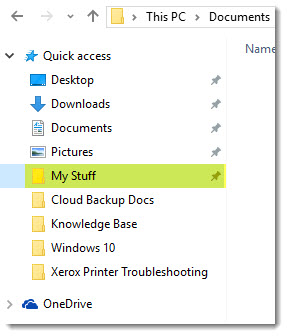
Viewing Folders at the Same Level as Your Current Folder
To view the folders at the same level as the current folder, click on the right-pointing arrow to the left of that folder listing in the Address bar. (The screen example below shows that clicking on the arrow next to Documents displays all the folders at the same level as My Stuff.)
Note: The current folder (in this example, the My Stuff folder) is shown in boldface type.
Viewing Previously Visited Folders in the Address Bar
To view folders you’ve been to previously, you can do any of the following:
Click on the Forward or Back buttons. (These buttons work just like the Forward and Back buttons on a Web browser.)
![]()
Click on a folder name in the Address bar.

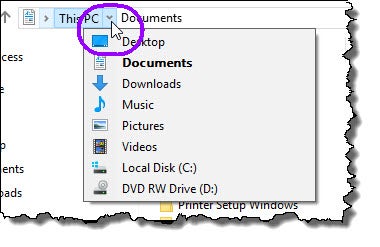
Viewing the Contents of a Folder in the Address Bar
Click on the right-pointing arrow next to the folder whose subfolders you want to view. The arrow changes to a downward-pointing arrow, and a drop-down list of the subfolders will be displayed.
Changing How Your Files and Folders are Displayed
You can change how your folder and file icons look, as well as display different information about them. Note: Changes you make will apply to the contents of the current folder only.
- Navigate to the folder whose display you want to change.
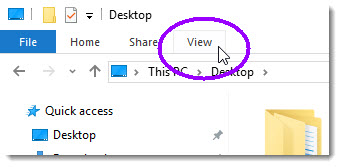
- Click on the View tab to display the Ribbon.
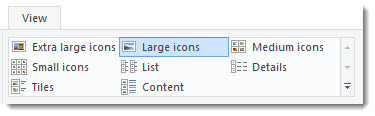
 In View, you’ll see the following available display options:
(Note: If some of your files or folders are hidden when the Ribbon is displayed, you can pin the Ribbon to File Explorer (keep it displayed, or expanded, in File Explorer even if you’re doing another task) by clicking on the up-pointing arrow on the top right-hand side of your File Explorer window; once you pin the Ribbon, you’ll be able to see those previously hiddent files or folders.)
- Move your mouse over each option to see a quick preview of that option in the area where your files and folders are displayed. To choose an option, just click on it. The following table lists and briefly describes each display option. (Note: To show more information about files and folders from display views that show little or no information (e.g., Large icons), you can open the Details Pane by clicking on the View menu, and then clicking on Details Pane. Click on an item to view the details of that item in the Details Pane.)
| File/Folder View | What is looks like | Description |
| Tiles | 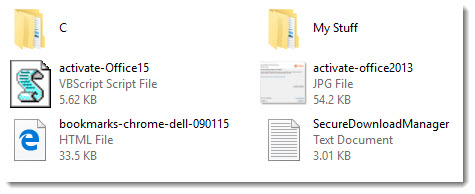 |
Shows icons of each item. Files also show file type and file size. |
| Details | 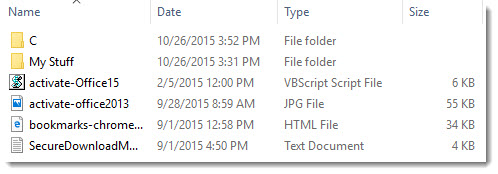 |
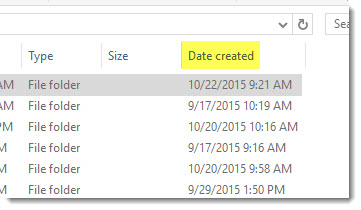
Lists and shows information about your files and folders. In this view, folders show date last modified; files also show file type, file size, and date created. |
| List | 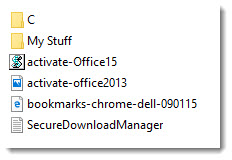 |
Shows you the file or folder name and its associated icon. |
| Small icons | 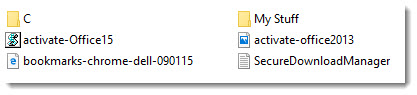 |
Virtually the same as the List view. |
| Medium icons | 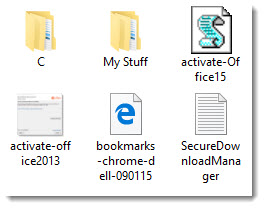 |
Virtually the same as the Tiles view, except that only the file or folder name is displayed. Windows displays a thumbnail of images. |
| Large icons | 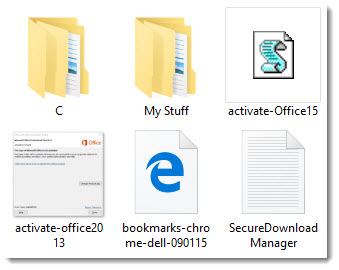 |
Shows a larger view of file and folder icons. Only the name of the file or folder is displayed. Windows displays a thumbnail of images. |
| Extra Large icons |  |
Shows the largest available view of file and folder icons. Only the name of the file or folder is displayed. Windows displays a thumbnail of images. |
| Content | 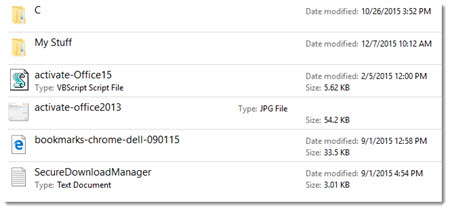 |
Displays a listing of files, folders, and program shortcuts and their associated icons. In this view, you’ll see an item’s last modified date and file size (if a file), and date taken if an image. |
Adding a Column Heading
You can add a column headings to display additional information about your files and folders. (Note: You can only do this in Details view.)
- Navigate to the folder for which you want to add a column heading.
- Right-click on any column heading.
- From the drop-down menu, click on the heading you want to add so that a check mark appears. (In the example below, the heading “Date created” is being selected.)
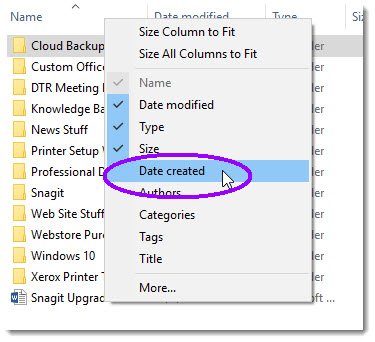
- The heading you added will be displayed.
- Repeat steps 2 and 3 until you’ve added all the desired column headings.
Removing a Column Heading
- Navigate to the folder for whom you want to remove column headings.
- Right-click on any column heading to display a drop-down menu of column headings; the headings that are currently displayed have check marks next them, as shown below.
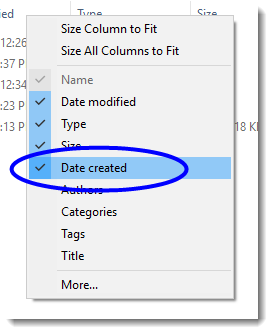
- Click on the column heading you want to remove so that the check mark no longer appears for that heading. The column heading will no longer be displayed for the current folder’s contents.
- Repeat steps 2 and 3 until you’ve removed all the desired column headings.
Creating a New Folder
- Navigate to the location where you want to add your folder.
- In File Explorer, click on the Home menu item.
- From the Home riibbon, click on the New folder button.
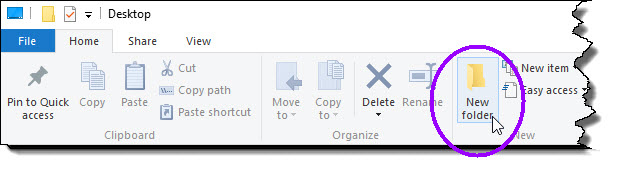
- Enter the name of your new folder.
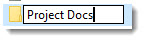
- After you enter the folder name, click anywhere outside the text area to complete creation of the folder name.
Displaying Subfolders
In File Explorer, you will see a right-pointing bracket ( > ) next to any folder that contains subfolders. Just move your mouse over a folder name to see if it contains the bracket.
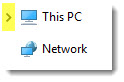
In the example above, “This PC” contains subfolders. To display the subfolders, just click on the folder name.
There are a number of ways to display a folder in File Explorer:
- Click on a folder if it’s listed in the Navigation pane
- Click on a folder in the Address bar to display its subfolders
- Double-click on a folder in the file and folder listing to display any subfolders
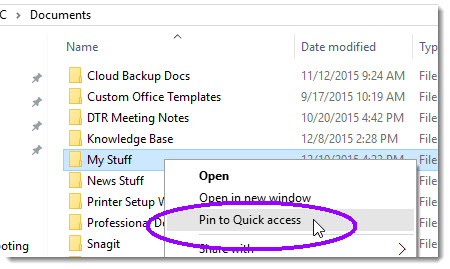
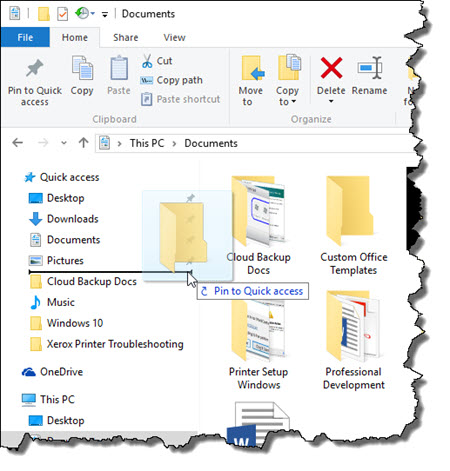
You can also add any folder to the Quick access area that you go to frequently by right-clicking on the folder and selecting Pin to Quick access from the drop-down menu.
You’ll now be able to open the folder at any time from the Quick access area:
Searching for Files
Windows 10 comes with a powerful search capability. Windows 10 will search all file types—documents, images, music, Web pages—as well as bookmarks and program shortcuts on your Desktop. Windows 10 will search file content, as well as file and folder names.
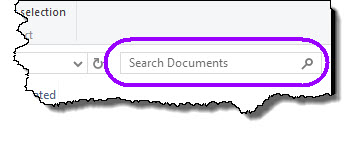
- Navigate to the folder where you want to search for items. You will see the Search box in the upper right-hand corner of the Windows Explorer window. (You should see a small magnifying glass icon on the right-hand side of the text area.)
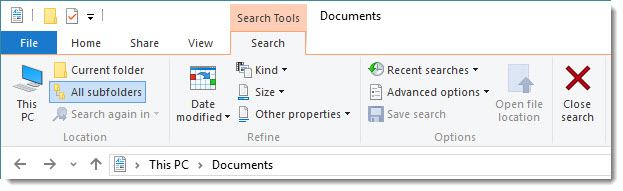
(Note: Windows 10 searches in your current folder. So, for example, if you’re looking for a file that you know exists somewhere in your Documents folder, you may want to conduct your search from the top level of the Documents folder [not from a subfolder in Documents] to have the best chance of finding that file.)When you click inside the Search text box, Windows displays a Search Tools ribbon (shown below), which provides numerous options you can select for your search.
- Type the desired search text in the Search box. Choose the desired search criteria from the Search Tools ribbon. (Some of the search criteria you select might be added to the Search text area; Windows updates the search results automatically as you enter search criteria.)As you type your search text, Windows automatically displays in the file and folder list area any iitems that match your search criteria. The Address bar will also display Search results in [current folder name]; in the example below, Search results in Documents is displayed in the Address bar. If not already displayed, expand the File Explorer window to also display file or folder location, text snippet for text documents, or dimensions for image files.
- If you’ve set up search criteria you want to retain for a future search, you can save that search by clicking Save search.
Creating a Shortcut to a Folder
You can add a folder in the Quick access area of the Navigation Pane as a shortcut, much like you might add a bookmark in a Web browser. Creating a shortcut enables you to quickly and easily get to any folder you use frequently.
- Open Windows Explorer.
- Navigate to the folder for which you want to create a shortcut.
- Drag the folder icon to the Favorite Links section, and then drop it in the position you want it to appear. (A horizontal line changes position as you move your mouse. The line indicates where your icon will appear.)
The folder will be displayed in the Quick access area, as shown in the example below.
