
Setting Up Your Adobe Acrobat Pro Enterprise Account
Note: If you don’t have any files in an old Adobe account (i.e., in Adobe cloud storage), skip the steps below, and click here to claim your Adobe Acrobat Pro account.
STEP 1. Download your Adobe files from your old Adobe account (e.g., Adobe VIP account).
IMPORTANT: You must download any files you’ve saved in an old Georgetown Adobe account (in Adobe cloud storage) to avoid losing those files.
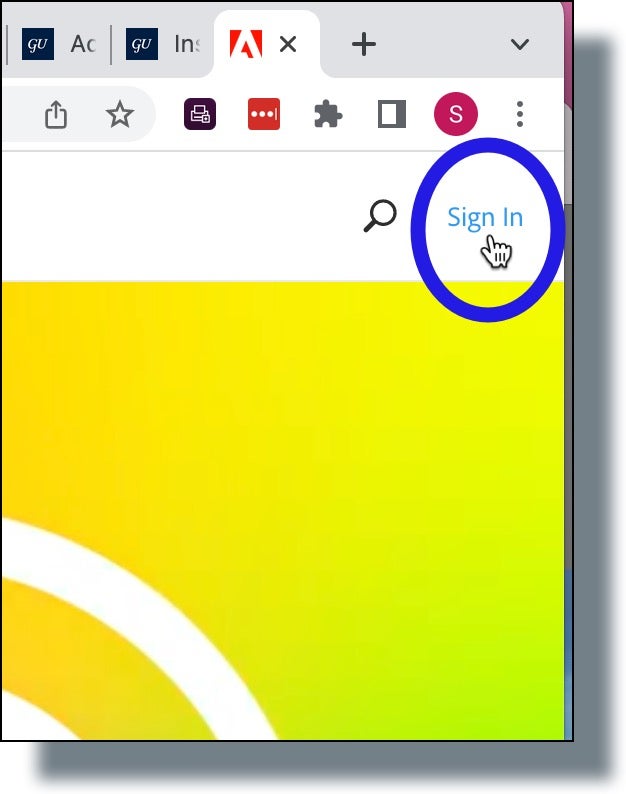
- Go to adobe.com, and then click Sign In.
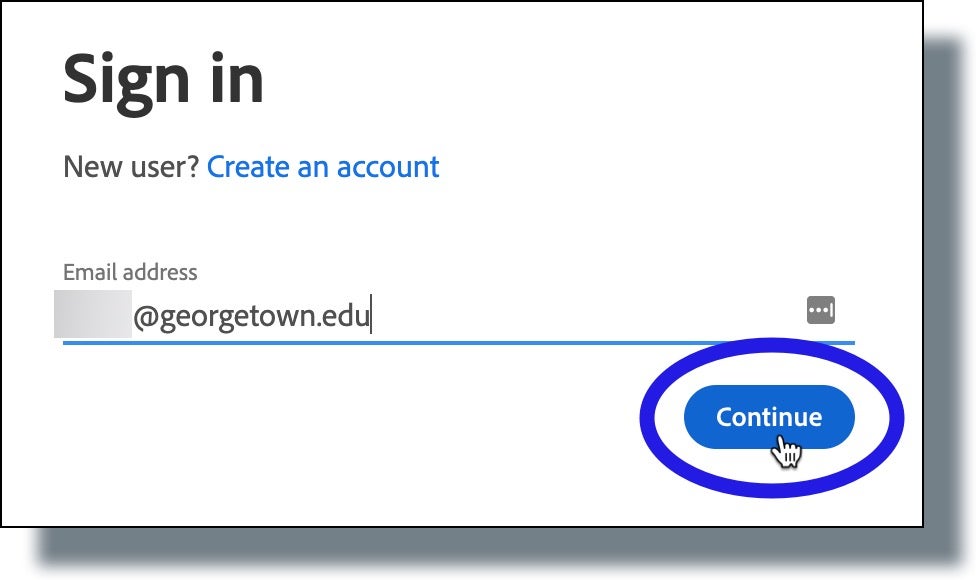
- In the Adobe sign in screen, enter your Georgetown email address, and then click Continue.
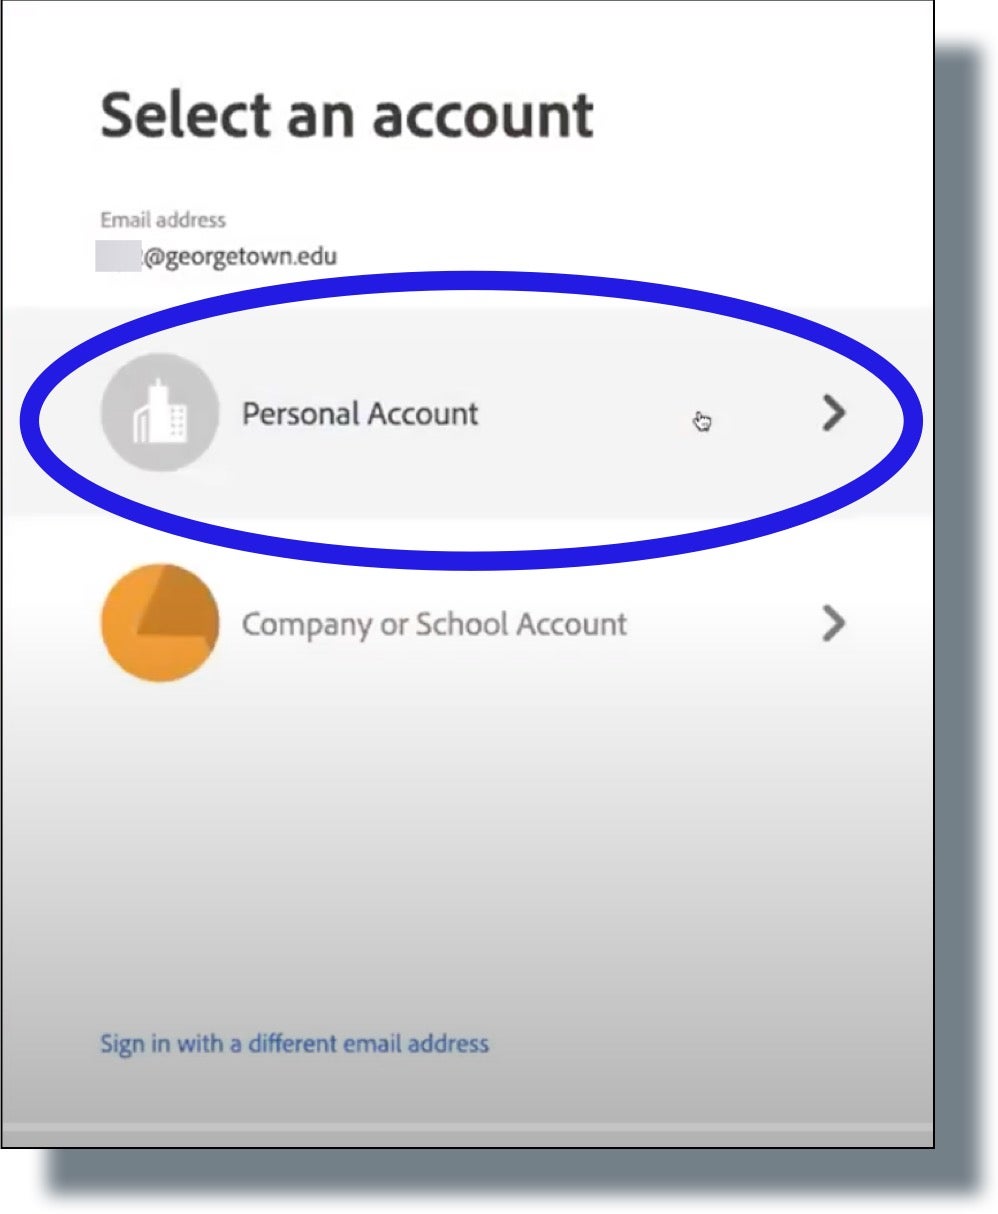
- In the next screen, select Personal Account. (Selecting this option will enable you to access your pre-existing Georgetown Adobe account.)
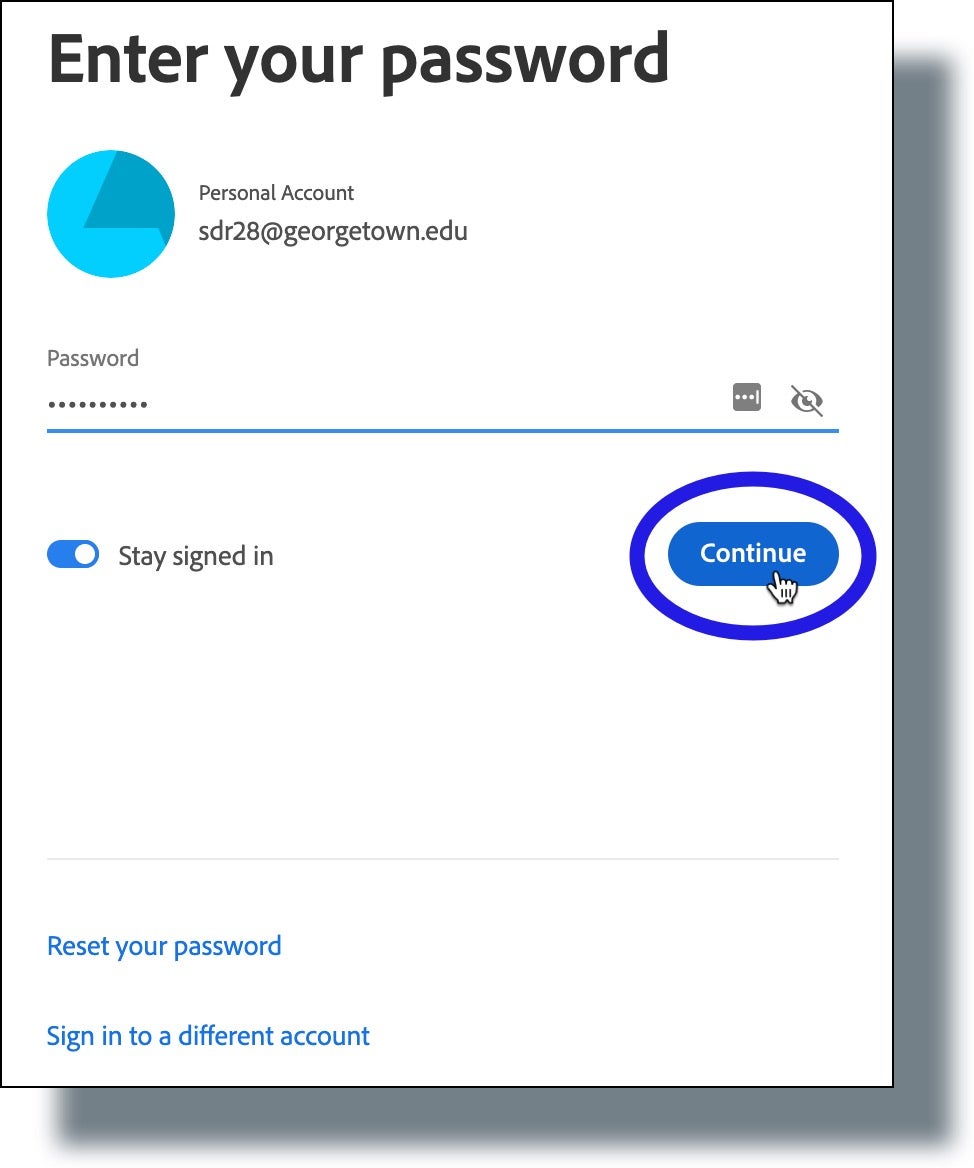
- In the next screen, enter your account password, and then click Continue.
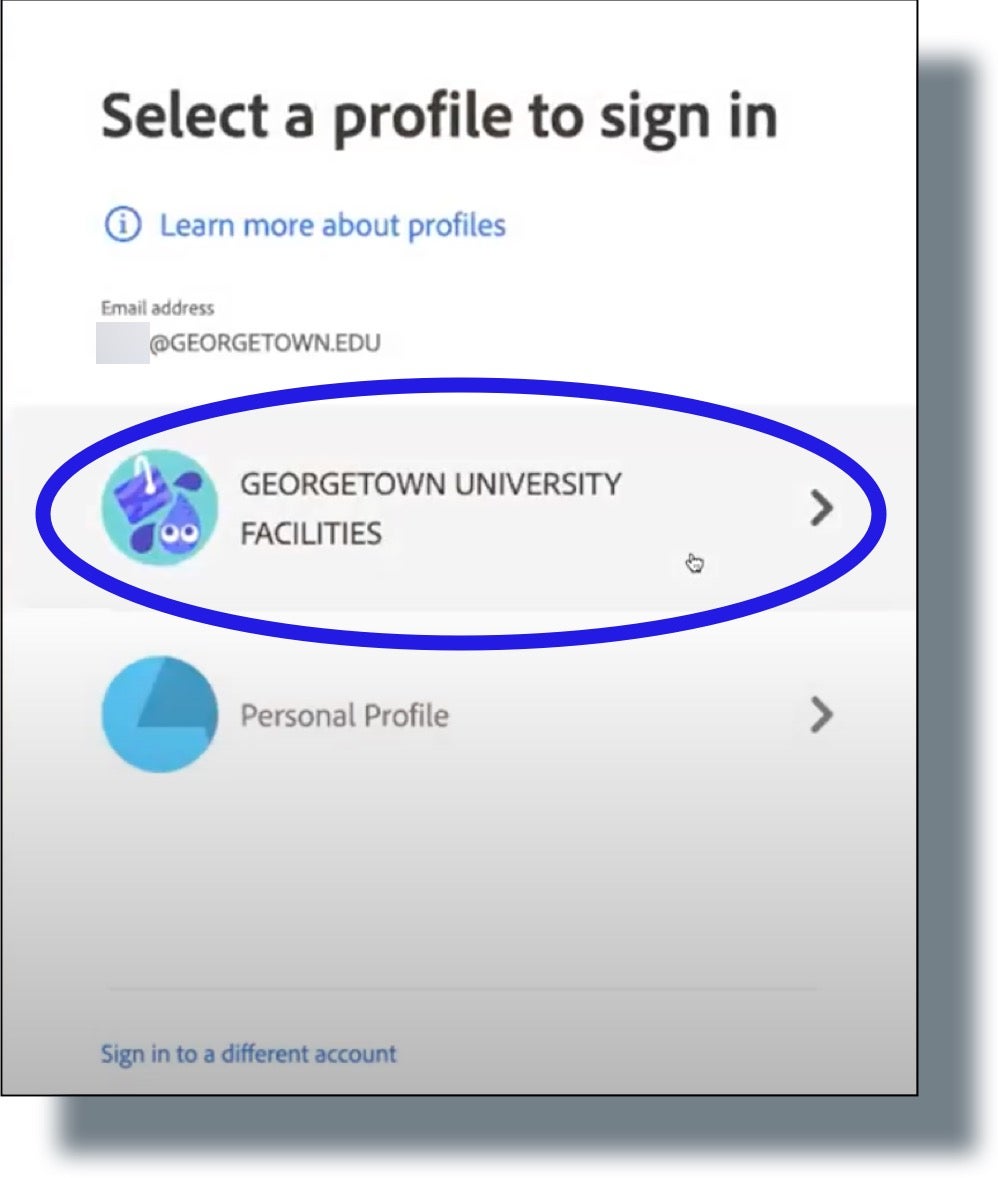
- In the next screen, select the Georgetown Adobe account associated with your department. (Note: In the example shown below, the department listed is “Georgetown University Facilities”.)
- From the Adobe home page, open Adobe Acrobat Pro.
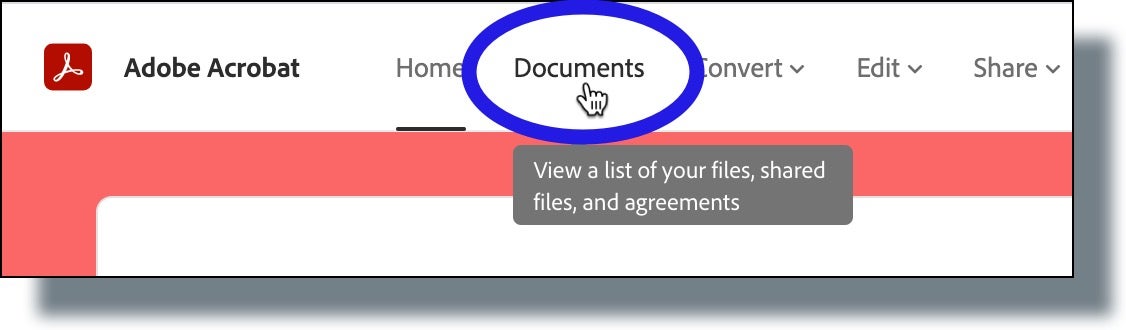
- Any documents you’ve saved to Adobe storage from within that application should be displayed. If you don’t see them listed, click Documents located in the menu at the top of the screen.
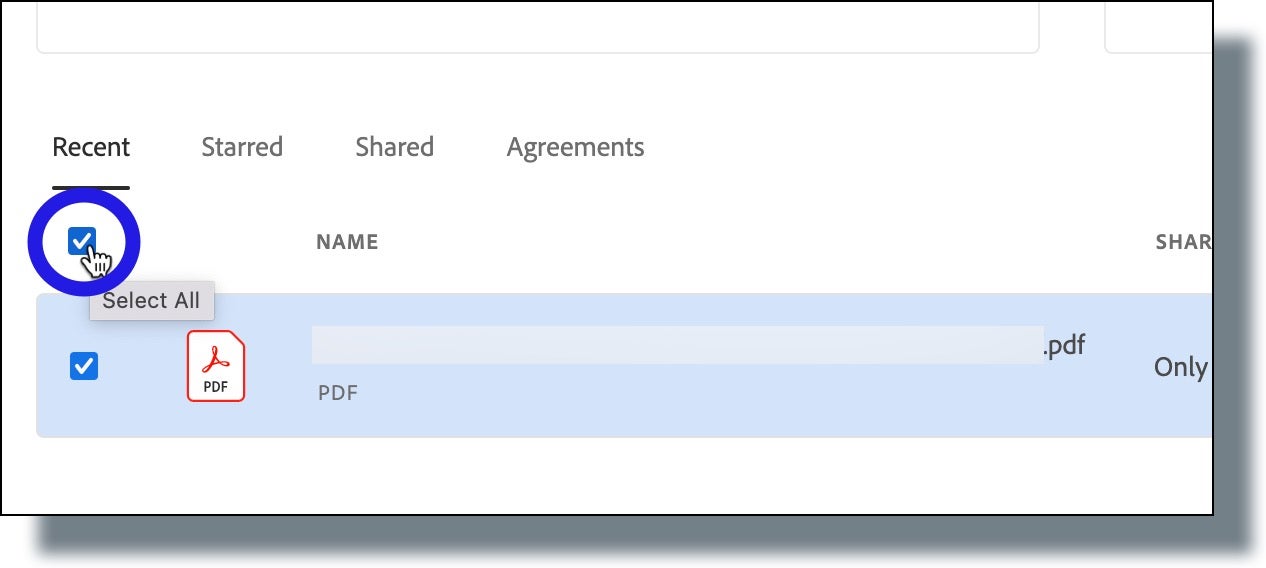
- Select the documents by clicking on the box next to that application, or click the box just above the document list to select all the documents.
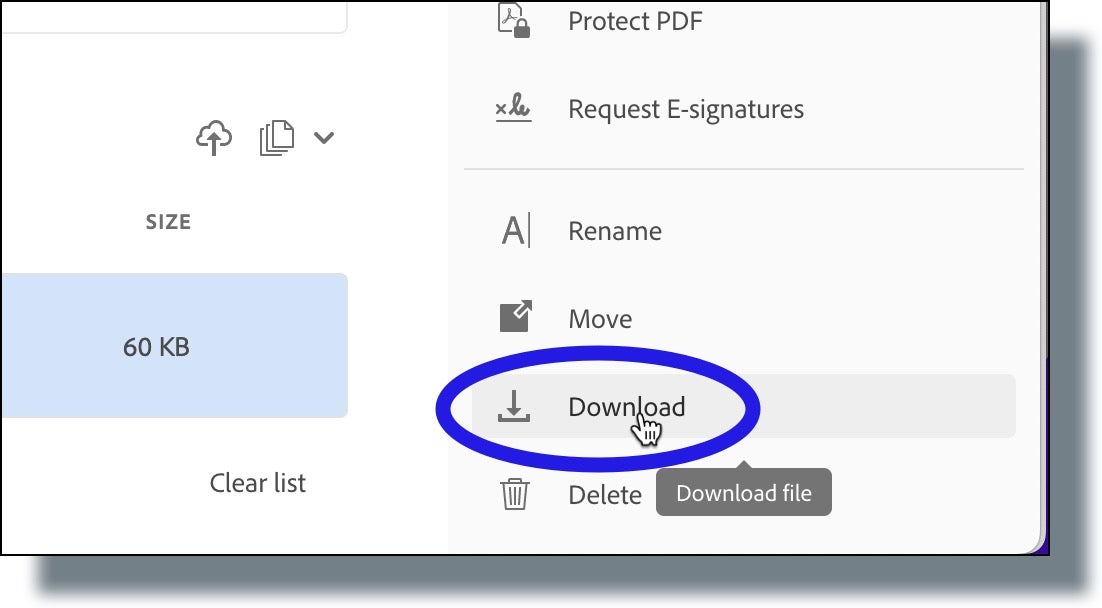
- Click Download from the menu on the right-hand side of the screen.
If you’re using an Apple computer, your documents will be saved to your Downloads folder, and if you’re using a Windows computer, your documents will be saved to your Desktop.
STEP 2. Claim your Adobe Acrobat Pro account.
STEP 3. Upload your Adobe files to your Adobe Acrobat Pro enterprise account.
- Log out of your old Adobe account, and then log in to your GU Adobe Acrobat Pro enterprise account. (Note: When logging in to your Adobe Acrobat Pro enterprise account, make sure to select Company or School Account.)
- Open Adobe Acrobat Pro.
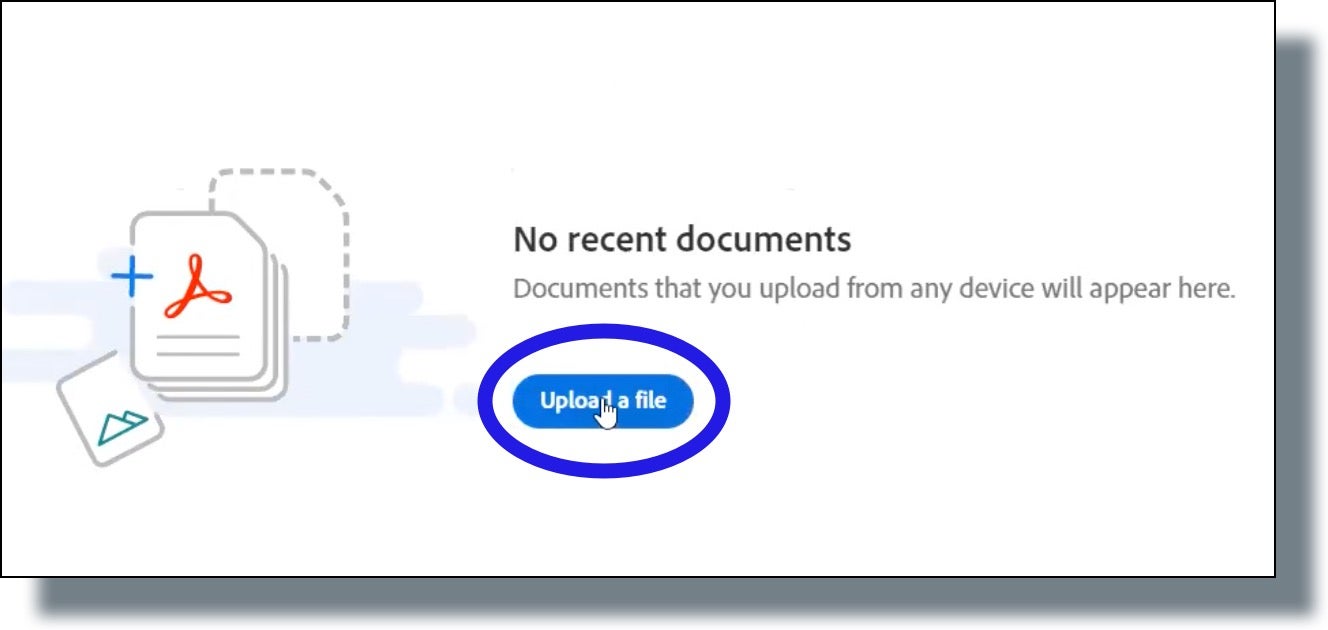
- In Acrobat, click Upload a file.
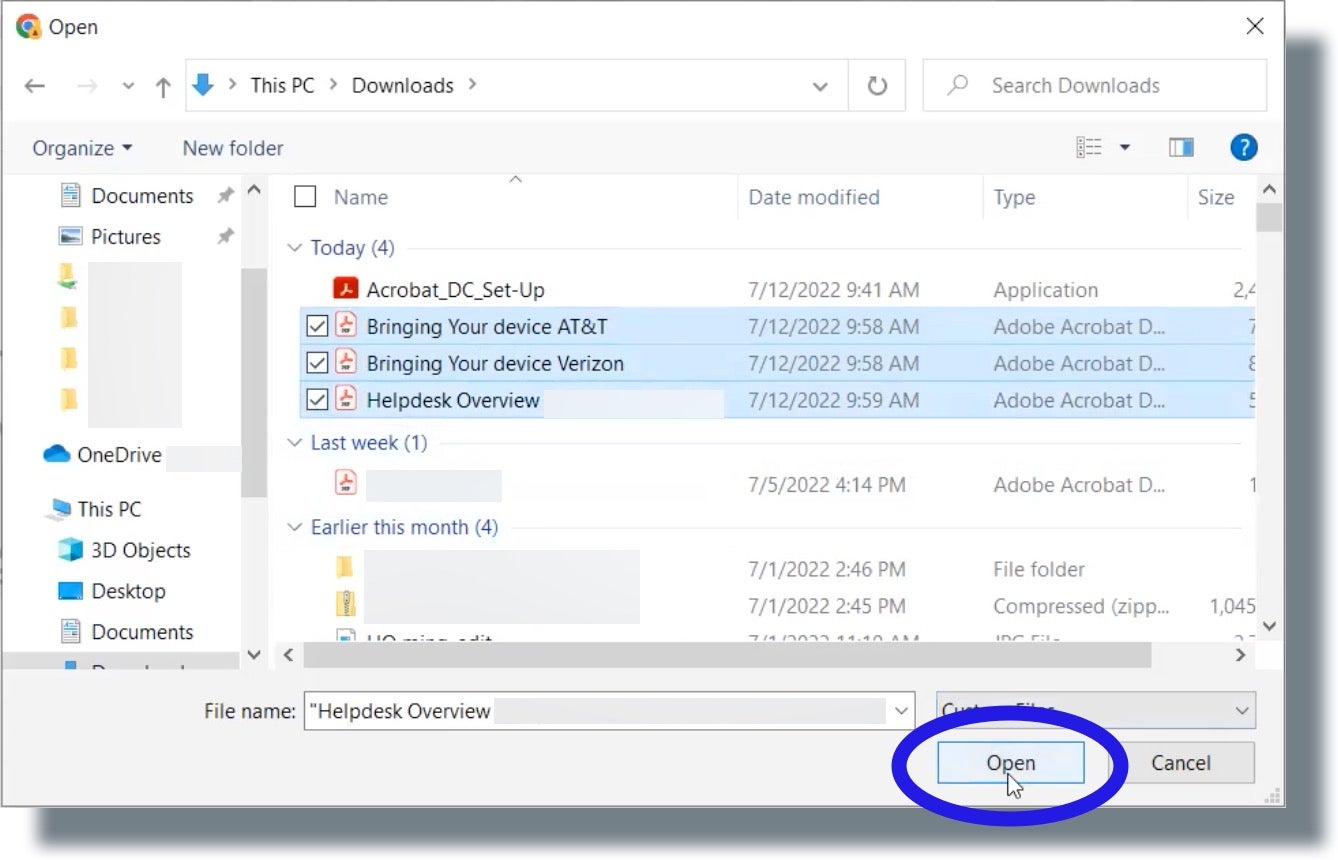
- From the Finder (Mac) or Windows Explorer (Windows), select the files you want to upload to your Acrobat account. (Note: You can select multiple files to upload from any given location.) Click Upload when you’re done. (In the example below, files are selected from Windows Explorer.)
Your files should appear in Acrobat, as shown in the example below.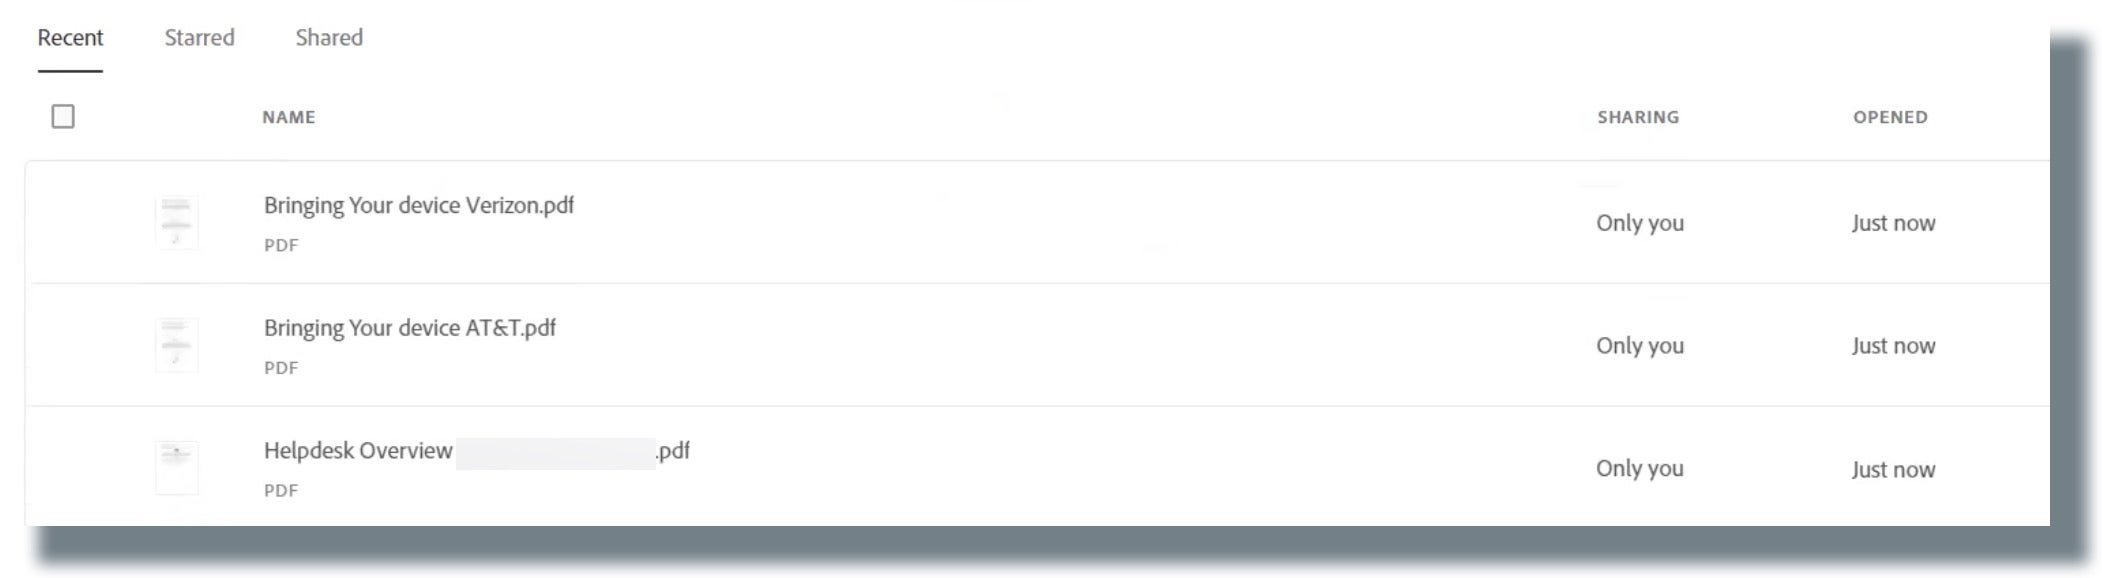
Note: If you installed Acrobat previously from your old Adobe account, then Acrobat should still be licensed.