
Calendar: Event Manager Guide
As an Event Manager, you are able to edit and create events and then publish them to the Georgetown websites that you have been approved to publish to. You are also able to request that your event is listed on the overall university calendar (see guidance for these types of events) See the list of departments and event managers to check your access. The calendar system is at events.georgetown.edu.
Logging In
To log in as an Event Manager, go to events.georgetown.edu. and navigate to the login link in the footer where you need to login with your Georgetown NetID.
Adding a New Event
Click on the ‘New’ Button in the header to open up the New event form.

At a minimum, every event requires a title and a date. For simple events like “Spring Break” or “Registration Week,” this may suffice. However, including additional details—such as images, times, and descriptions—can enhance your event’s appeal and visibility.
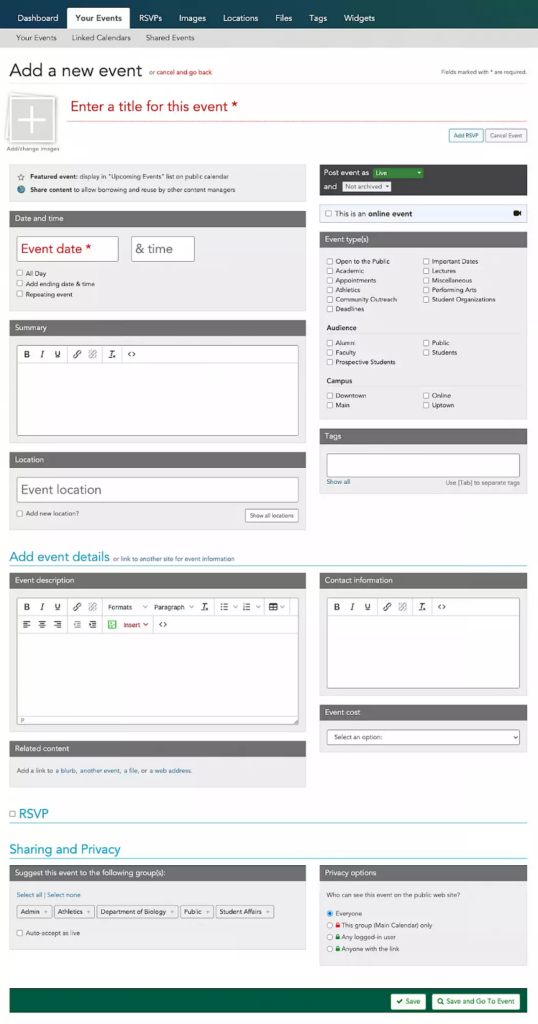
Event Status Options

- Live: The event is visible on the public calendar, in search results, and via API.
- Hidden: The event is not visible to the public, useful for drafts.
- Planned: Similar to Hidden but can be scheduled to automatically go Live at a future time.
How to add images:
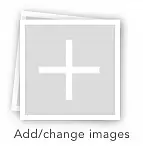
- Click the “+ Add/change images” button or drag-and-drop an image into the designated area.
- Use the cropping tool to create thumbnails.
- Optionally, upload multiple images to create a gallery view for your event.
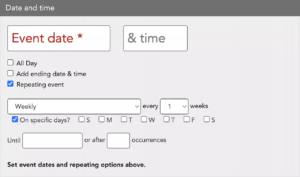
Dates and Times
- Include a start date (required) and optionally an end date/time.
- For all-day events, check the “All Day” box.
- Use the repeating options for recurring events, like weekly meetings or annual events.\
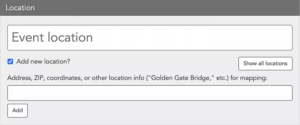
How to add a location:
- Start typing in the location field to select a saved location or create a new one.
RSVPs:
- Enable registrations with customizable limits and notifications.
- Set open/close dates for RSVPs.
Online Events:
- Mark events as “Online” and add a URL for joining (e.g., Zoom links).
- Specify “Online only” or “Hybrid” to enhance visibility in search engines
Privacy Settings
Choose who can see your event:
- Everyone (default): Publicly visible.
- Logged-in users only: Limit visibility to authenticated users.
- Direct link only: Accessible only via a specific URL.
Sharing Events
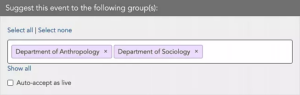
- Suggest your event to other groups by typing the group name in the suggestion field.
- Shared events can be approved and promoted by other groups, increasing visibility.
- If you manage more than one calendar, and suggest an event to that calendar, you will also have the ability to automatically accept the event from the form.
For additional details, please see LiveWhale’s extensive support documentation.