
Adding a Network Printer
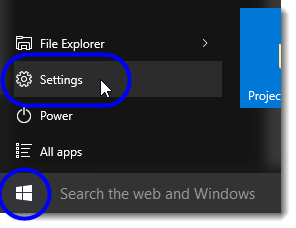
- Click on the Start button and then select Settings from the Start menu.
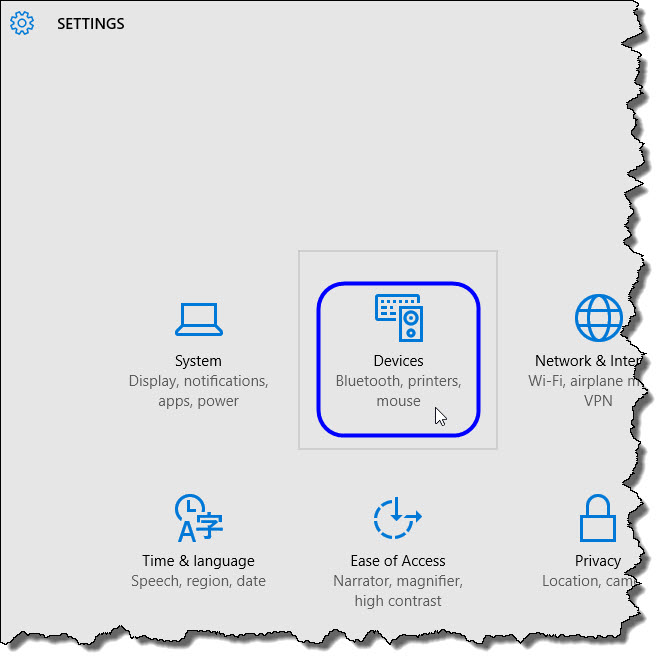
- In the Settings window, select Devices.
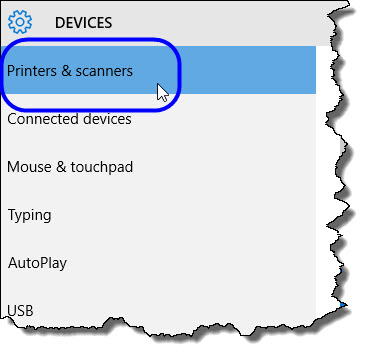
- In the Devices window, select Printers & scanners from the menu.
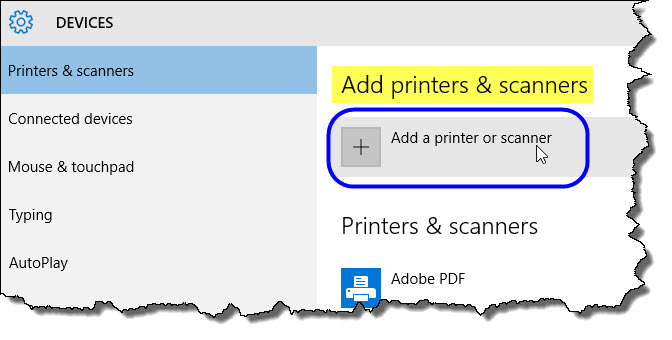
- In the Add printers & scanners area, click Add a printer or scanner.
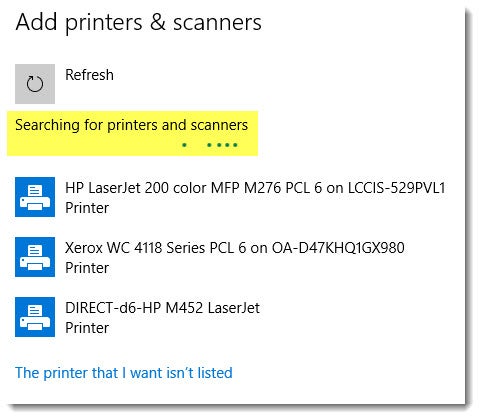
Windows searches for nearby printers.
- If you don’t see listed the printer you want to add, click on the link The printer that I want isn’t listed to add your printer manually.
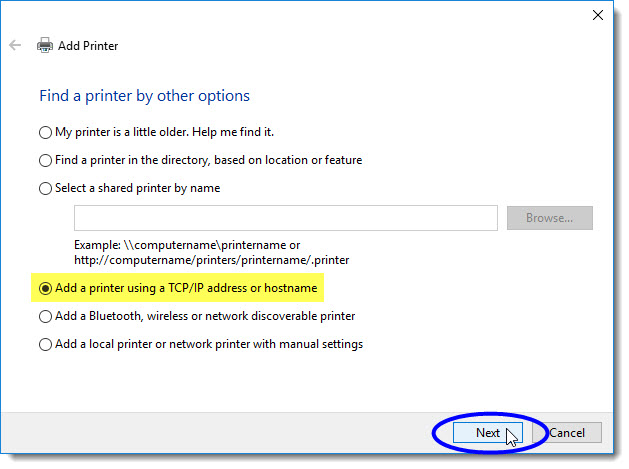
- Add a printer manually by performing the following:
- In the Add Printer window, select Add a printer using a TCP/IP address or hostname and then click Next. (Note: Your printer’s IP address should be available on the printer.)
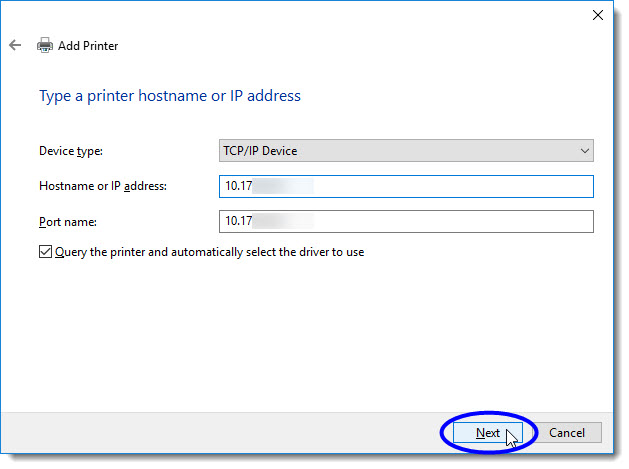
- In the next window, select TCP/IP Device from the Device type drop-down list, and then enter the printer’s IP address in the Hostname or IP address text box. (Note: Your printer’s IP address should be available on the printer.)
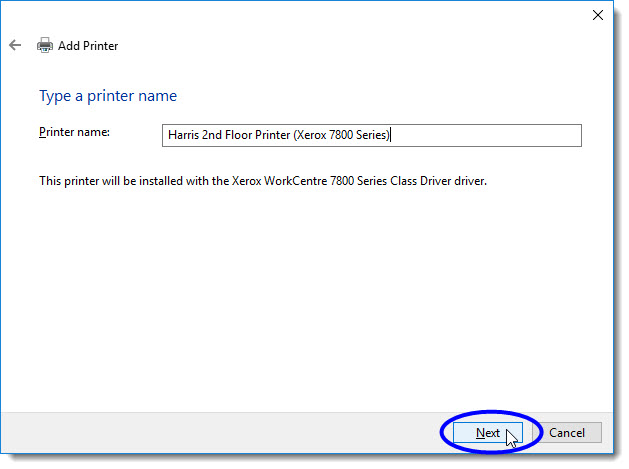
- In the next window, enter a descriptive name for your printer, or just use the default name, and then click Next.
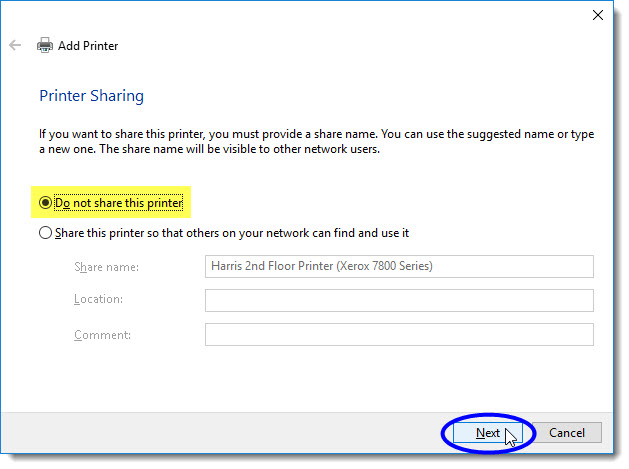
- In the next window, select the option Do not share this printer and then click Next.
- If the printer was added successfully, you should see the following confirmation message. Click Print a test page to confirm that you can print to the printer.
- In the Add Printer window, select Add a printer using a TCP/IP address or hostname and then click Next. (Note: Your printer’s IP address should be available on the printer.)