
Zoom Conferencing in Canvas
Faculty can use the Zoom Conferencing tool in their Canvas courses to schedule course meetings with students and hold online office hours. Students use the Zoom Conferencing tool to join meetings created by faculty. Each Zoom meeting at Georgetown can hold 300 people (including the host). If you anticipate more than 300 attendees please contact the GU Zoom team for assistance.
Which Meeting Option Should You Choose?
Details on the various Zoom meeting options in Canvas.
How to Create Zoom Meetings in Canvas
Jump right to the guides for step-by-step instructions.
After You Create a Zoom Meeting in Canvas
Learn how to start your meeting as the host, invite guest speakers who are not enrolled in your Canvas course and/or who are external to Georgetown; and can edit/change the meeting details or delete the meeting altogether.
How to Join Zoom Meetings in Canvas
Learn how to join an Instant, Scheduled or Office Hours meeting using the Zoom Conferencing tool in Canvas.
Troubleshooting and Support
If you need help with Zoom Conferencing in Canvas.
Which Meeting Option Should You Choose?
How to Create Zoom Meetings in Canvas:
Create an Instant Meeting
- Sign in to Zoom before creating and starting the meeting.
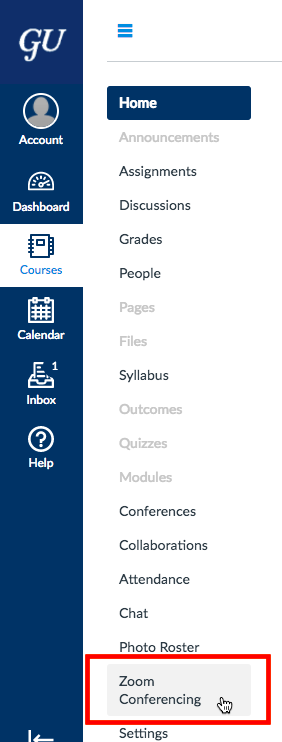
- Log in to Canvas and access the course site where you want to create a Zoom meeting. Click the Zoom Conferencing button on the course menu.
- Note: If you get a “Detected Cookies Not Supported” message, please see our help page on how to fix errors caused by third-party cookie settings.
- Click the Create Meeting (1-Click) button.
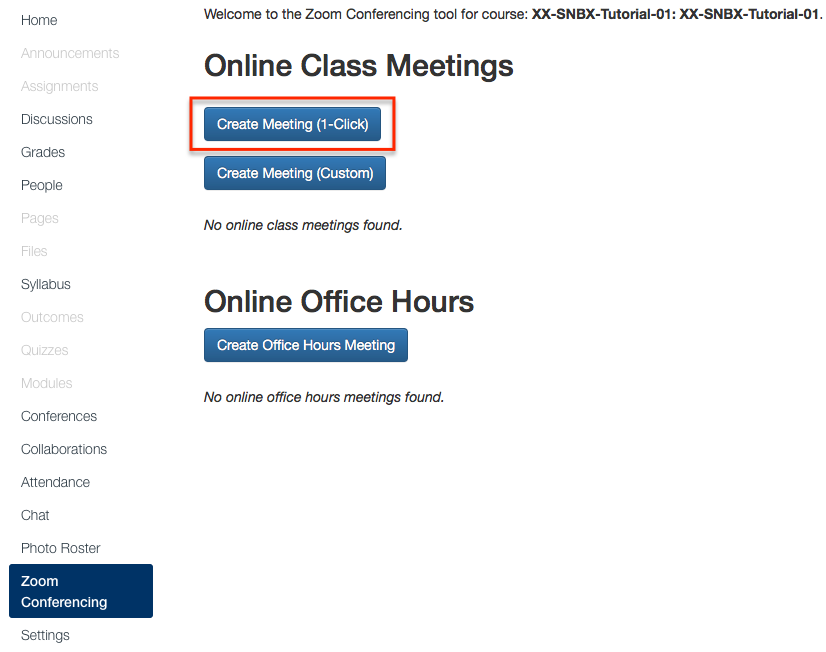
- A Zoom meeting link will be created and displayed on the page, and an announcement with instructions on how to join the meeting will be sent automatically to all users enrolled in the course.
After You Create a Zoom Meeting in Canvas, learn how to guest speakers who are not enrolled in your Canvas course and/or who are external to Georgetown; and how to edit/change the meeting details or delete the meeting altogether.
Learn how to join an Instant Meeting.
Create a Scheduled Meeting
- Sign in to Zoom before creating and starting the meeting.
- Login to Canvas and access the course site where you want to schedule a Zoom meeting. Click the Zoom Conferencing button on the course menu.
- Note: If you get a “Detected Cookies Not Supported” message, please see our help page on how to fix errors caused by third-party cookie settings.
- Click on the Create Meeting (Custom) button.
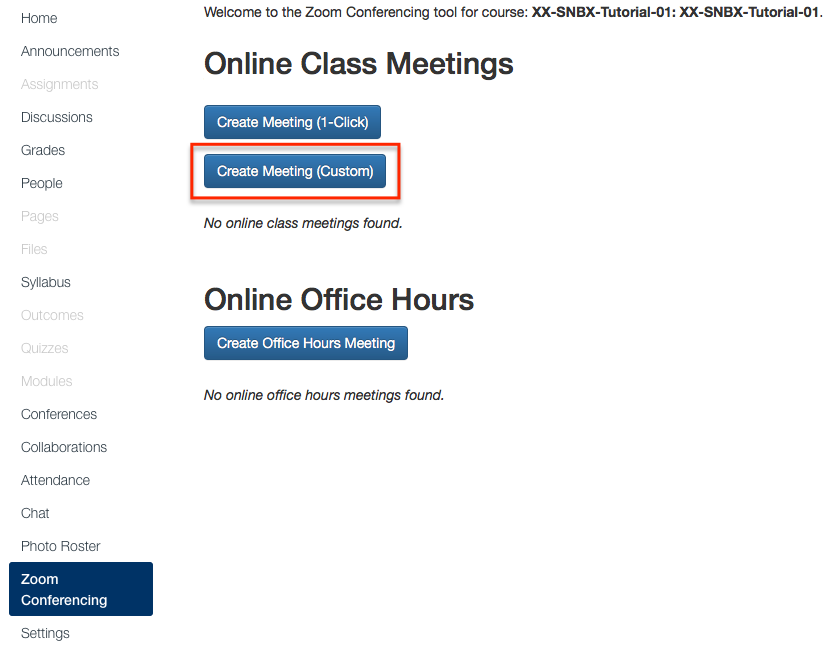
- Customize the specifics of your scheduled meeting:
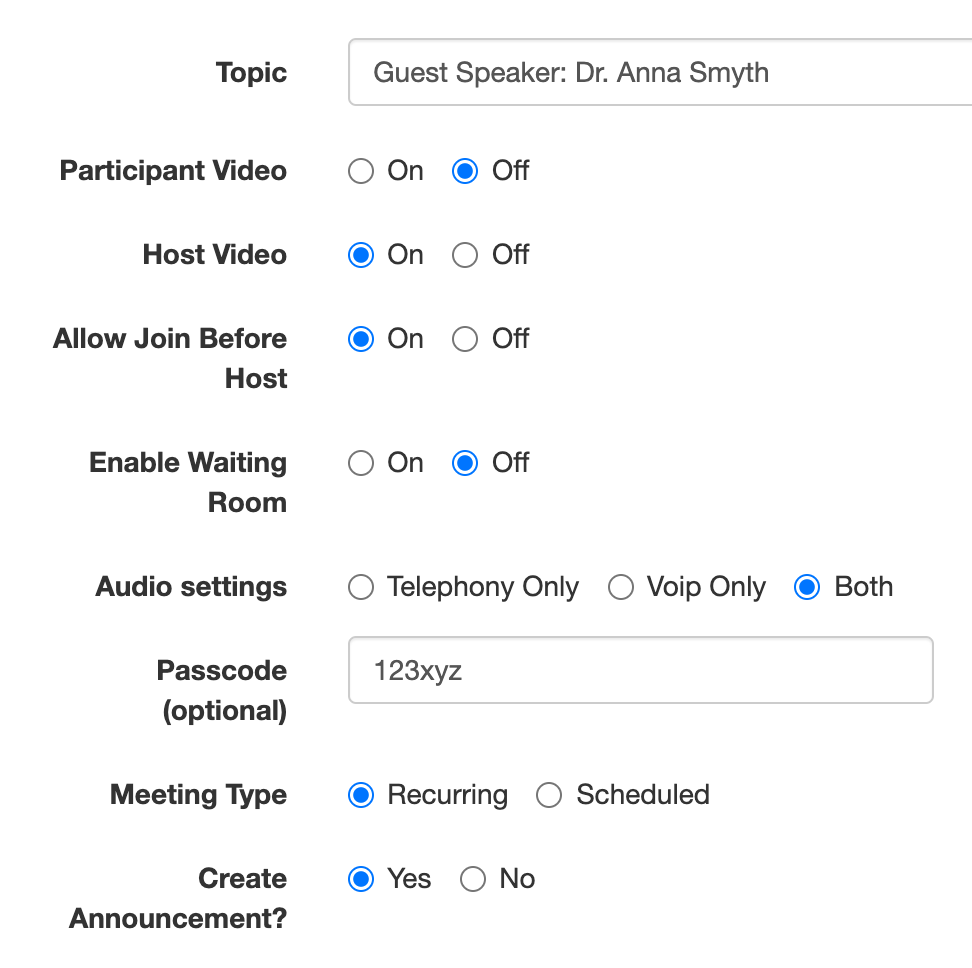
- Topic: By default, the meeting name will match the course ID. You can change it by entering a new meeting name.
- Participant Video: Turn On or Off (off by default). This will turn on each participant’s video (if applicable) upon joining the meeting.
- Host Video: Turn On or Off (on by default). This will turn on the host video (if applicable) upon joining the meeting.
- Allow Join Before Host: Turn On or Off (on by default). This will allow participants to join the meeting before the host arrives (NOTE: enabling the Waiting Room will prevent participants from joining the meeting without action from the host).
- Enable Waiting Room: Turn On or Off (off by default). When enabled, the host (and anyone assigned as a co-host) receives a notification during the meeting when someone arrives and will need to click the “admit” button to allow the participant(s) in from the waiting room in order for them to join the meeting. (NOTE: when enabling the Waiting Room, the ability for participants to join before host will not be permitted).
- Audio Options: Telephony Only, VoIP Only, Both (Both is selected by default and recommended).
- Passcode: By default, a passcode is automatically generated and set for this meeting type. You can edit or remove the passcode if you’d like. (NOTE: removing a passcode will automatically enable a Waiting Room upon launching the meeting).
Teachers and students who click on the meeting link in Canvas won’t actually have to enter the passcode. However, those participants who attempt to join the meeting without the passcode protected link in Canvas will be asked to use a passcode in order to join. - Meeting Type: The default ‘Meeting Type’ is set to “Recurring.” This allows you to use the meeting right away, and throughout the semester over and over again.
- Use the ‘Scheduled’ option to create a meeting for a specific day/time and duration. Scheduled meetings will be available to use right away, and will last 30 days past the scheduled date/time.

- Start Date and Time: Click on the date/time field to edit, or click on the Calendar icon.
- To set the date, click the arrows at the top of the calendar to select the month, and then click on the day to select the day of your scheduled Zoom meeting.
- To set the time of the meeting, click on the small Clock icon on the calendar. Once the time-picker is revealed, use the up-and-down arrows and AM/PM button to adjust the start time.
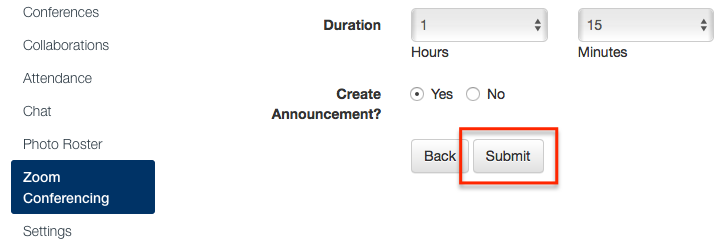
- Then set the Duration of the meeting.
- Use the ‘Scheduled’ option to create a meeting for a specific day/time and duration. Scheduled meetings will be available to use right away, and will last 30 days past the scheduled date/time.
- Create Announcement?: Canvas can automatically send an Announcement to everyone in the course with a link to the Zoom Conferencing page in Canvas. You can toggle this on or off.
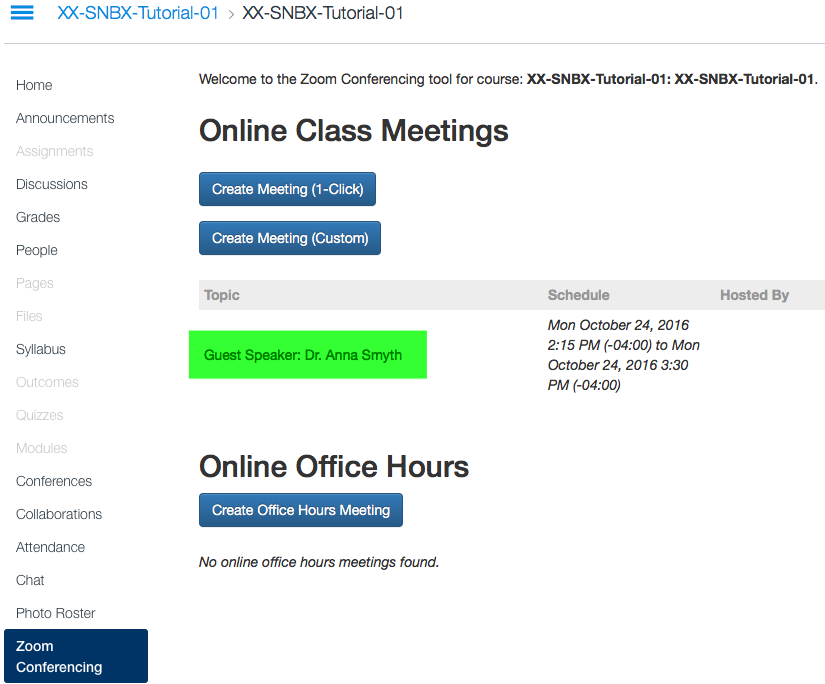
- Click on the Submit button to create your Zoom meeting.
- A link to your Zoom Meeting will appear under the topic section of the Zoom Conferencing page (e.g. Guest Speaker: Dr. Anna Smyth).
After You Create a Zoom Meeting in Canvas, learn how to guest speakers who are not enrolled in your Canvas course and/or who are external to Georgetown; and how to edit/change the meeting details or delete the meeting altogether.
Learn how to join a Scheduled Meeting.
Create Online Office Hours
- Sign in to Zoom before starting your online office hours to ensure you are the host of the meeting.
- Log in to Canvas and access the course site where you want to create online Zoom office hours. Click the Zoom Conferencing button on the course menu.
- Note: If you get a “Detected Cookies Not Supported” message, please see our help page on how to fix errors caused by third-party cookie settings.
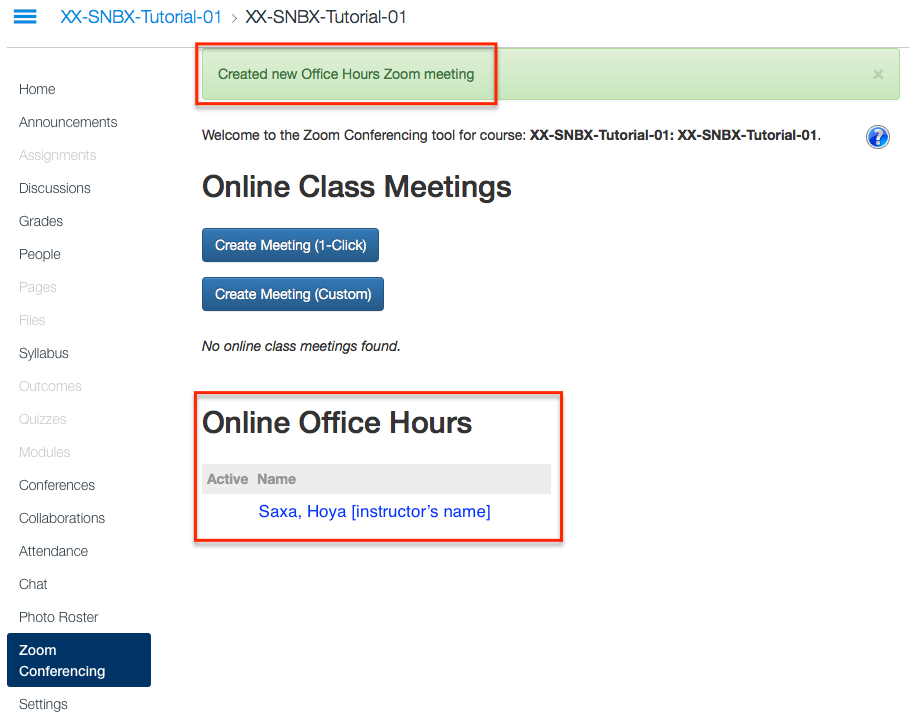
- Click on the Create Office Hours Meeting button.
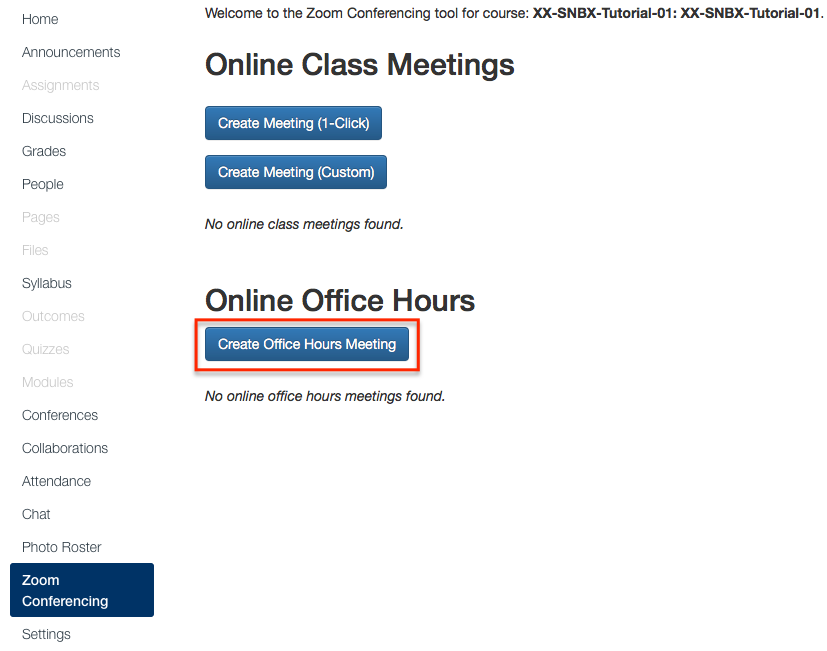
- You will receive a confirmation message “Created new Office Hours Zoom meeting,” and a meeting link with your “last name, first name” will appear below the “Online Office Hours” heading.
Learn how to join Office Hours meeting.
After You Create a Zoom Meeting in Canvas:
How do I start the meeting?
Faculty: Before clicking the Zoom meeting link in your Canvas course follow our guide to sign in to the Zoom App. This will ensure you are recognized as the meeting host and will allow you to record the meeting if necessary. Then see our guide on how to Join Zoom Meetings in Canvas below.
Students: See our guide on how to Join Zoom Meetings in Canvas guide below.
How do I Invite People?
It is not necessary to send meeting invites to students in order for them to join. Anyone enrolled in your course can click the ‘Zoom Conferencing’ button on the course menu and then click the meeting name/topic to join.
Guests Speakers: To invite guests speakers who are not enrolled in your Canvas course or not associated with Georgetown:
- Login to Canvas and go to the course where you’ve scheduled the meeting.
- Click on the Zoom Conferencing tool.
- Mouse over the meeting name/topic and click the “down arrow” that appears.
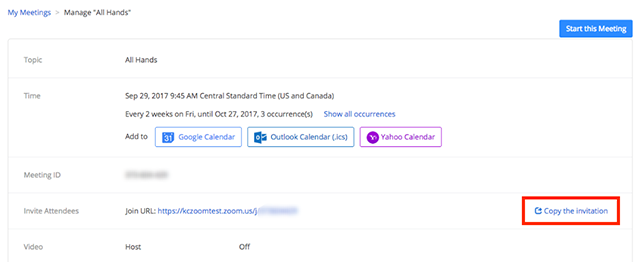
- Click ‘Open in Zoom Site’.
- Locate the “Join URL”‘ on the page and either manually copy/paste the meeting link in an email to your guest; or click the ‘Copy Invitation’ and then paste it in an email to your guest.
Editing your Course Meeting:
Meeting hosts can Edit the meeting details (e.g. change meeting title, passcode, etc.), or Delete the meeting altogether, or Open In Zoom Site to access the GU Zoom website to edit/change advanced meeting details (e.g. auto record). To do this, mouse over the meeting name and click the down arrow that appears.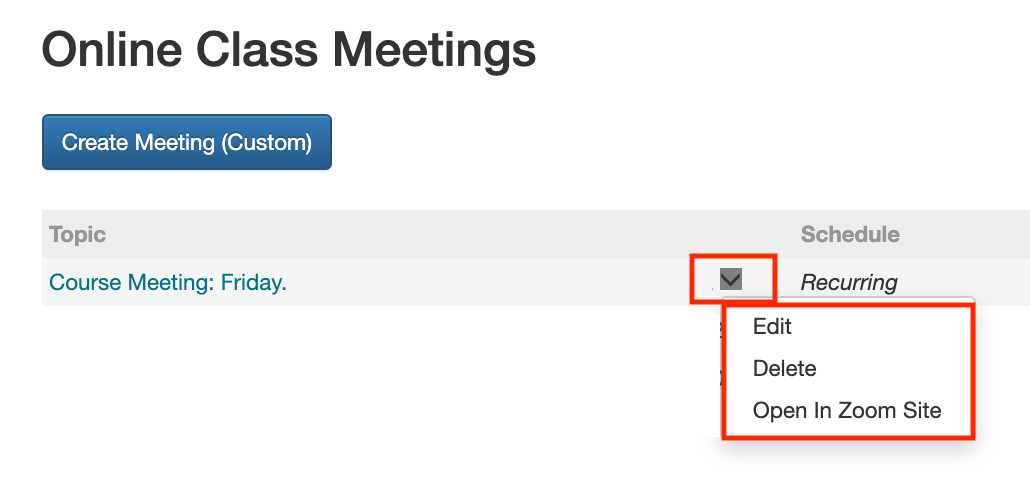
WARNING: When you select the option to Open In Zoom Site do not remove the course SIS ID (e.g. ENGL-101-01.Spring2023) in the meeting topic name. This will break the connect between Zoom and Canvas, and will result in the meeting disappearing from the Zoom Conferencing tool in Canvas.
How to Join Zoom Meetings in Canvas
Join Instant and Scheduled Meetings
- Sign in to Zoom.
- Click on the Zoom Conferencing tool in your Canvas course.
- To join a meeting, both faculty and students click the blue meeting link (e.g “Course Meeting:” as shown in the image below).
(Note: A meeting passcode is automatically generated for the “Instant Meeting” meeting type, but faculty and students who click on the meeting link in Canvas won’t actually have to enter the passcode. Those who attempt to access the meeting without clicking on the meeting link in Canvas will be asked to enter the passcode).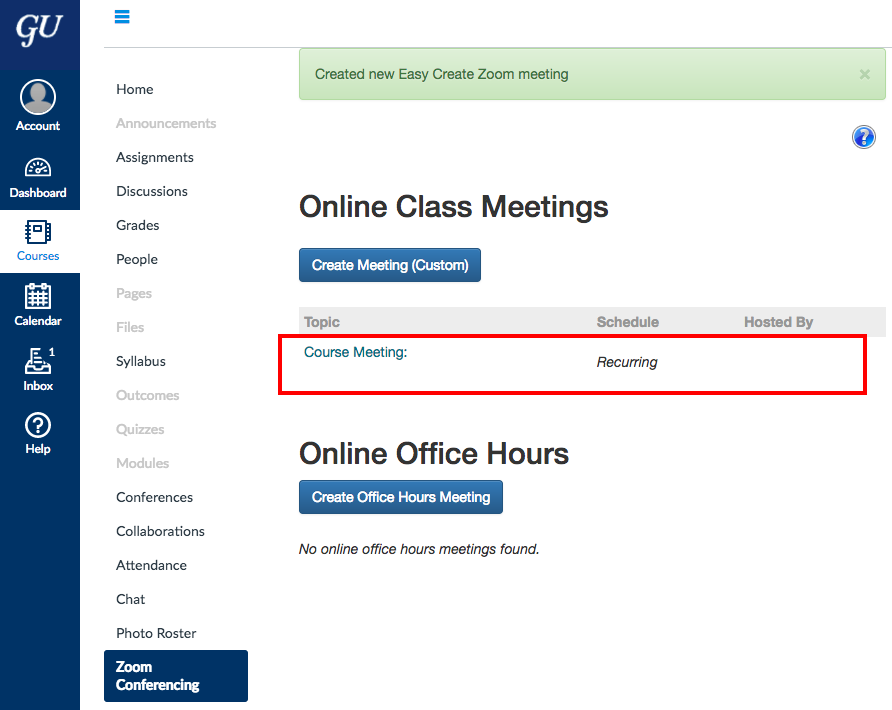
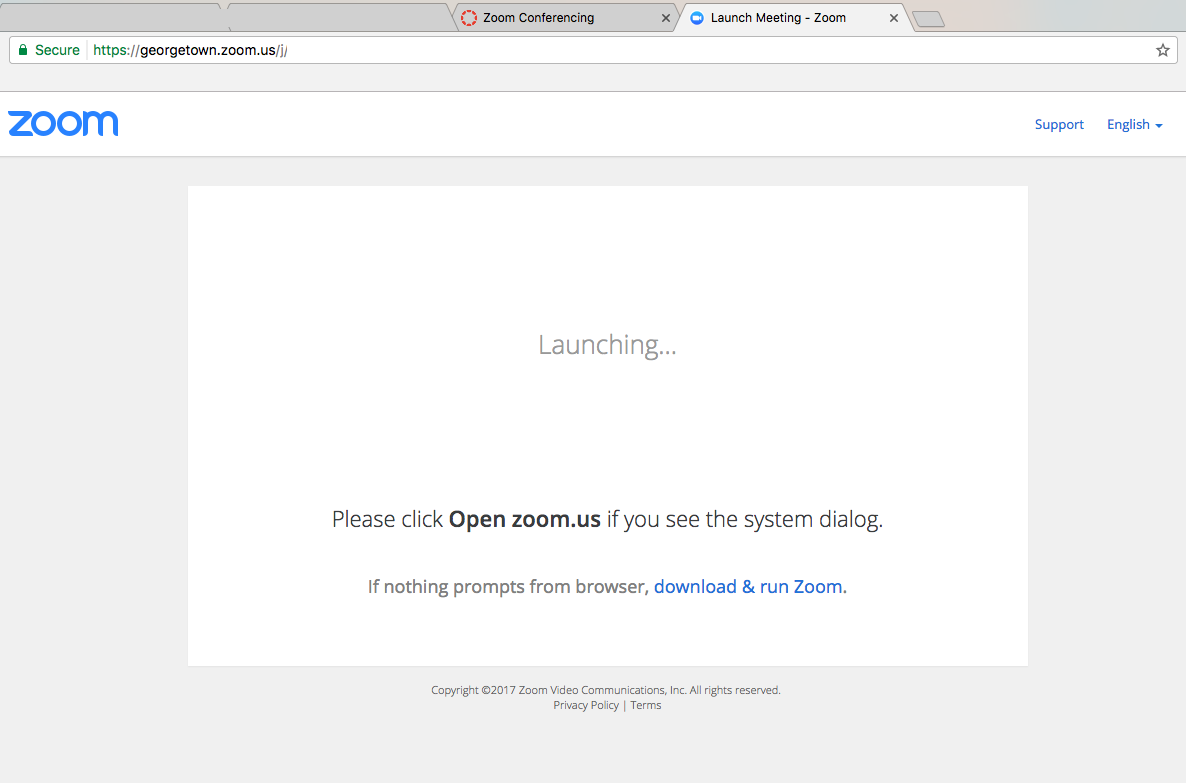
- A web browser tab or window will open, and depending on your browser settings you may have to click the “Launch Application” button that appears.
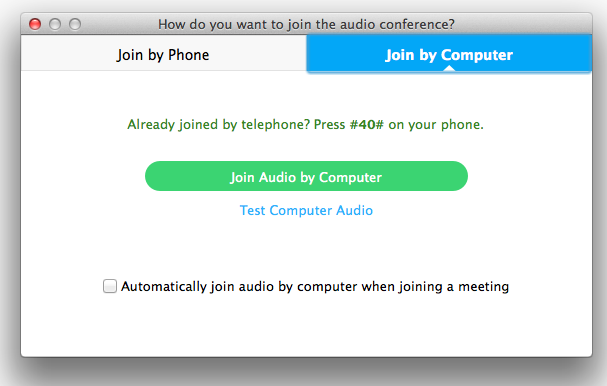
- Click the green button to join your computer’s speakers and microphone to the Zoom Meeting, or click the “Join by Phone” to dial in.
Join Office Hours
For faculty: When you are ready to start your online office hours, first sign in to Zoom (new window).
Note: By default, the “Waiting Room” feature is enabled for your Office Hours meeting. The Waiting Room feature allows the host to control when a participant joins the meeting. As the meeting host, you can admit students one-by-one or hold all them all in the waiting room and admit them all at once.
- Sign in to Zoom.
- Click on the Zoom Conferencing tool in your Canvas course.
- When you are ready to join Office Hours scroll down to the ‘Online Office Hours’ heading, and click on the name of the person who’s office hours you want to join.
- A new tab or window will open in your browser, redirecting you to the Zoom Meeting, and depending on your web browser you may have to click the “Launch Application” button that appears.
- Click Join Audio by Computer to use your computer’s speakers and microphone to join the Zoom Meeting, or click Join by Phone to dial in.
Troubleshooting and Support:
- How do I secure my Zoom room for class instruction?
- How can I improve my Zoom experience?
- Do you want to invite guest speakers to your course Zoom meeting?
- Do you see “third-party cookie” error messages when using Zoom Conferencing in Canvas?
- Did your Zoom meeting disappear from your Canvas course?
- Do you see “cannot connect to server” error message when using Zoom Conferencing in Canvas?
- Who’s Zoom account is associated with course meetings created using the Zoom Conferencing tool in Canvas?
- Get help with Zoom Conferencing